WebStorm
The Doppler CLI when combined with WebStorm allows you to say goodbye to.env files for local development and takes only a few minutes to setup.
All that's required is to add a new npm script to run your application using the Doppler CLI, then add that script as an npm Debug Configuration in WebStorm.
Prerequisites
- Installed the Doppler CLI locally
- Created a Doppler Project for your application
Setup
Open your application in WebStorm and launch a terminal window. Ensure the Doppler CLI is configured to sync secrets for your Development environment by running:
doppler setupThen confirm you can access your secrets successfully by running:
doppler secretsAdd doppler-run script
Open your package.json and add a new doppler-run script that will use the Doppler CLI to run your application:
// package.json
  "scripts": {
    "start": "node ./src/server",
    "doppler-run": "doppler run --forward-signals -- npm start",
    ...
  }
Debug Configuration
Add a new npm Debug Configuration with Command set to run and Scripts set to doppler-run.
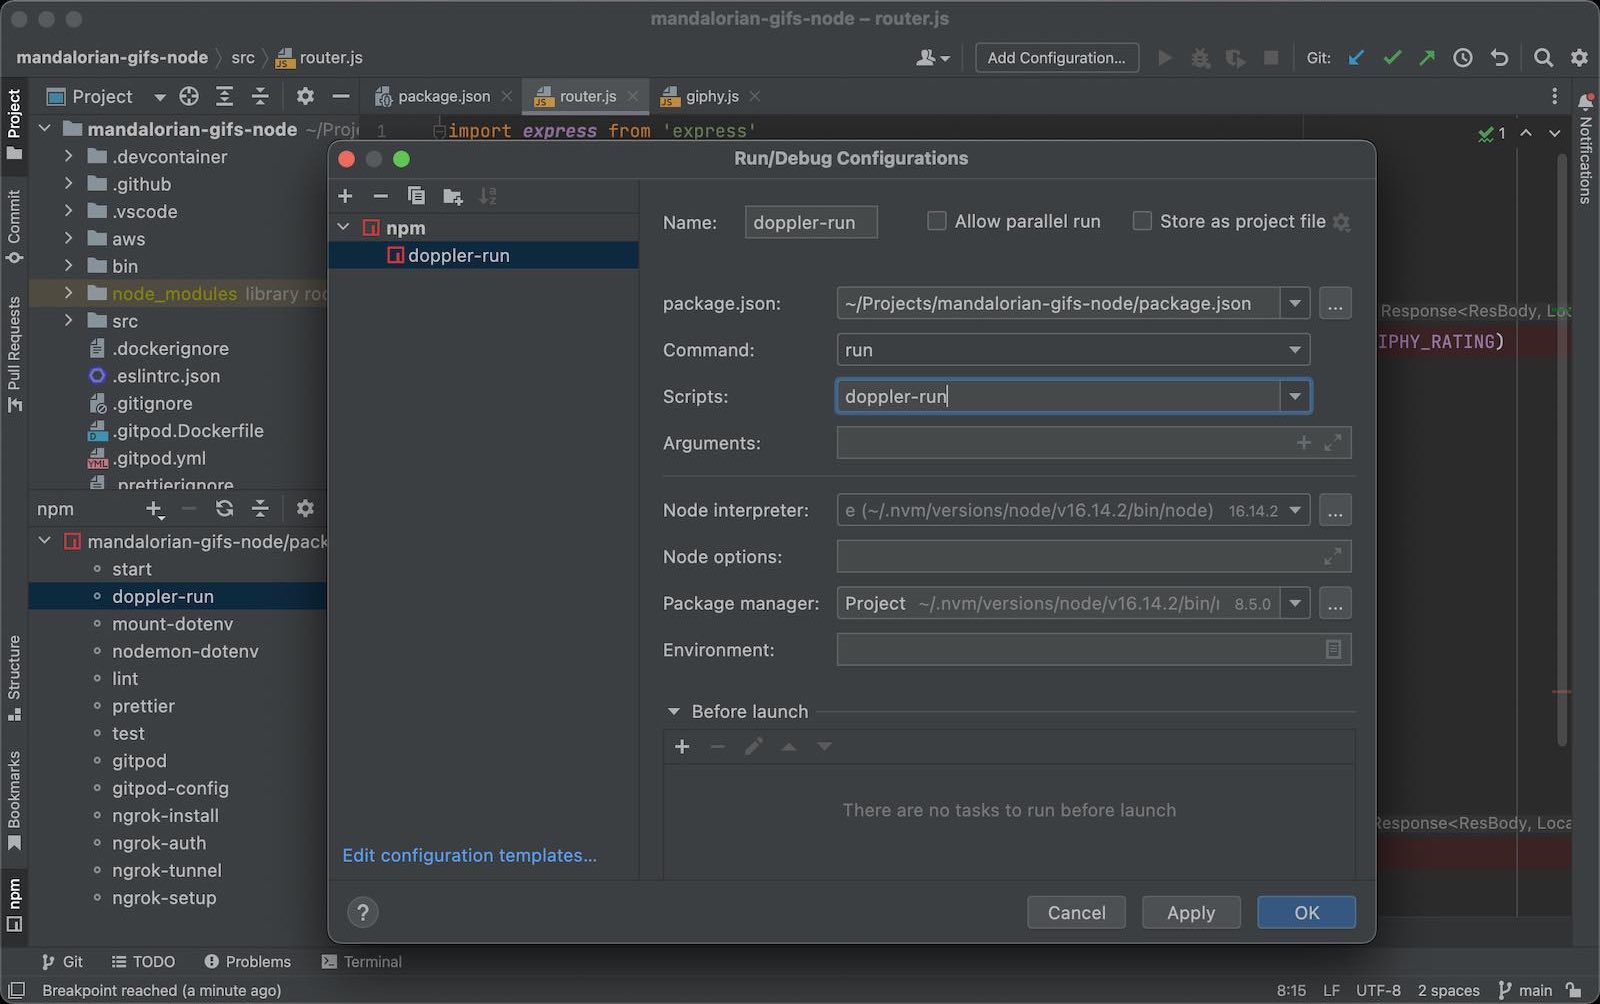
Click Ok to save the Debug configuration.
Then launch your application by selecting doppler-run from the Debug configuration list and clicking the debug icon.
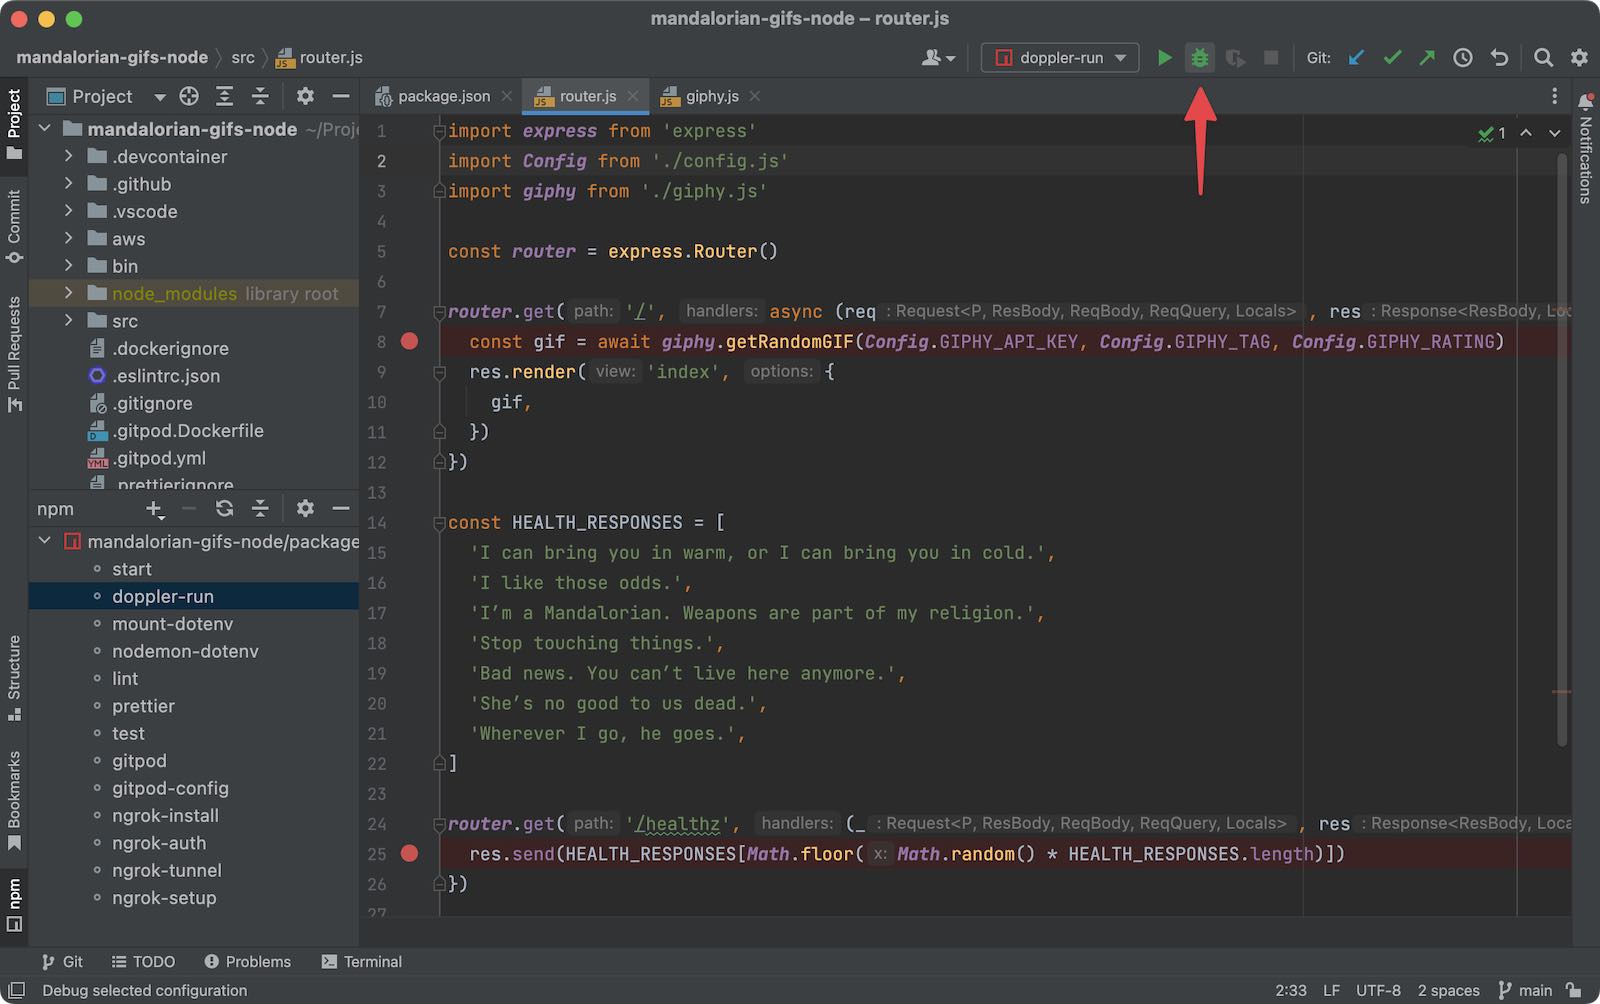
You're now ready to insert a breakpoint to debug your Node.js application.
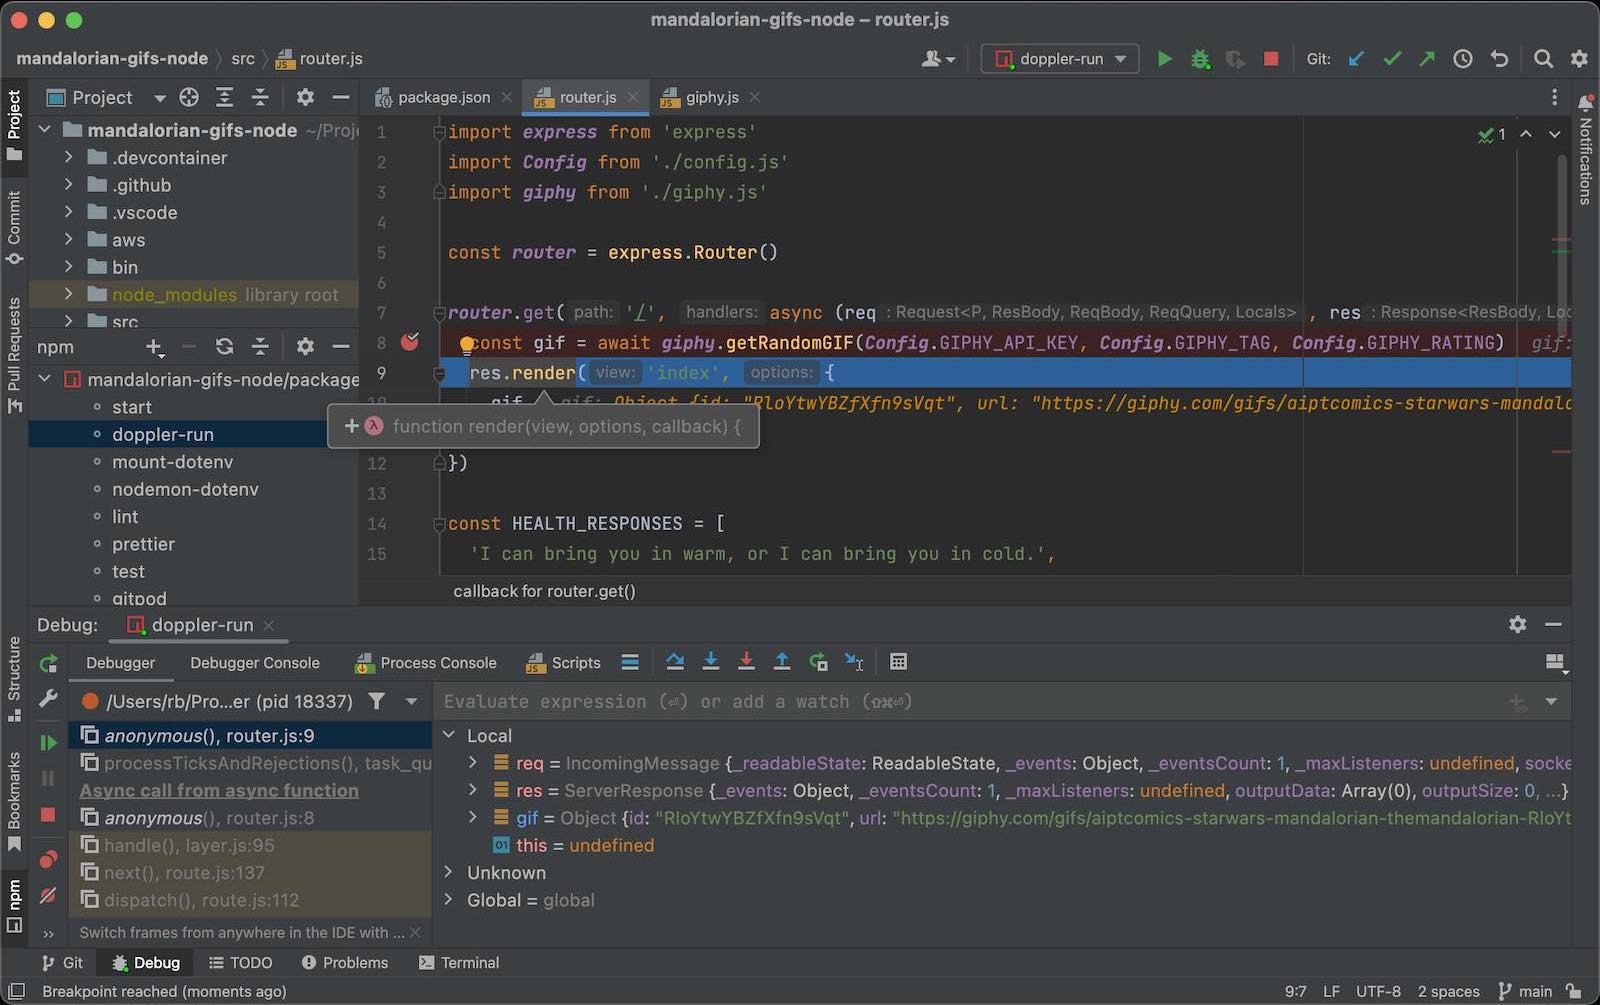
Awesome Work!Now you know how to debug Node.js and web applications applications in WebStorm with secrets injected by the Doppler CLI.