BuddyCI
Learn how to use Doppler to provide secrets to CI / CD pipelines in BuddyCI.
In this guide, we’ll show how to set up an example pipeline for testing purposes to demonstrate one way you can integrate Doppler with BuddyCI.
Prerequisites
- You have created a project in Doppler.
- You have a BuddyCI project created and appropriate permissions to create and configure a new pipeline.
Create & Configure a BuddyCI Pipeline
To get started, you'll need to create a new Pipeline in BuddyCI. Click on Projects in the left navigation bar and then choose the project you want to work with from the project dropdown in the top left of the page. Now click the Add a new pipeline button at the top right of the page.

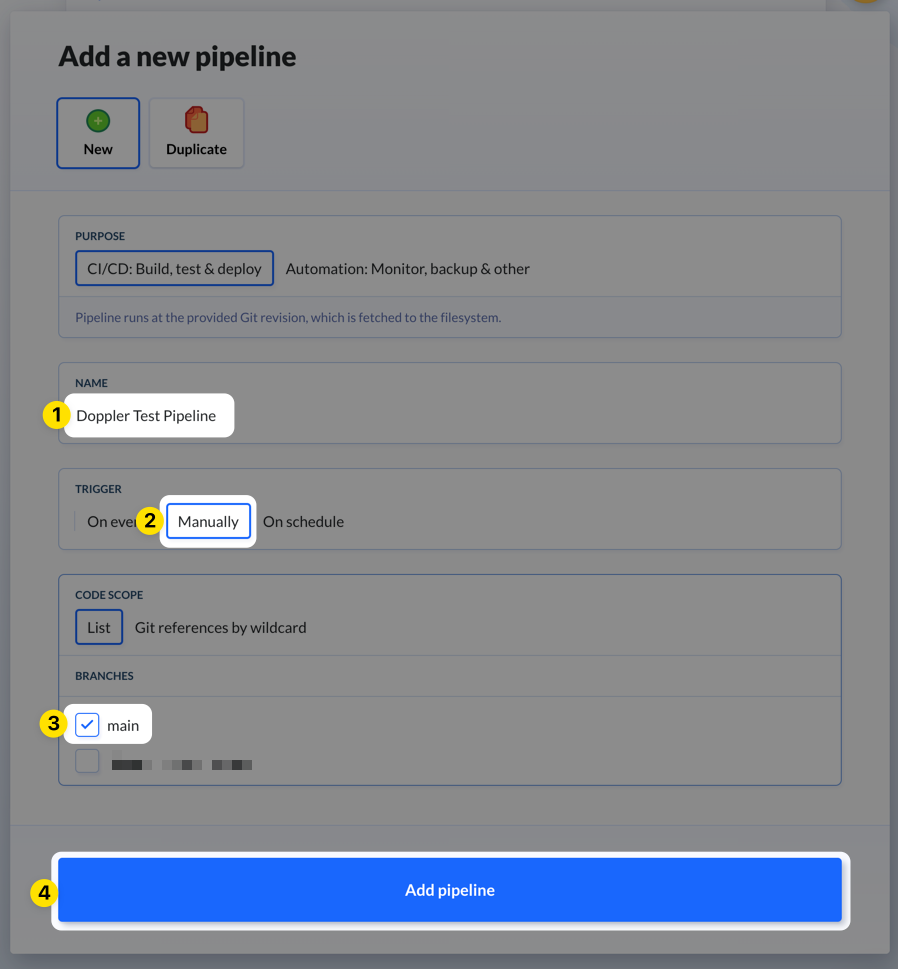
Name the new pipeline Doppler Test Pipeline, choose the Manually trigger, select the Git branch to use, and then click the Add pipeline button.
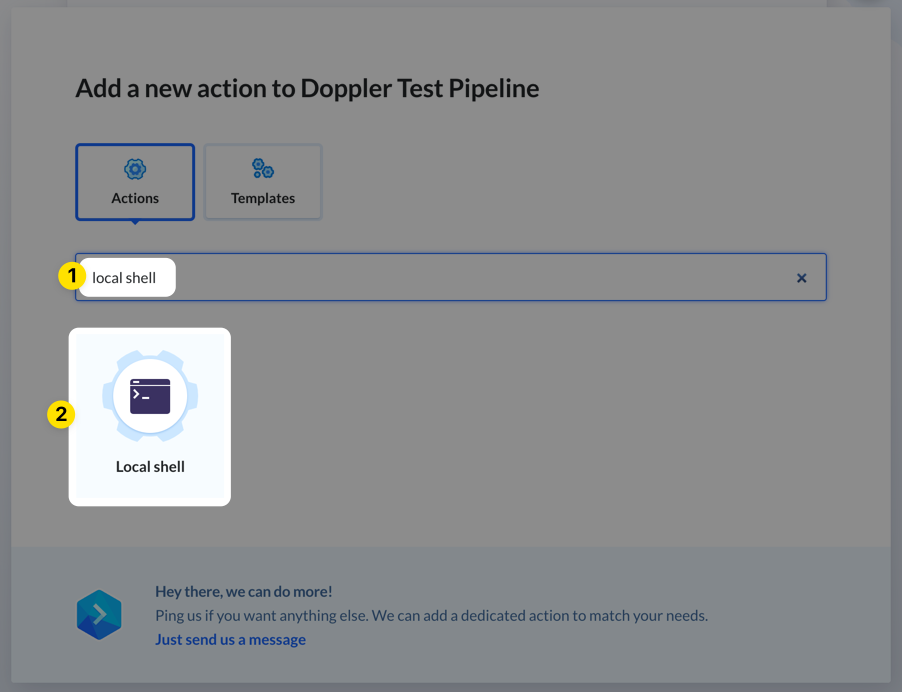
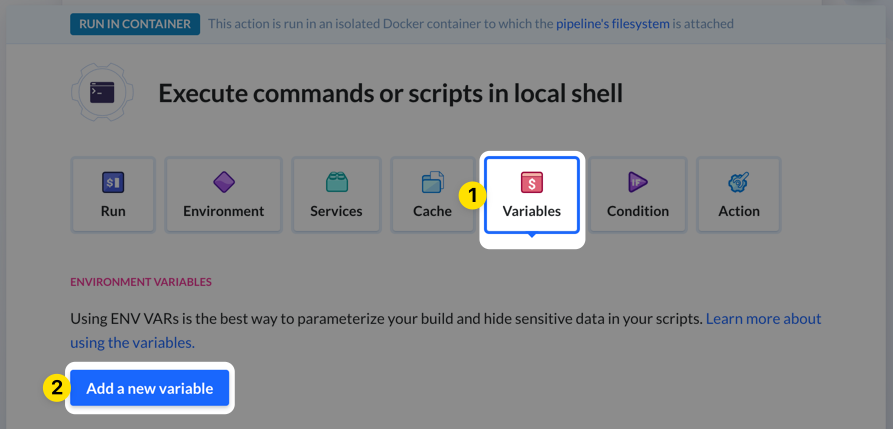
In the next form that appears, add a Local shell action to the pipeline. The Local shell action is chosen because the Doppler CLI will be used to inject environment variables into your build scripts and commands, which requires a shell session.
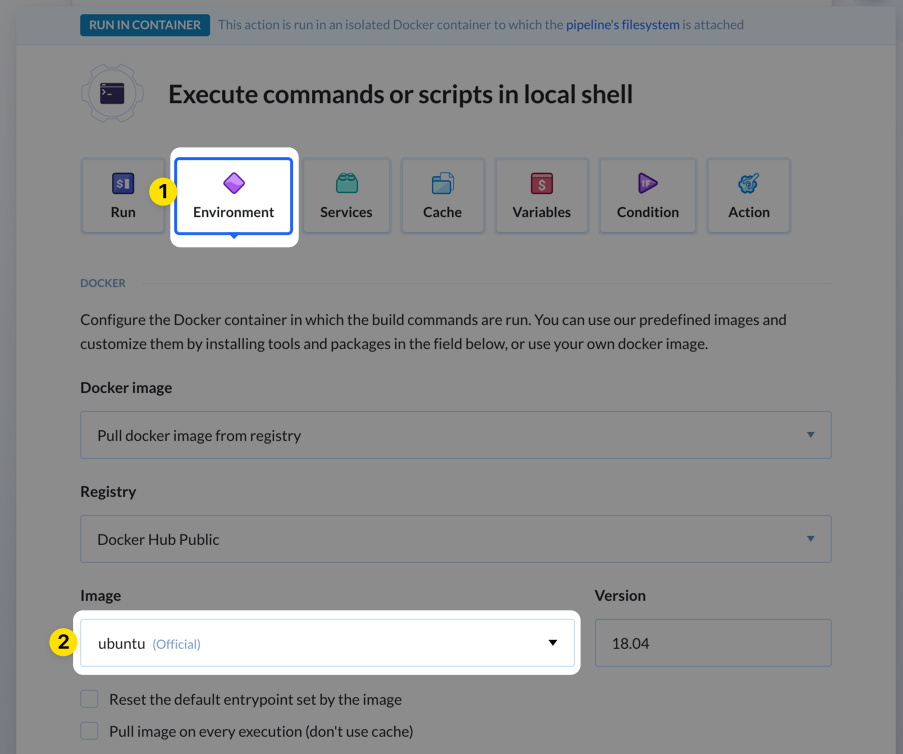
On the next page, click on the Environment tab. Choose the Docker image you'd like to use from the Image dropdown menu. In this example, we'll use the default Ubuntu image, but for your actual pipelines we recommend using custom built images that include the Doppler CLI.
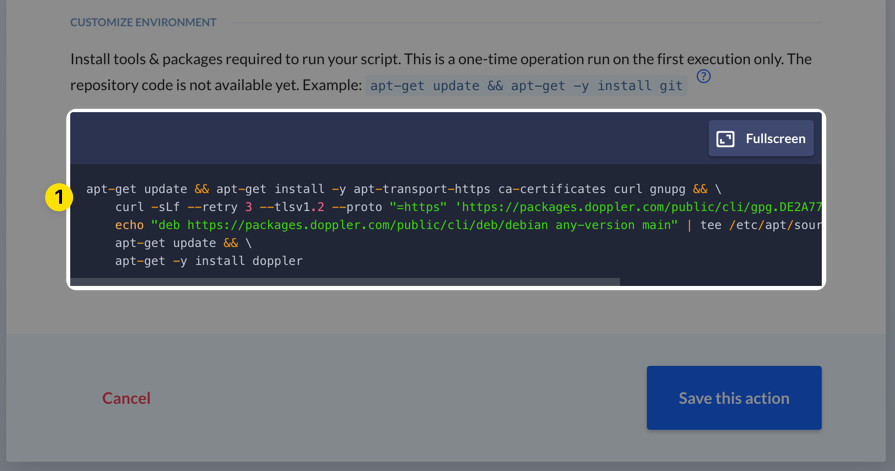
Next, scroll to the Customize Environment section of the form. Any commands added here will be used to generate a new docker image behind the scenes based on the one you specified earlier. This adds some time to the first run when the image build happens, but subsequent runs will be much faster until something changes requiring a new build (e.g., you modify the build commands again).
Add the appropriate installation steps for the distribution you're using. You only need to copy the command portion, so leave out the RUN prefix as it isn't needed here.
Next, scroll back to the top of the page and click on the Variables tab. At this point you need a Doppler Service Token for the config you want to source secrets from, so switch back to the Doppler project you have setup for this application.
Create a Doppler Service Token
Using Doppler to manage your CI / CD secrets requires only a single DOPPLER_TOKEN variable to be stored in BuddyCI, which is used by the Doppler CLI to fetch the latest version of your secrets during each job run.
We recommend you first migrate any existing CI / CD job variables to Doppler at this point. Most customers create a custom environment for CI / CD jobs named ci, so that would be a good place to store them!
Once you've decided on the environment and config you want to use, create a Doppler Service Token for the CI / CD pipeline and copy it to your clipboard.
Finish Configuring BuddyCI Pipeline
Now that you have the Access Token, switch back to the BuddyCI pipeline form we were working with earlier. You should be on the Variables tab. Click the Add a new variable button.
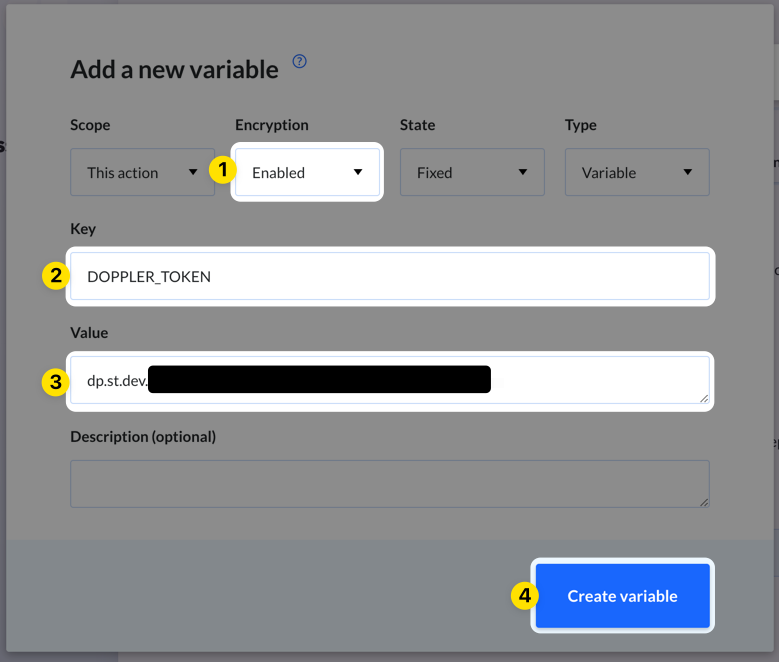
In the new variable form that appears, choose "Enabled" from the Encryption dropdown menu, set the Key field to DOPPLER_TOKEN, and paste your Doppler Access Token into the Value field. Then click the Create variable button.
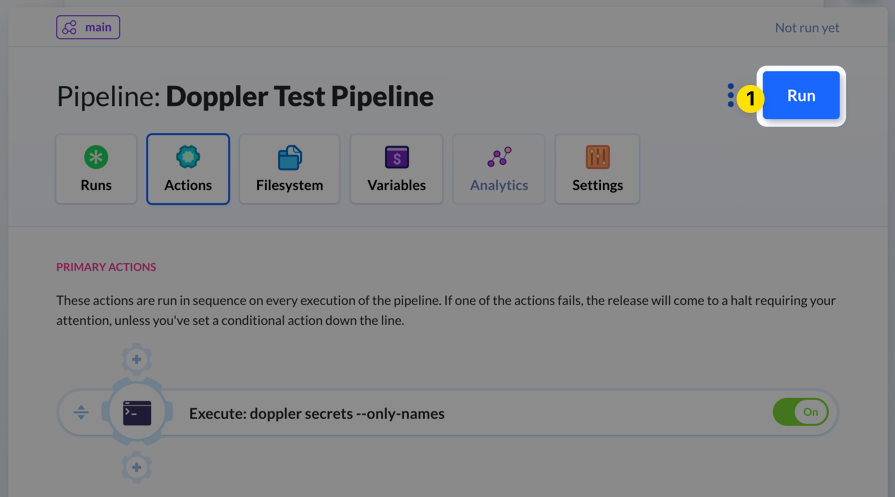
Finally, switch to the Run tab at the top of the page. Set the Build Commands field to doppler run -- printenv | grep DOPPLER and then click the Add this action button. The printenv command will print out the shell session's environment variables and we're then filtering that to the DOPPLER prefixed environment variables. This will show that doppler run fetched your Doppler project's secrets and injected them into the job's shell session environment.

Test the Pipeline
Now it's time to test the pipeline! Click the Run button at the top right of the page.
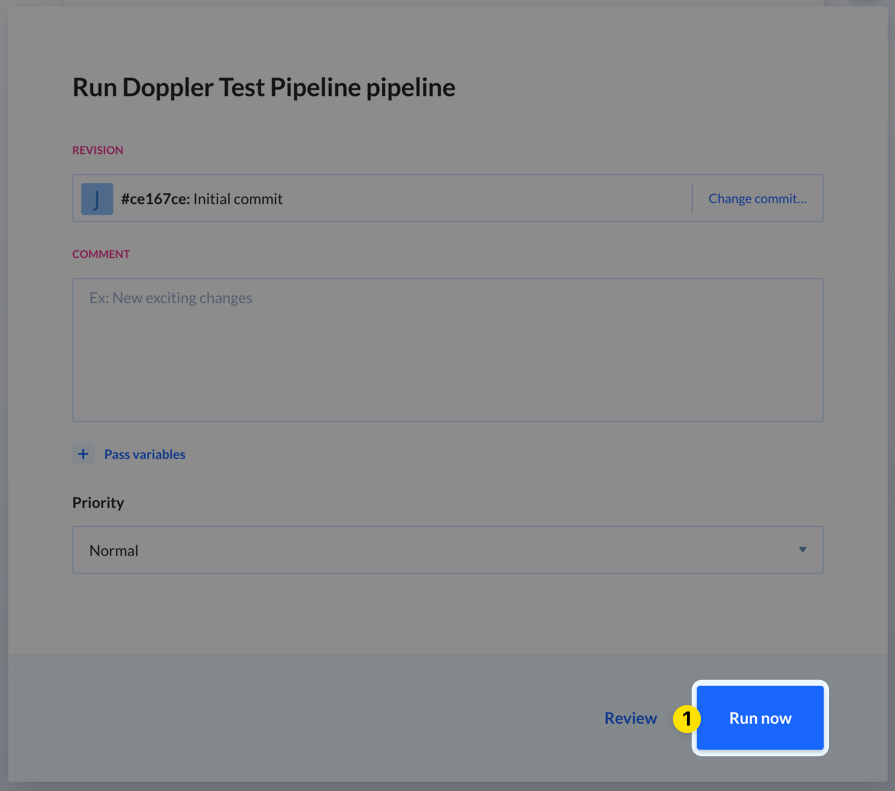
Then click the Run now button at the bottom of the page.
If all went well, the build will succeed and you should see something like this:
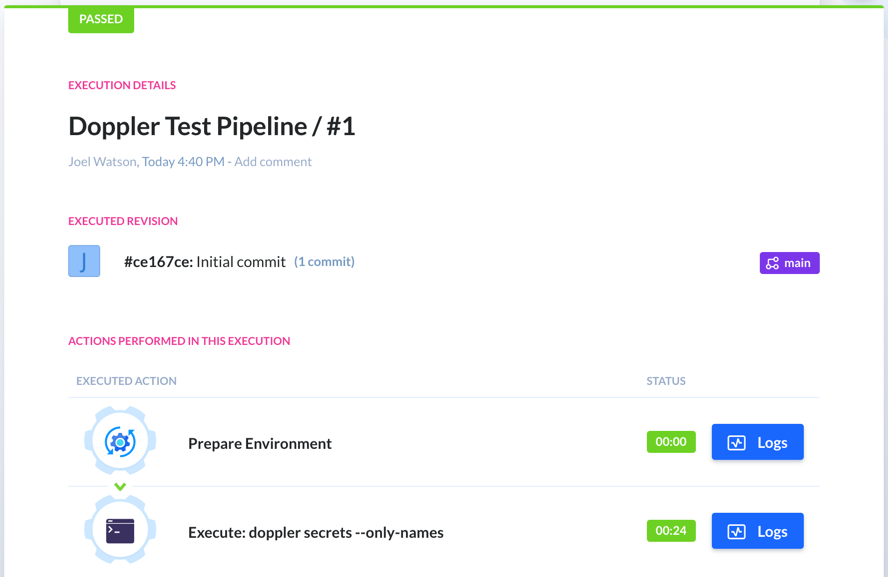
You can review the logs for the builds by clicking the blue Logs buttons. The first time this runs will take longer due to a new Docker image being created with the Doppler CLI added. Subsequent runs won't perform that build step unless you make a change to the build commands we setup earlier in the process.
Amazing Work!You now know how you can integrate Doppler into any of your existing BuddyCI pipelines.
Updated about 1 year ago