Domain Verification
Verify your workplace domain to restrict account Single Sign-On to that domain.
For increased security, we recommend Owners verify a domain via the Settings page as early on as possible so only email accounts belonging to that domain can be added to a workplace.
Adding a Domain
To verify a domain, browse to the Settings page for your workplace and scroll down to the Domains section. Then, click the Add Domain button.

Enter the name of the domain you'd like to add and then press the Save button.

Verifying the Domain
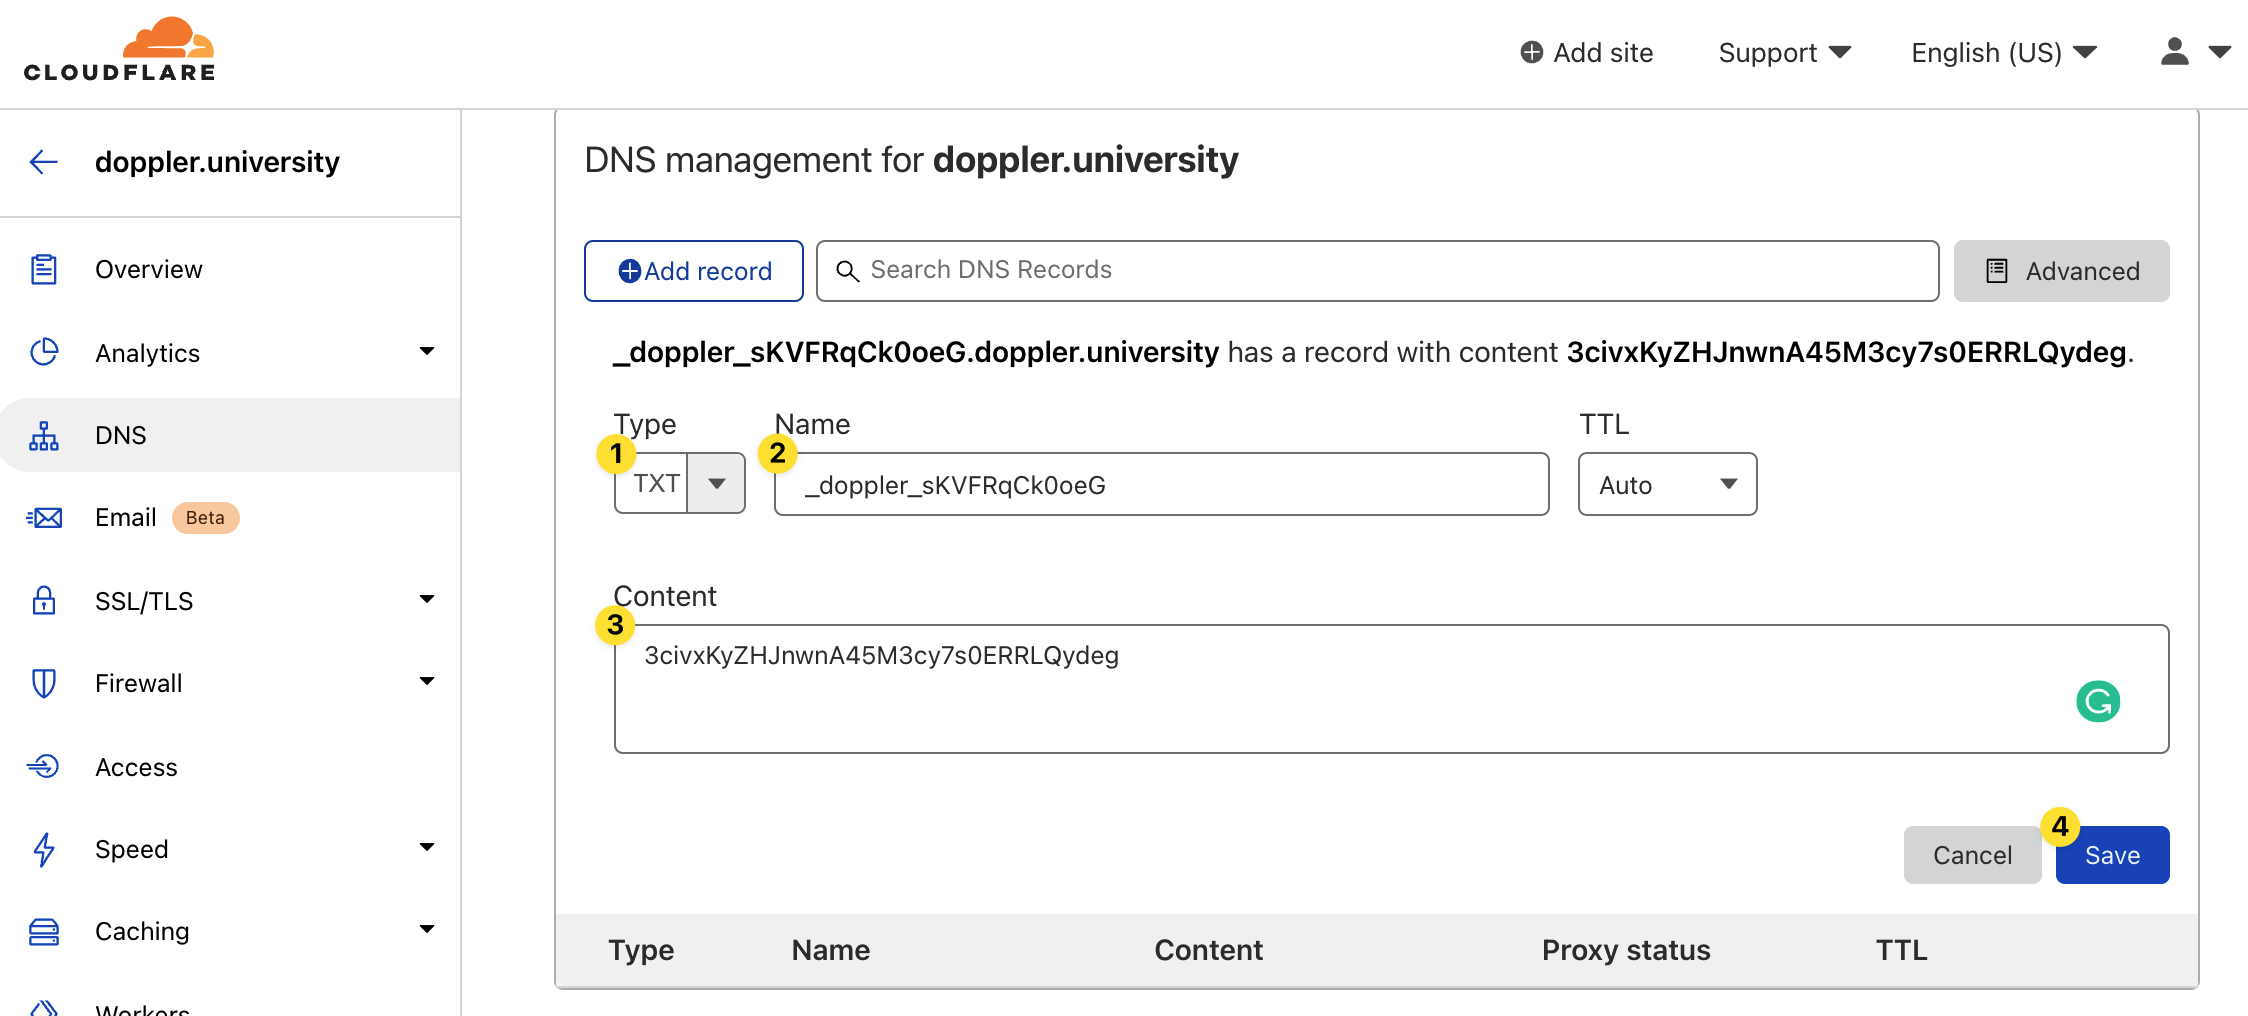
After adding the domain to your workplace, you'll be presented with the name and value you'll need to create a DNS TXT record to verify domain ownership of the domain you added.
You have 7 days after adding the domain to complete the verification process. After that time, you'll need to remove the domain, add it again, and use the freshly generated verification code in your DNS record to continue with the verification process.

You'll create that TXT record in whatever DNS provider you use. Below, we picture CloudFlare as an example.

Once the domain has been added, click the Verify button.
The first time you create the TXT record for this domain, it should be available for verification immediately. However, if you made a mistake and end up having to modify the value of the record, you may need to wait for up to the record's TTL period for the old value to be purged from DNS cache.

If the verification is successful, the Domains section of the Settings page should show that the domain is now verified and a link is now available to take you to the SSO configuration section.

Multiple Domains
It's possible to have multiple verified domains attached to your workplace. This is useful for situations where you want to provide users access to your workplace using Email or SAML SSO and they have different email domains. A classic use case is when you have users with a company.com email address and then contractors who have been given an email with a different domain (e.g., contractor.company.com). You might have separate SAML SSO applications setup in your IdP for this or might just want to add both emails for Email SSO.
To add additional domains, simply follow the process outlined above a second or third time. Each domain can be selected for Email SSO or can have separate SAML SSO settings (to map to separate IdP applications).
Updated 3 months ago
