Webhooks
Learn how to use webhooks to integrate Doppler into your continuous delivery workflows.
Webhooks enable you to perform actions in third party systems when your secrets change. You can use them do things like automatically restart or redeploy your applications by triggering a continuous delivery pipeline.
When a webhook is triggered, Doppler will send a POST request to the specified URL. Webhooks will generally be delivered once, though exactly once delivery is not guaranteed.
Supported Platforms
Doppler's webhooks support triggering workflows on many different platforms. Some of the supported platforms include:
- Azure DevOps Pipelines (docs)
- Bitbucket Pipelines (docs)
- CircleCI Pipeline (docs)
- GitHub Actions (docs)
- GitLab Pipeline (docs)
- Google Cloud Build (docs)
- Heroku (docs)
- Netlify (docs)
- Vercel (docs)
Creating a Webhook
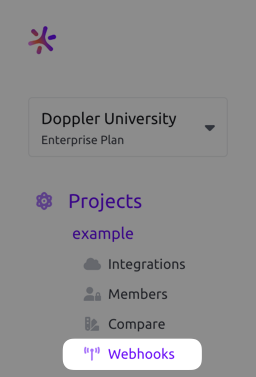
- Navigate to a project, then click Webhooks from the project menu

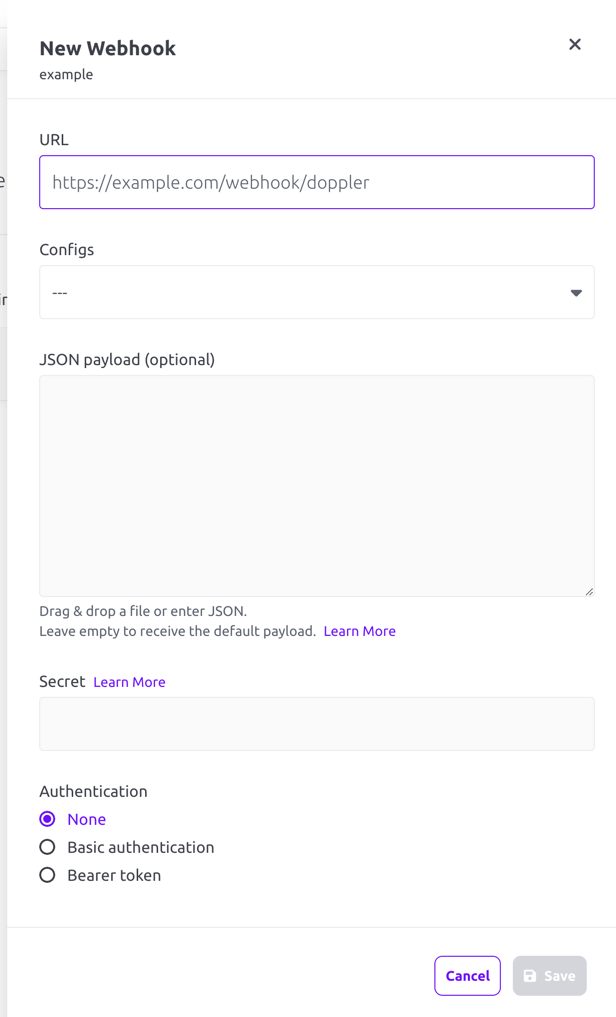
- Click the + Add button which will open a drawer where you can configure the webhook.
- Add the webhook URL and choose which configs it will trigger for. Root configs are bolded in the selection list for easy identification
- Provide an optional JSON payload. The provided payload must be valid JSON. It does not support variables, replacement values, or any other dynamic data. Only the JSON will be sent in the payload when this field is populated. Leave the payload field empty to use our default payload (documented below).
- Provide an optional signing secret. When a Secret value is provided, Doppler uses this to cryptographically sign each webhook request, enabling you to verify that the request originated from Doppler. See the Request Signing section to learn more. Configuring this field is highly encouraged when Authentication is set to None.

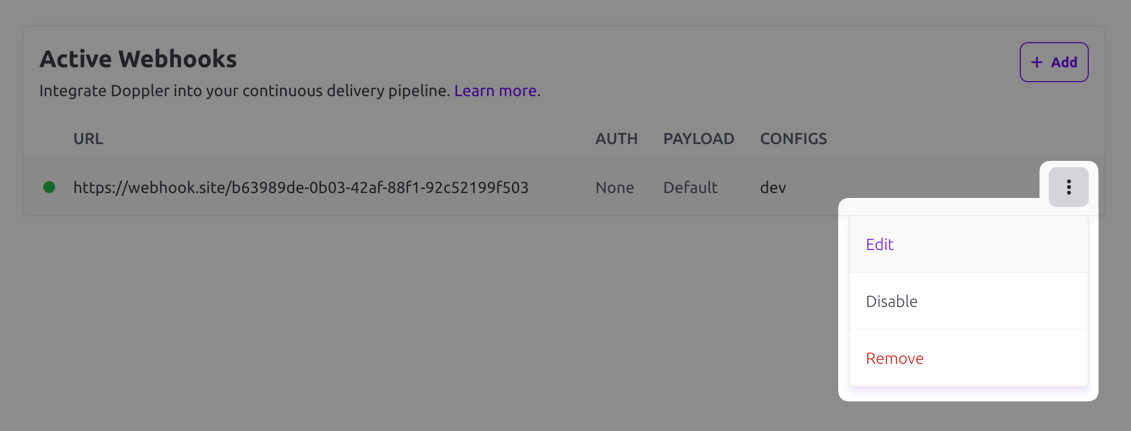
- Click the Save button. You'll now see it listed in the Active Webhooks list.

- You can edit the webhook by clicking the three-dot menu on the right and choosing Edit.

Default Payload
By default, your endpoint will receive a JSON payload with the following structure. Note that this payload will be different when a custom payload is configured.
| Field | Description |
|---|---|
| type | Currently alwaysconfig.secrets.update |
| config | Config object |
| project | Project object |
| workplace | Workplace object |
| diff | List of secret names that have been modified |
Here is an example payload:
{
  "type": "config.secrets.update",
  "config": {
    "name": "dev",
    "root": true,
    "locked": true,
    "initial_fetch_at": "2023-01-01T00:00:00.000Z",
    "last_fetch_at": "2023-01-01T00:00:00.000Z",
    "created_at": "2023-01-01T00:00:00.000Z",
    "environment": "dev",
    "project": "backend",
    "slug": "c9748dae-de1c-4971-b00c-f539970fee24"
  },
  "project": {
    "id": "backend",
    "slug": "backend",
    "name": "backend",
    "description": "",
    "created_at": "2023-01-01T00:00:00.000Z"
  },
  "workplace": {
    "id": "9f0c0c0d5d4e240ce26e",
    "name": "My Workplace"
  },
  "diff": {
    "added": ["FOO"],
    "removed": ["BAR"],
    "updated": ["BAZ"]
  }
}
Verify Webhook With Request Signing
Doppler can optionally sign the webhook events by including a signature in each event’s X-Doppler-Signature header. This allows you to verify that the events were sent by Doppler, not by a third party.
To enable webhook verification, a value for Secret must be supplied when creating the webhook. The X-Doppler-Signature header will then contain a SHA256 hash of the request body prepended with sha256= (e.g. X-Doppler-Signature: sha256=724cd2c1110335a8ea6207f74cd74fb198a8e59ca1b7b39d67678e0f97df832e).
To verify the signature, create your own SHA256 hash of the request body using the Secret value. Then compare the header value against your own computed value using a timing-safe equality function. Here is an example of how you might accomplish this using Node.js.
const bodyParser = require("body-parser");
const crypto = require("crypto");
const express = require("express");

const app = express();
app.use(bodyParser.json({
  limit: '200kb',
}));

app.post('/webhooks/doppler', (req, res) => {
  const requestHMAC = req.header("X-Doppler-Signature");
  const secret = process.env.WEBHOOK_SECRET;
  const computedHMAC = `sha256=${crypto.createHmac('sha256', secret).update(JSON.stringify(req.body)).digest('hex')}`;
  const signatureMatches = crypto.timingSafeEqual(Buffer.from(requestHMAC), Buffer.from(computedHMAC));

  if (signatureMatches) {
    // do stuff
  }

  res.sendStatus(signatureMatches ? 204 : 401);
});
require "sinatra"
require "json"
require "openssl"
set :port, ENV["PORT"] || 8081
post "/webhooks/doppler" do
if valid_webhook_signature?(request)
# do something
status 200
else
status 401
end
end
def valid_webhook_signature?(request)
request.body.rewind
data = request.body.read
key = ENV["WEBHOOK_SECRET"]
digest = OpenSSL::Digest.new("sha256")
computedHMAC = OpenSSL::HMAC.hexdigest(digest, key, data)
requestHMAC = request.env["HTTP_X_DOPPLER_SIGNATURE"].delete_prefix("sha256=")
return OpenSSL.secure_compare(requestHMAC, computedHMAC)
endEvent Logs
You can troubleshoot webhooks by looking at their event logs. To access those, browse to the project that has the webhook configured and click on the Webhooks link. From there, click on the Logs tab.

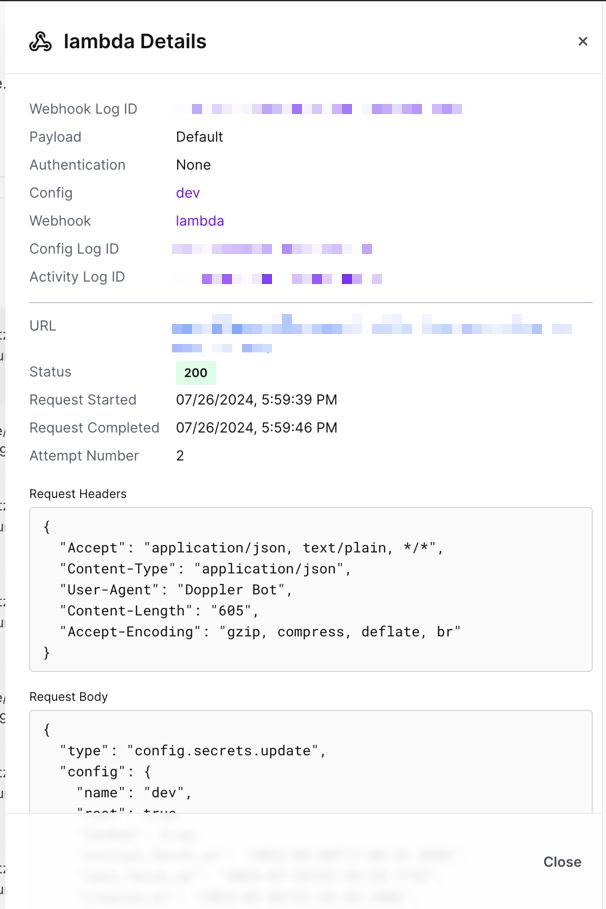
Each event log entry will show the HTTP status code of the response the webhook got when it fired, the name of the webhook, the URL the webhook was running against, the timestamp it ran, the attempt number (we retry up to 5 times), the Doppler config(s) the hook is configured to run for and then a link to pull up details.
You can filter the log for successful or failed entries if desired:

To view details for a particular event log entry, click the icon on the far right of the entry. A drawer will appear that will include the headers on the response that we received, the response body and the payload that was sent to the webhook endpoint along with some other pieces of information.

Updated about 2 hours ago
