Authentik SAML SSO
Learn how to create a custom Authentik SAML application for Doppler Single Sign-On.
Requirements
- Workplace domain verified (Settings page)
- Working installation of Authentik
1. Initial Doppler SAML SSO Configuration
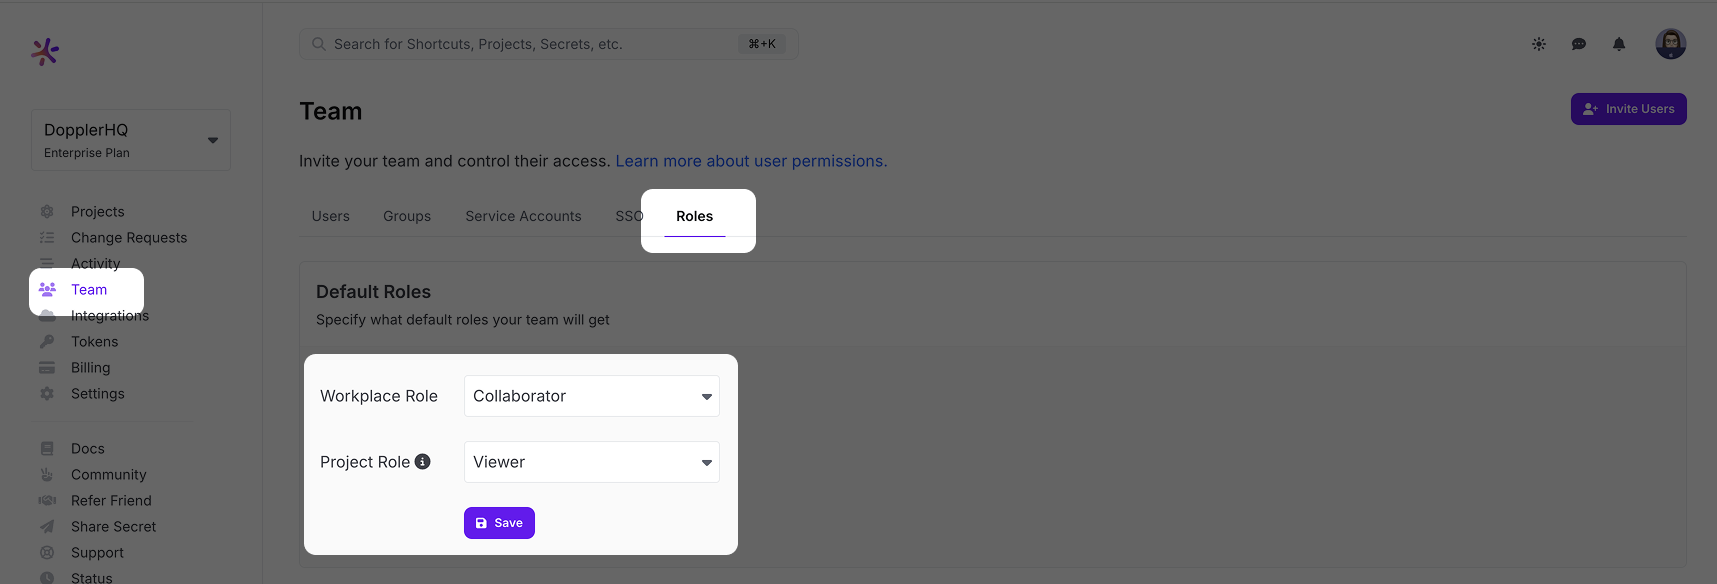
Go to the Doppler dashboard and from the menu click Team, then select the Roles tab from the top menu. Choose the Default Roles for users who login via SSO.
The Workplace Role controls the initial permissions a user will receive when their account is created. We recommend keeping it at Collaborator access to follow the principle of least privilege. The Project Role is the role granted to a user when they're added to a project, so set this to the role most commonly used. Users with the Owner role can adjust these after the user has logged in once. If you scroll down further on the Roles page, you'll see a breakdown of what permissions each Role has.
After setting the Default Roles, we need to enable SAML SSO in Doppler to get access to the URLs needed to configure the third party SAML SSO application.
Select the SSO tab from the top menu and scroll down to the SAML Single Sign-On section. Click the Add SAML button.

Next, choose a verified domain from the dropdown menu and click Save.
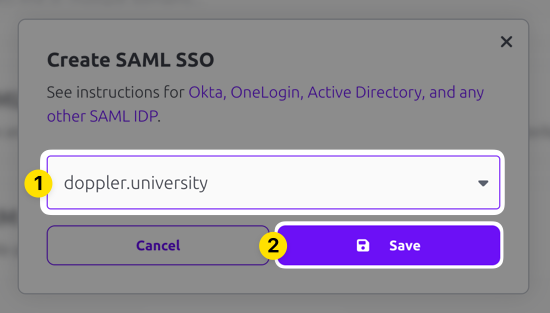
SAML SSO configuration requires having a domain associated with it because users login using their email address and the domain of that address is mapped back to your SAML SSO login. Verification is required when you add the domain to your account to confirm your ownership of the domain.
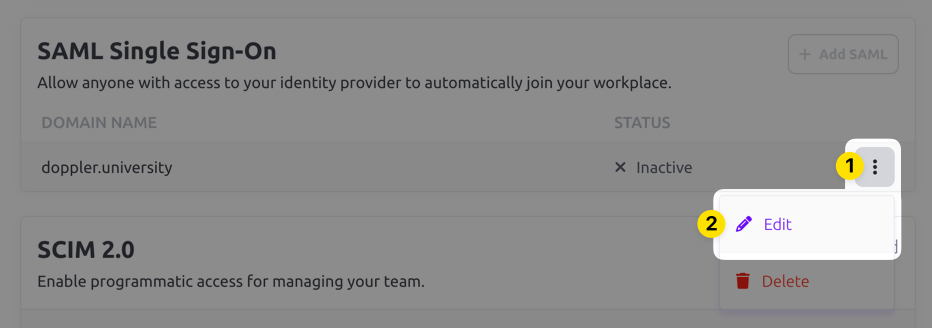
The domain you selected should show up now in the Inactive state. Click on the three dot menu and choose the Edit option.
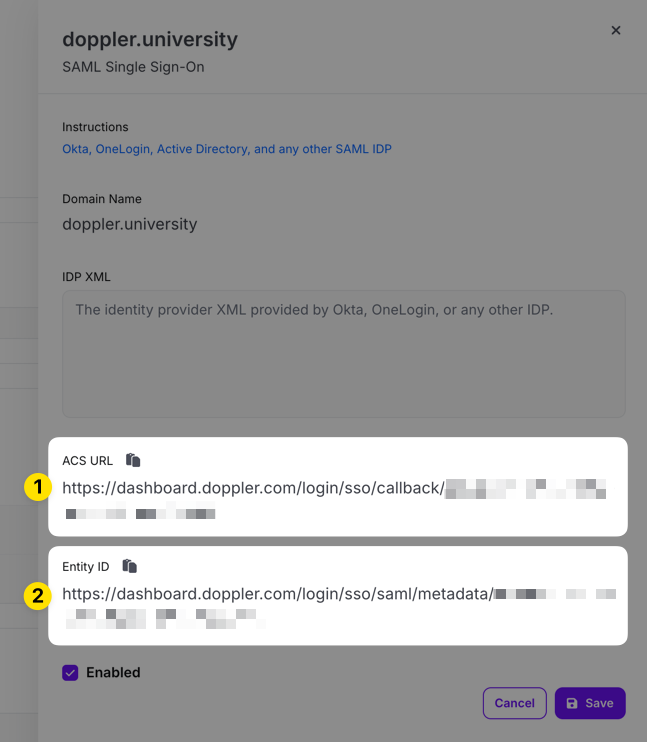
Copy the ACS URL and Entity ID URLs in the edit drawer that appears for use when configuring the third party SAML SSO application.
2. Create SAML Property Mappings
In a separate window, browse to your Authentik admin interface and browse to the Customisation > Property Mappings section from the left sidebar, then click the Create button. Select SAML Property Mapping and then click Next.
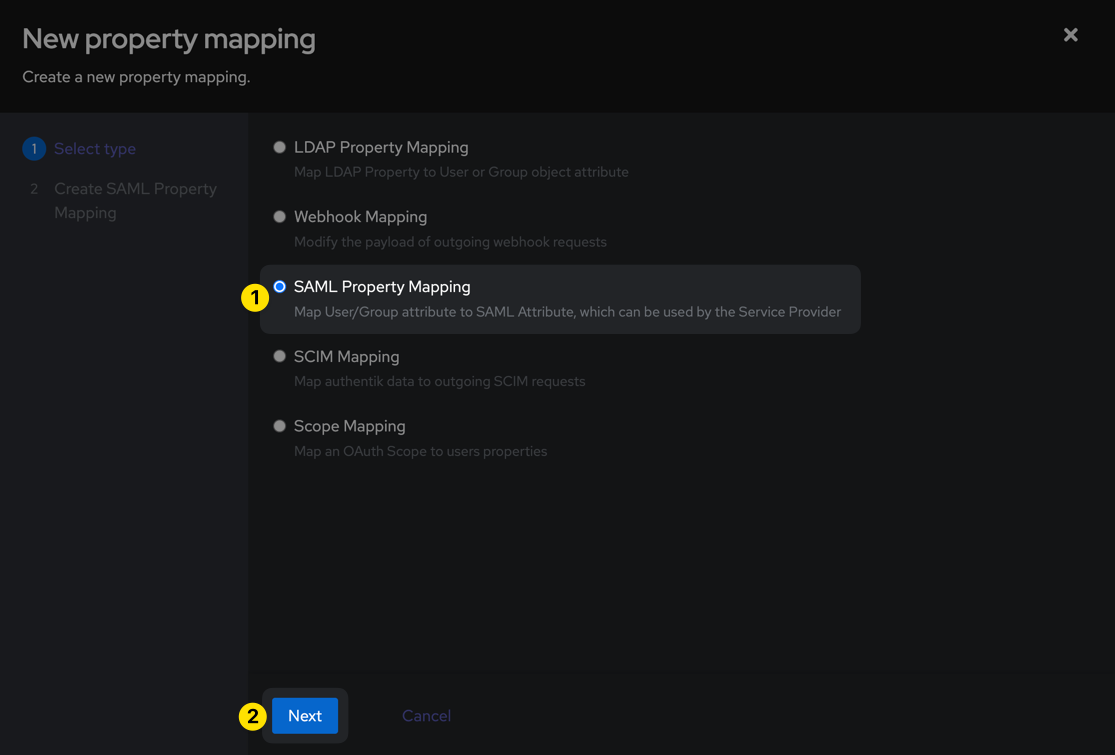
Then use the following values to create the property and click Finish.
| Parameter | Value |
|---|---|
| Name | Doppler Name |
| SAML Attribute Name | name |
| Expression | return request.user.name |
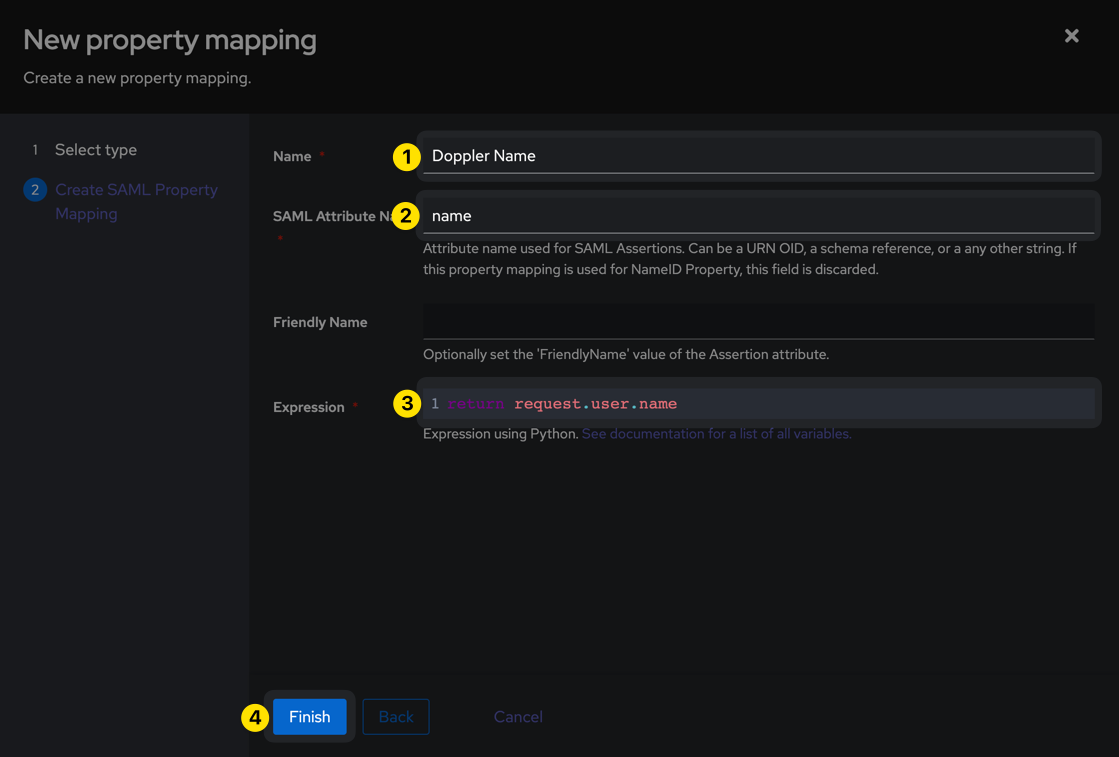
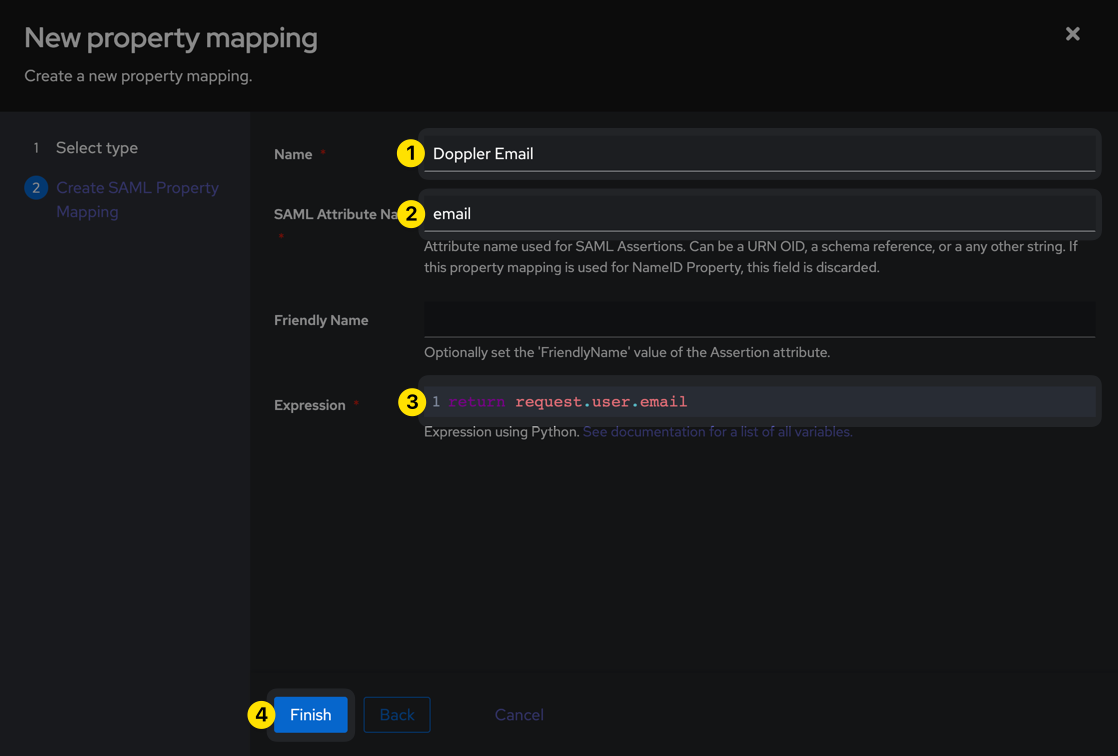
Create a second property using the following values:
| Parameter | Value |
|---|---|
| Name | Doppler Email |
| SAML Attribute Name | |
| Expression | return request.user.email |
3. Create SAML Provider
Next, browse to the Applications > Providers section from the left sidebar, then click the Create button. Select SAML Provider and then click Next.
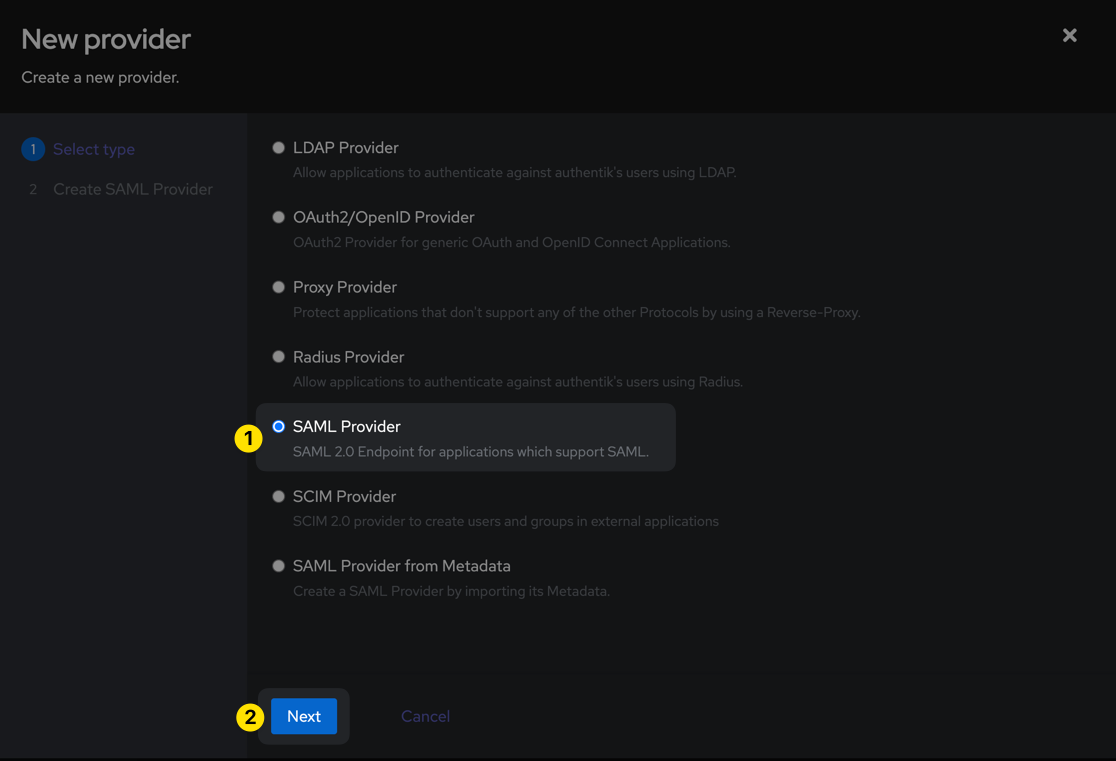
Populate the form with the URLs obtained from the Doppler SAML Single Sign-On setup page in Step 1 above and the other values shown below:
| Parameter | Value |
|---|---|
| Name | doppler-saml |
| Authentication flow | default-authentication-flow |
| Authorization flow | default-provider-authorization-implicit-consent |
| ACS URL | https://dashboard.doppler.com/login/sso/callback/$UUID |
| Issuer | https://dashboard.doppler.com/login/sso/saml/metadata/$UUID |
| Audience | https://dashboard.doppler.com/login/sso/saml/metadata/$UUID |
| Service Provider Binding | Post |
| Signing Certificate | Either the default, or whichever you'd like to use (but one must be selected). |
| Property Mapping | Doppler Name, Doppler Email |
| NameID Property | Doppler Email |
The ACS URL, Issuer, and Audience are example URLs only and will not work in your setup. You need to use the URLs obtained from the Doppler SAML Single Sign-On setup page referenced in Step 1 above.
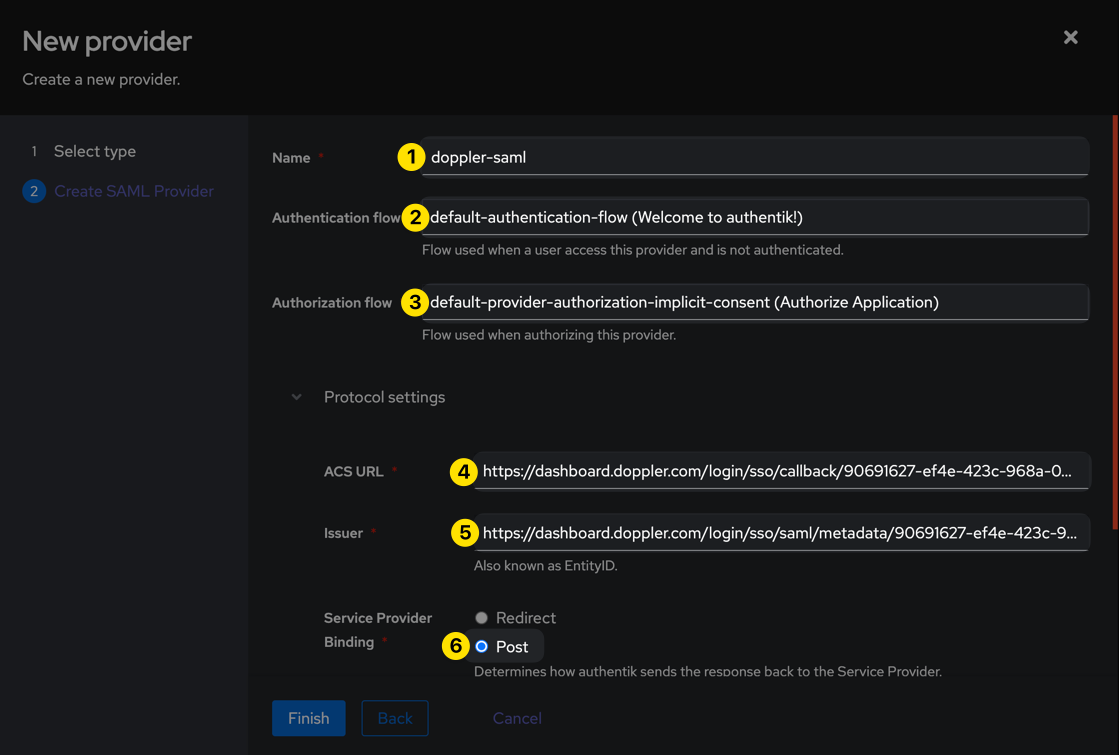
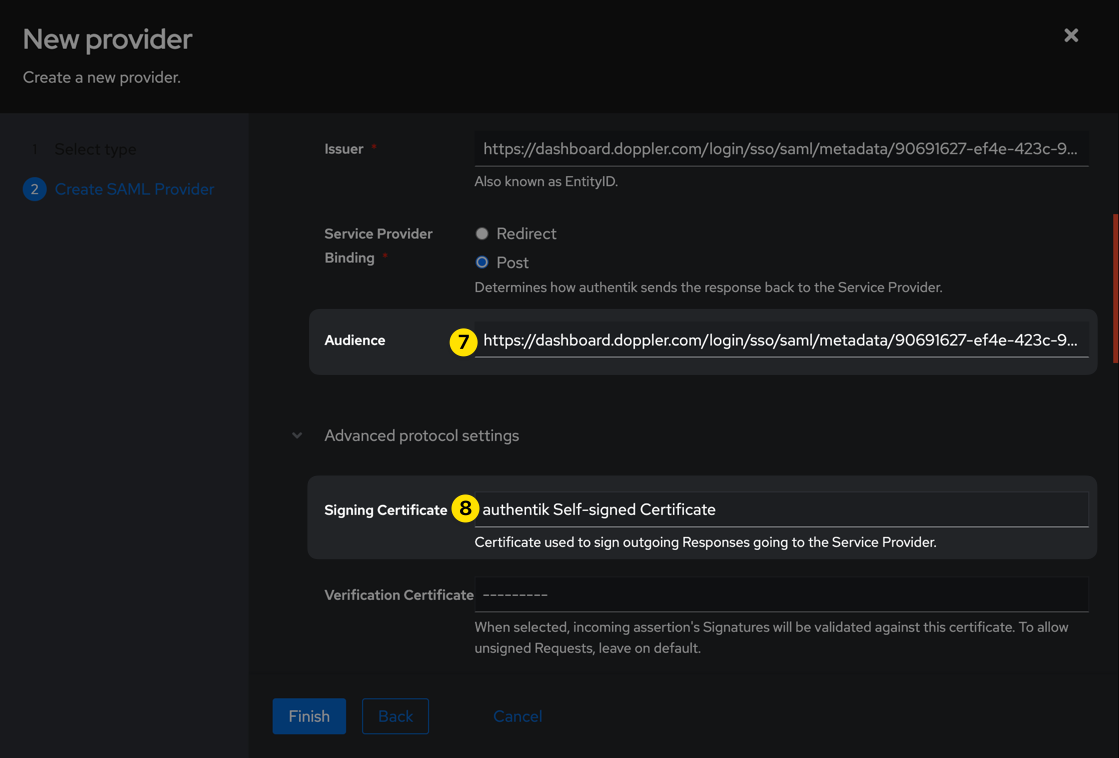
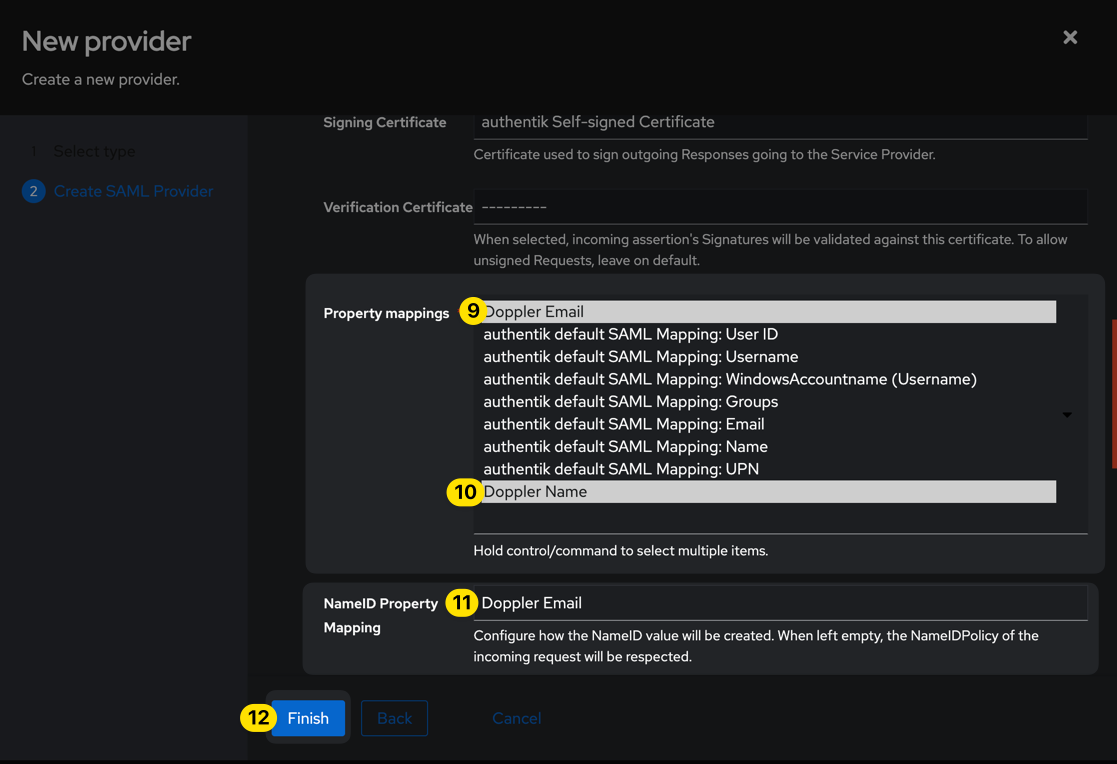
Be sure to leave the Verification Certificate field blank (which is the default), then click the Finish button.
4. Create SAML Application
Click the Create button under the "Assigned to application" heading that's now showing for the doppler-saml provider in Authentik.
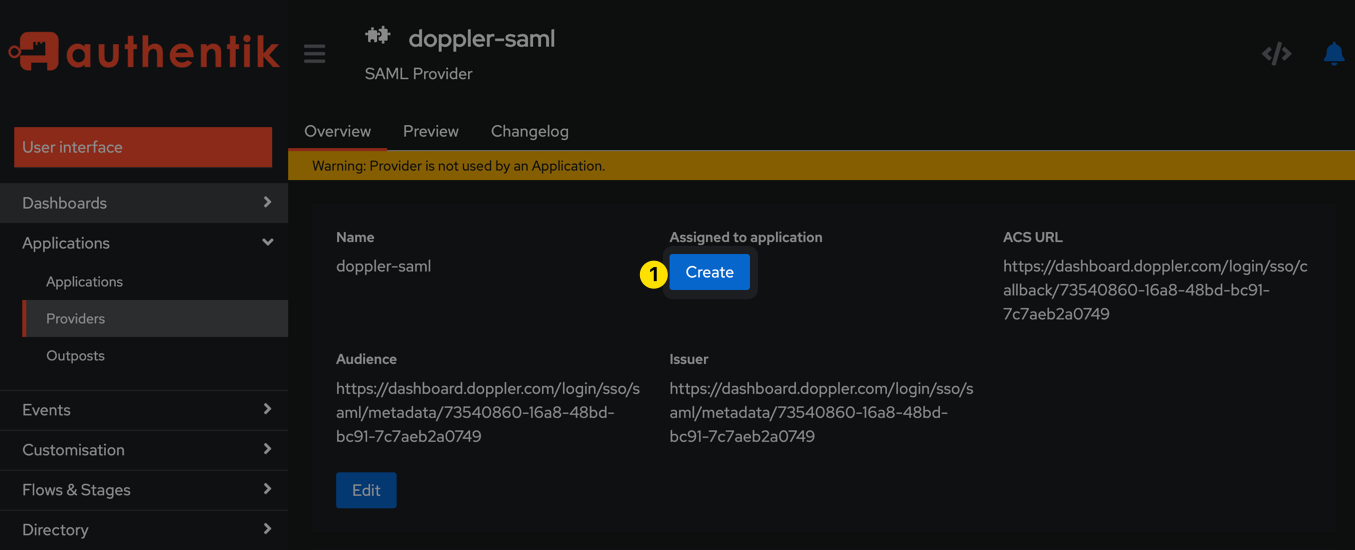
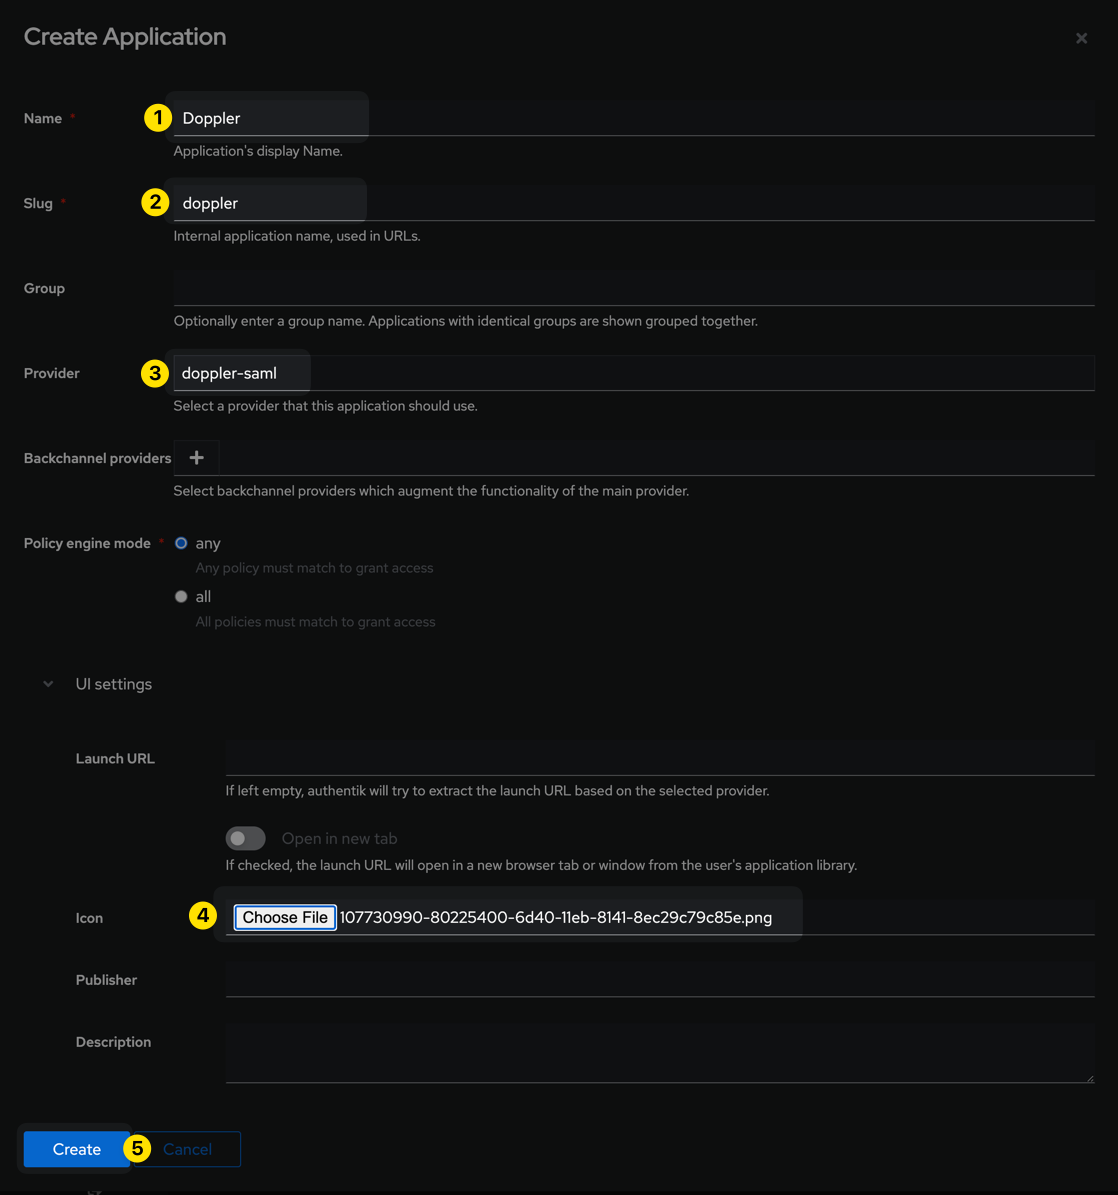
Populate the form with the information pictured below and then click the Create button:
| Parameter | Value |
|---|---|
| Name | Doppler |
| Slug | doppler |
| Provider | doppler-saml |
| Icon | Doppler Logo (use this logo or one of your choosing) |
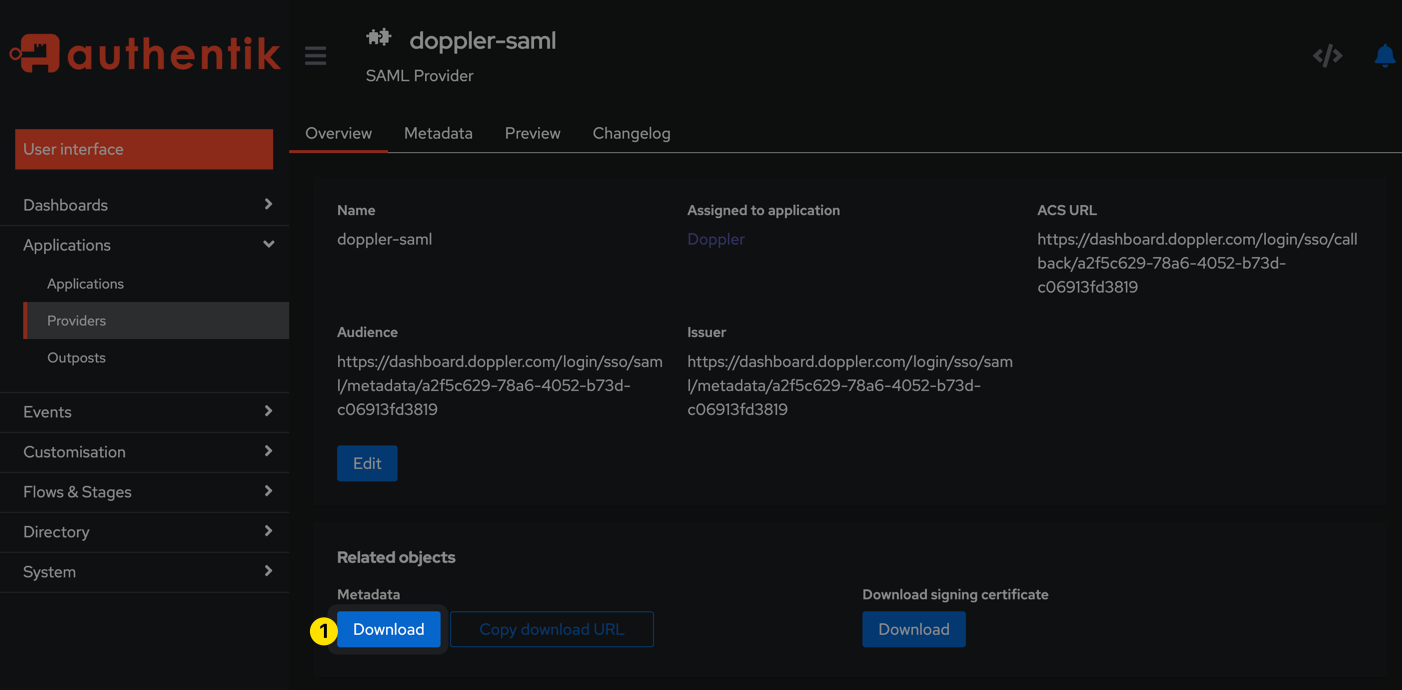
Browse back to the doppler-saml provider page under Applications > Providers and click the Download button under the Metadata section. The contents of the resulting XML file will be used in the next step.
5. Update Doppler SAML SSO Configuration
Navigate to the Doppler Team page and click on the SSO tab.
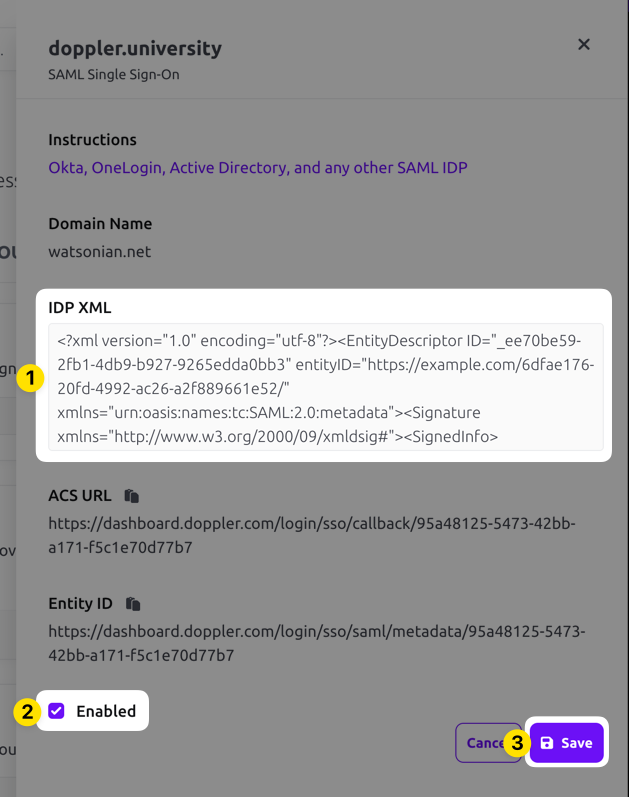
Scroll down to the SAML Single Sign-On section, click on the three dot menu, and choose the Edit option. Paste in the IDP XML metadata, check the Enabled field, then click the Save button.
You're now ready to start using your Authentik SSO application!
Awesome Work!Your custom Authentik Doppler SAML application is now set up!
Updated 3 months ago
