Okta SAML SSO
Requirements
- Workplace domain verified (Settings page)
- Okta Developer Account with access to create custom application integrations
1. Initial Doppler SAML SSO Configuration
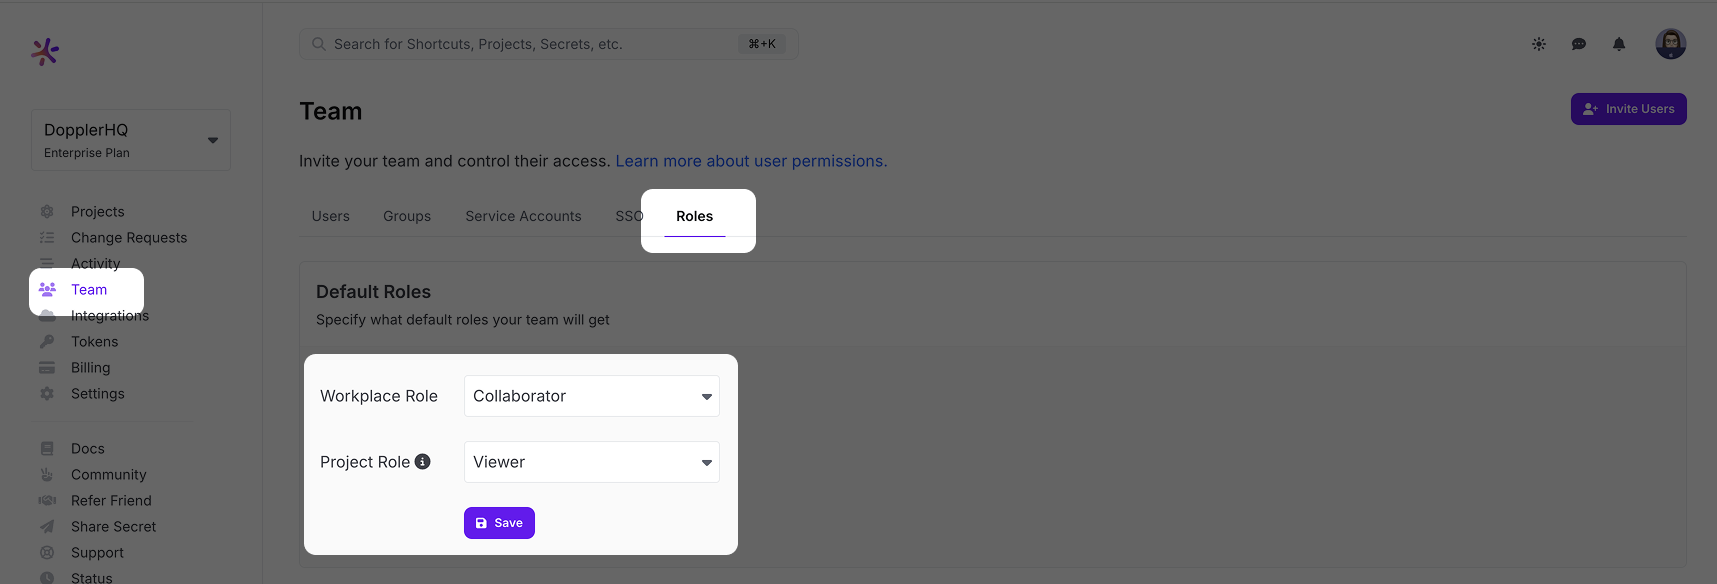
Go to the Doppler dashboard and from the menu click Team, then select the Roles tab from the top menu. Choose the Default Roles for users who login via SSO.
The Workplace Role controls the initial permissions a user will receive when their account is created. We recommend keeping it at Collaborator access to follow the principle of least privilege. The Project Role is the role granted to a user when they're added to a project, so set this to the role most commonly used. Users with the Owner role can adjust these after the user has logged in once. If you scroll down further on the Roles page, you'll see a breakdown of what permissions each Role has.
After setting the Default Roles, we need to enable SAML SSO in Doppler to get access to the URLs needed to configure the third party SAML SSO application.
Select the SSO tab from the top menu and scroll down to the SAML Single Sign-On section. Click the Add SAML button.

Next, choose a verified domain from the dropdown menu and click Save.
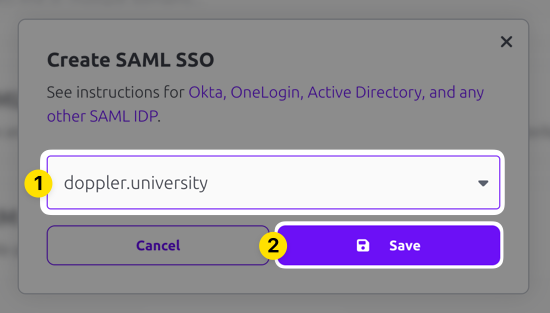
SAML SSO configuration requires having a domain associated with it because users login using their email address and the domain of that address is mapped back to your SAML SSO login. Verification is required when you add the domain to your account to confirm your ownership of the domain.
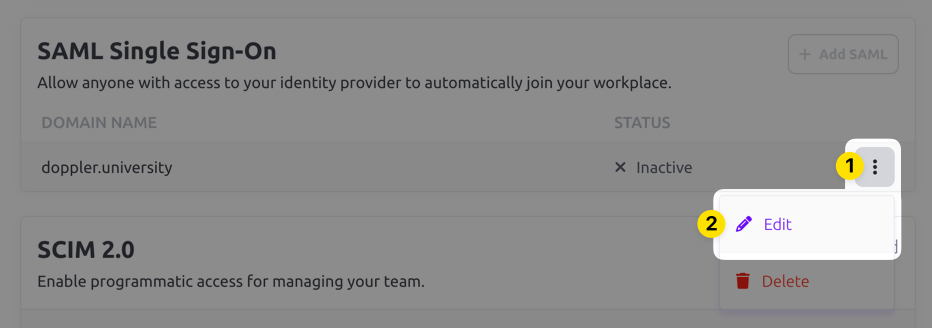
The domain you selected should show up now in the Inactive state. Click on the three dot menu and choose the Edit option.
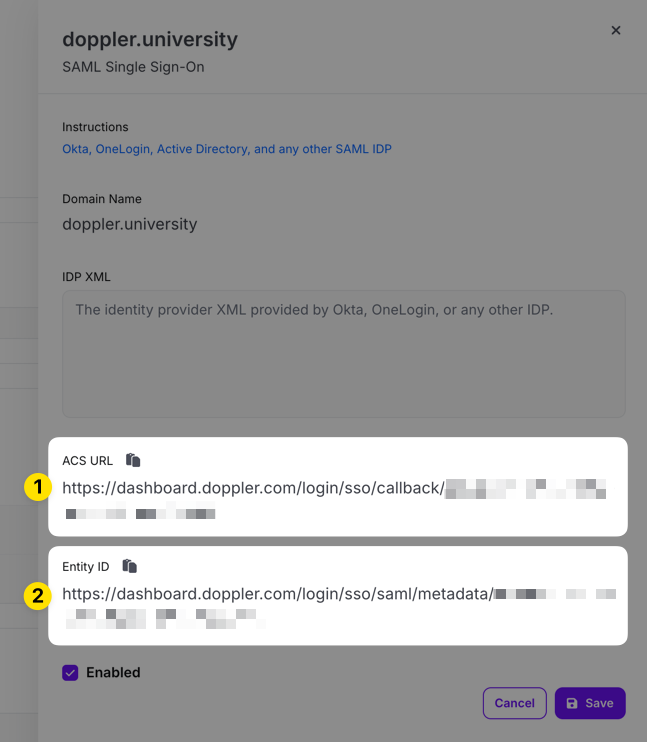
Copy the ACS URL and Entity ID URLs in the edit drawer that appears for use when configuring the third party SAML SSO application.
2. Create SAML Application
In a separate window, browse to your Okta dashboard and select Applications from the main menu, then click the Create App Integration button.

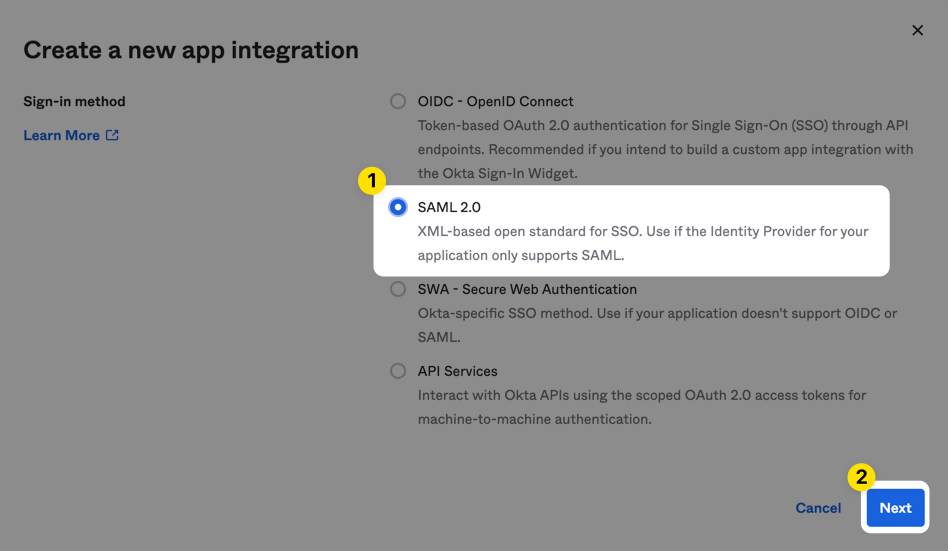
Select SAML 2.0 as the sign-in method and then click Next.
Then name the application and optionally upload the Doppler logo.
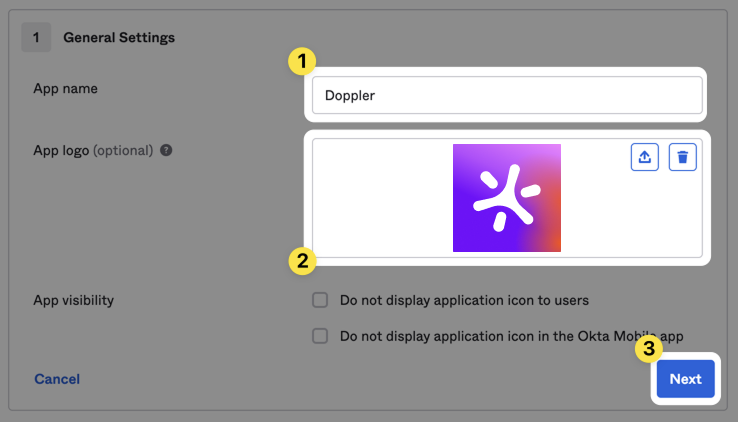
Click the Next button to proceed to the SAML Settings page.
3. Okta SAML Configuration
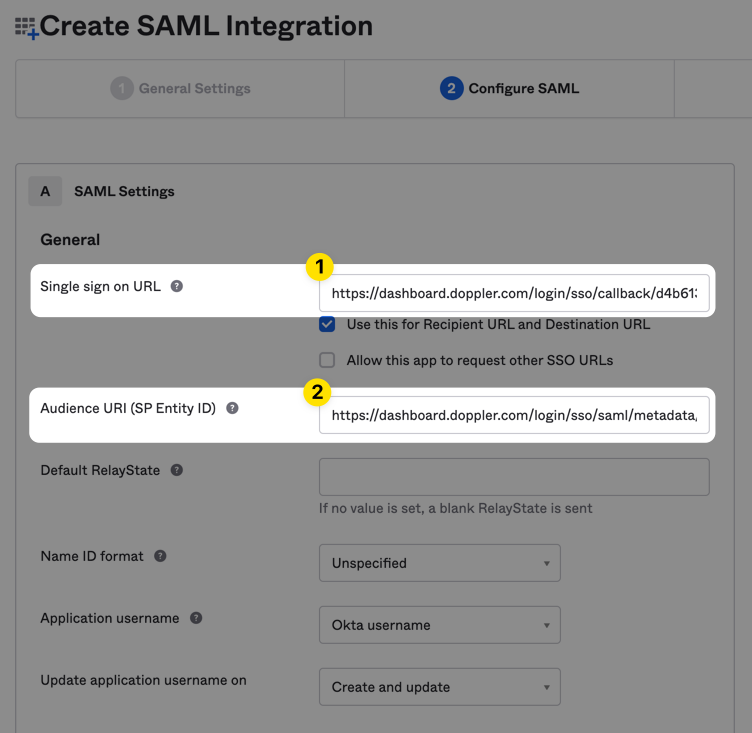
Populate the form with the URLs obtained from the Doppler SAML Single Sign-On setup page in Step 1 above. They will look similar to the following:
| Parameter | Value |
|---|---|
| Single sign-on URL | https://dashboard.doppler.com/login/sso/callback/$UUID |
| Audience URI | https://dashboard.doppler.com/login/sso/saml/metadata/$UUID |
These are example URLs only and will not work in your setup. You need to use the URLs obtained from the Doppler SAML Single Sign-On setup page referenced in Step 1 above.
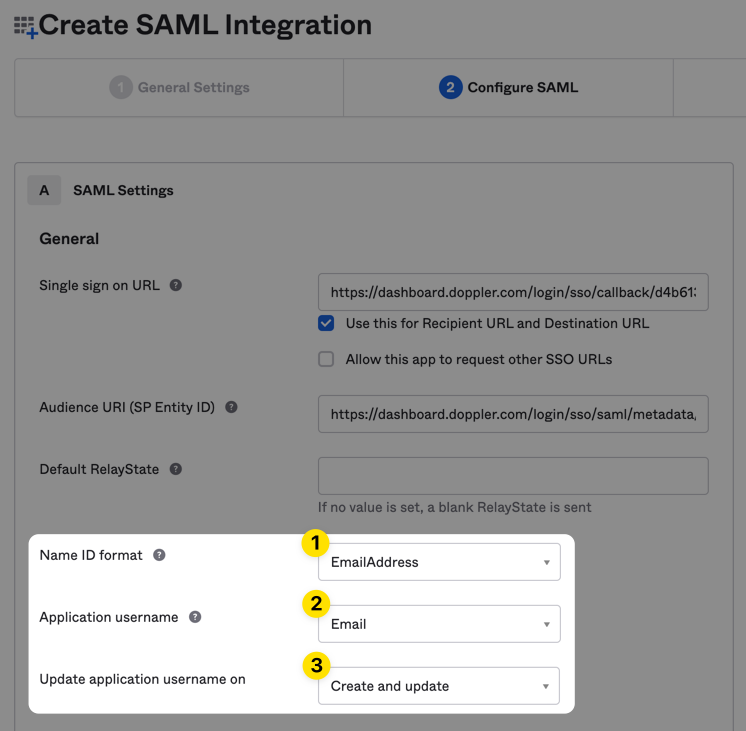
Set the Name ID format to EmailAddress, Application username to Email and check that Update application username on is set to Create and update.
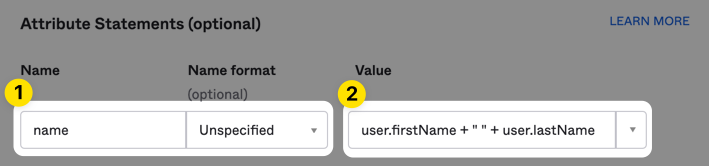
Then scroll to the Attribute Statements section and create a name custom attribute.
Finally, scroll down to the bottom of the page and click the Next button.
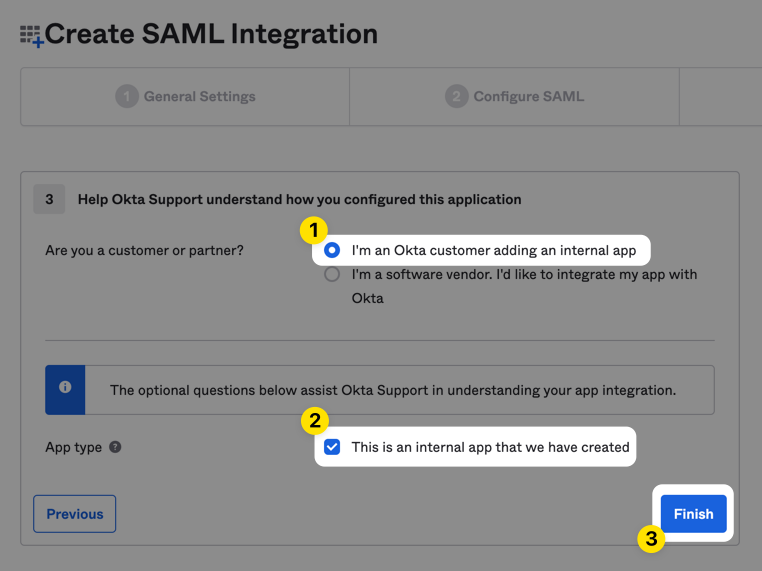
Mark the app as an internal application, then click the Finish button to complete the creation of the SAML 2.0 application.
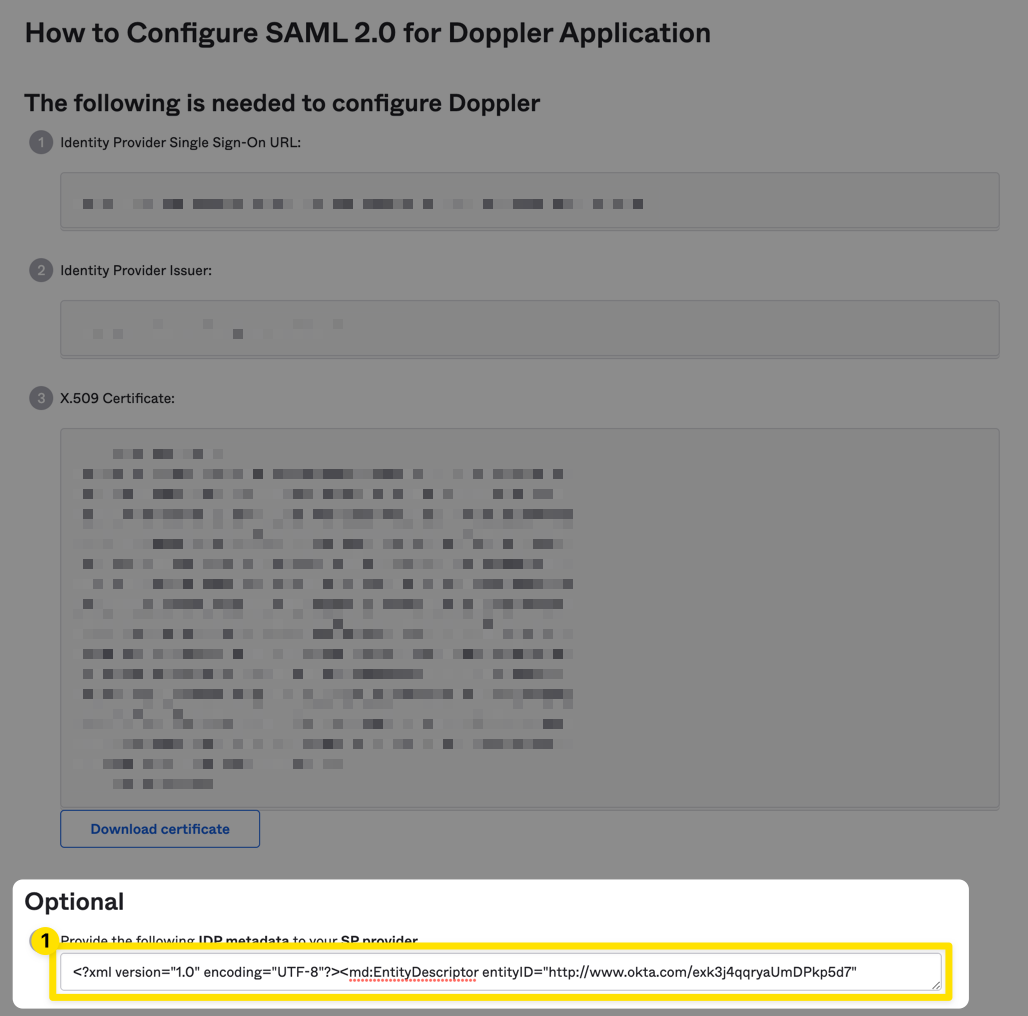
Click the Sign On tab for the Doppler application in Okta, then scroll down and click on the View SAML setup instructions button which will open a new tab.

Scroll down to IDP metadata field and ensure you've selected the entire XML content (not just the first line), then copy the contents which you'll use next in the Doppler dashboard.
4. Update Doppler SAML SSO Configuration
Navigate to the Doppler Team page and click on the SSO tab.
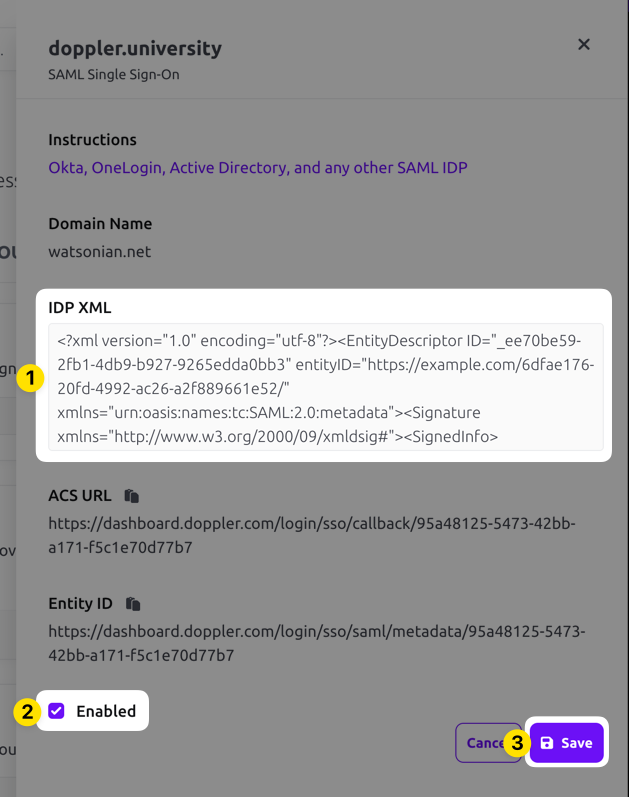
Scroll down to the SAML Single Sign-On section, click on the three dot menu, and choose the Edit option. Paste in the IDP XML metadata, check the Enabled field, then click the Save button.
You're now ready to test the Okta application!
5. Testing
As an Okta administrator, it's presumed you'll know how to sufficiently test a new Okta application, but here is a general guide.
Test sign-in flow using incognito windowBe sure to stay signed in to the Doppler dashboard until you've verified the Okta sign-in flow from an incognito window.
Staying signed in to the dashboard will allow you to update the SAML settings or disable SAML SSO in the event of misconfiguration.
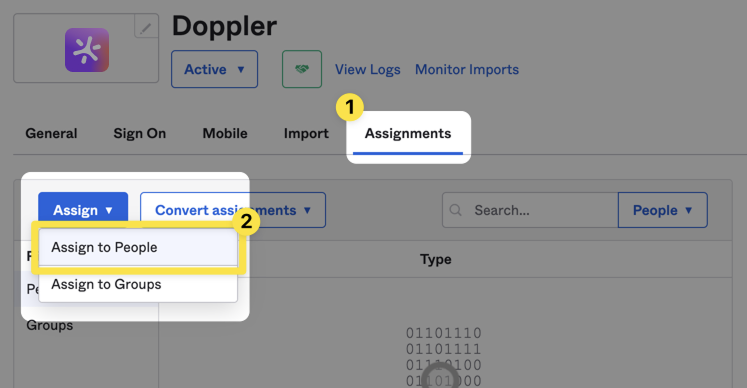
Click on the Assignments tab for the Doppler application and assign either a test account (recommended) or your own account to the Doppler application.
Now test the Doppler SAML sign-in flow by opening an incognito window and sign-in to Okta using the assigned user from the previous step.
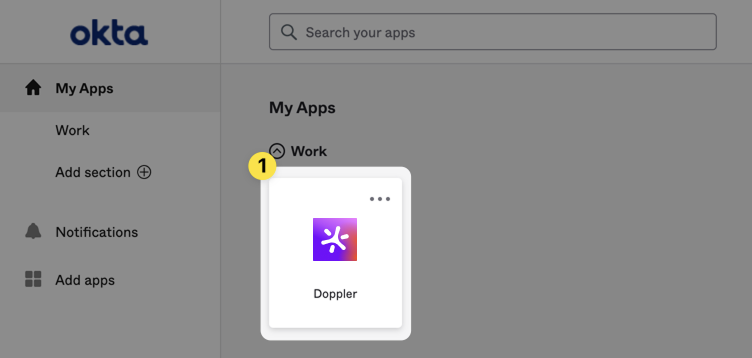
Click on the Doppler application to initiate the sign-in process.
You should then be redirected to the Doppler dashboard for the assigned user.
Once you've verified the Doppler SAML application is configured correctly, you can then apply your standard organization policies for people and groups assignment.
Troubleshooting
Here are some general troubleshooting tips:
- Double-check that the Single sign in URL and Audience URI values match exactly what is displayed in the Doppler SAML section.
- Check that the Name ID format and Application username values are correct.
- Ensure that the name attribute has been added to the Attribute Statements section.
If you're still running into issues, the error page should present you with a requestId value that can be used by our support team for further diagnosis.
Awesome Work!Your custom Okta Doppler SAML 2.0 application is now set up!