Microsoft Entra ID SCIM
Configure Microsoft Entra ID to automatically provision users in Doppler using SCIM.
This guide will show you how to configure a Microsoft Entra ID SAML application to enable SCIM for Doppler.
Requirements
- Azure role with permissions to create enterprise applications: Global Administrator, Cloud Application Administrator, Application Administrator, or owner of the service principal.
- Microsoft Entra ID SAML application for Doppler.
Enable SCIM in Doppler
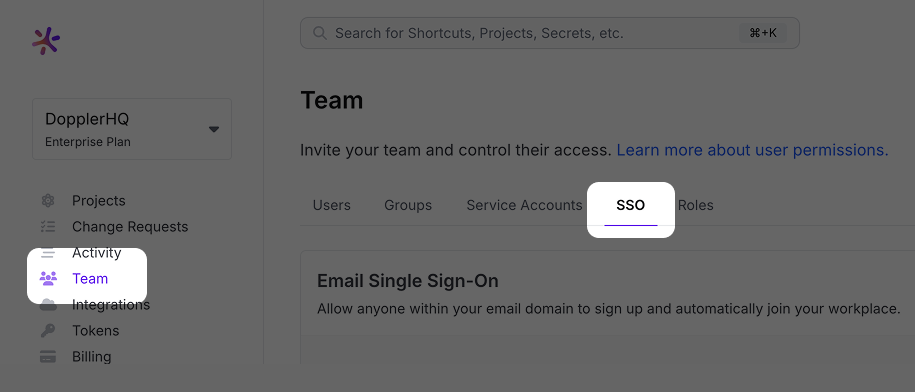
In a separate tab, browse to your Doppler workplace. Click on the Team link in the left navigation menu and then click on the SSO tab.
Scroll down to the SCIM 2.0 section, choose Enabled from the status dropdown menu, and then click Save.
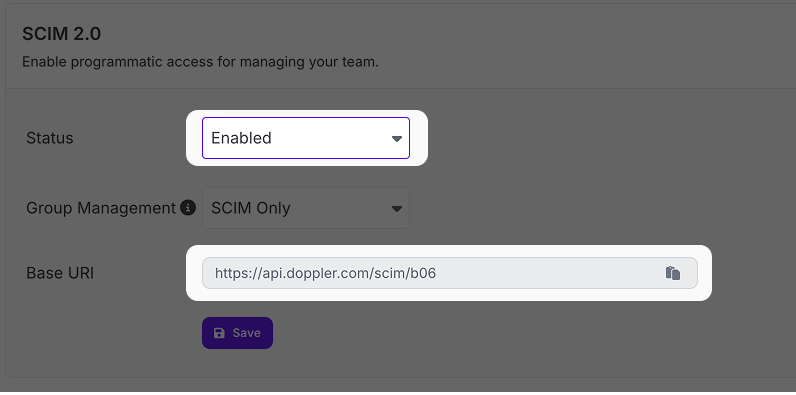
After doing so, a new Base URI and Authentication option will appear. These will both be used in the next section to further configure Okta SCIM provisioning.
Copy the Base URI for later use:

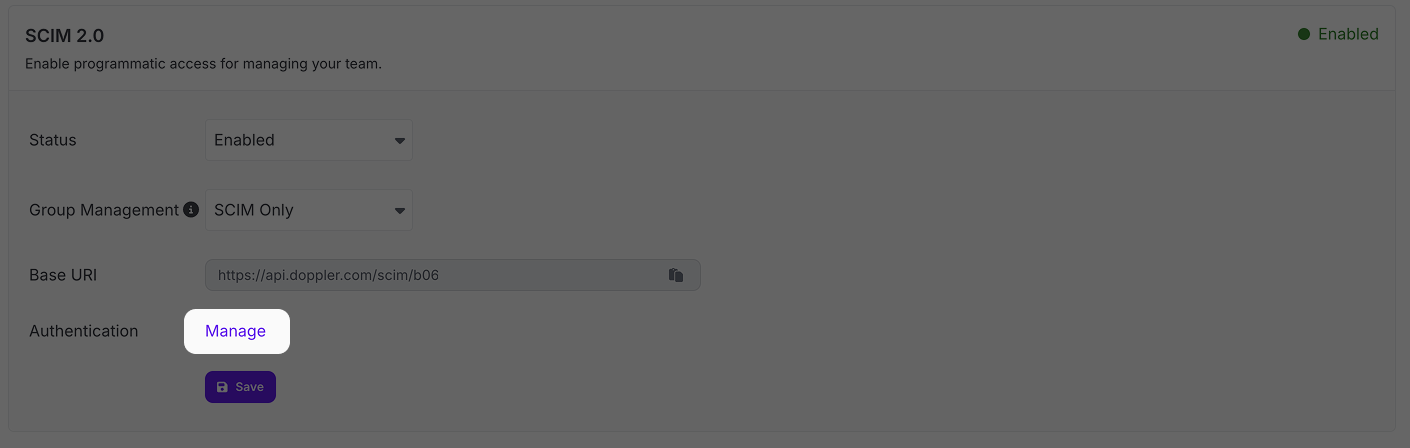
Now click the Manage link next to Authentication:
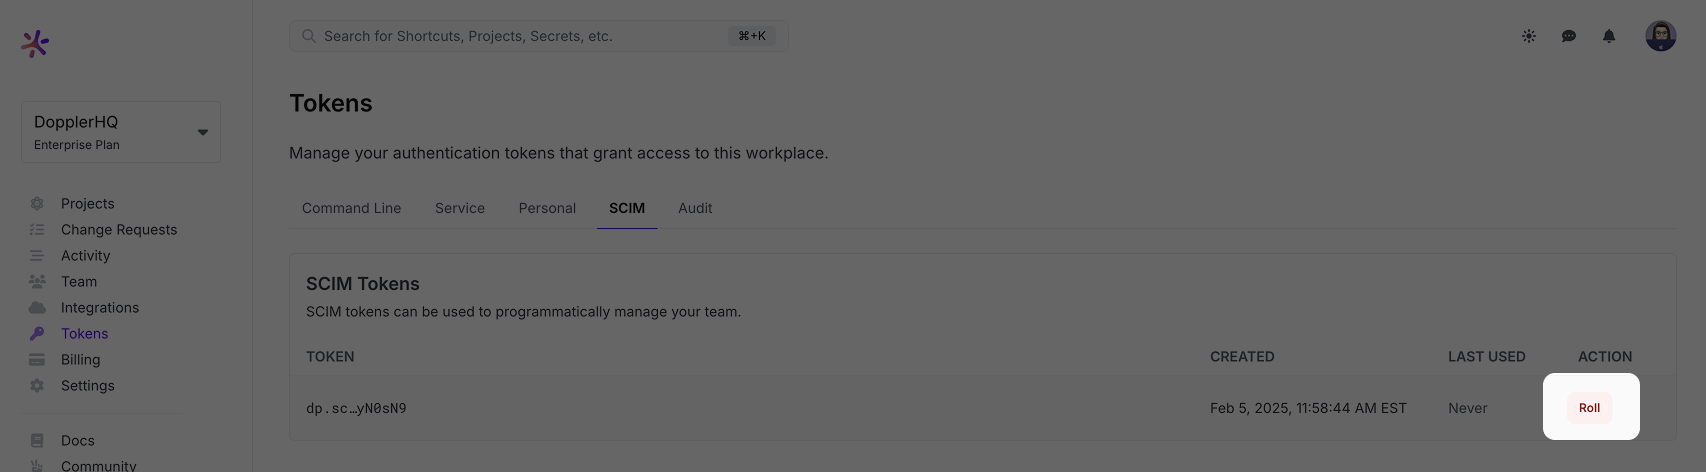
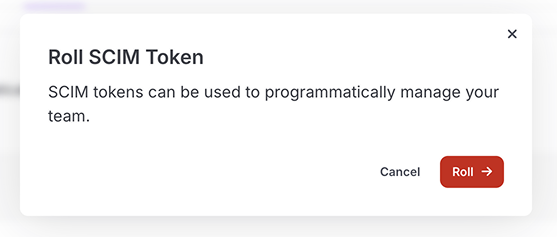
This will take you to the SCIM tab of the Tokens page for your workplace. Click the Roll link to generate a new token:
Click the Roll button in the modal window that's displayed next:
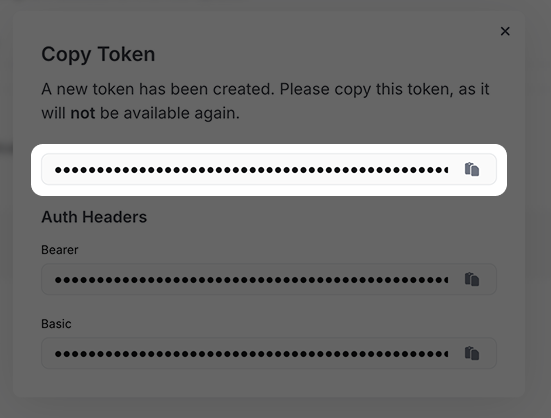
Finally, copy and save the token to use in the next step:
Configure Credentials for Entra ID Provisioning
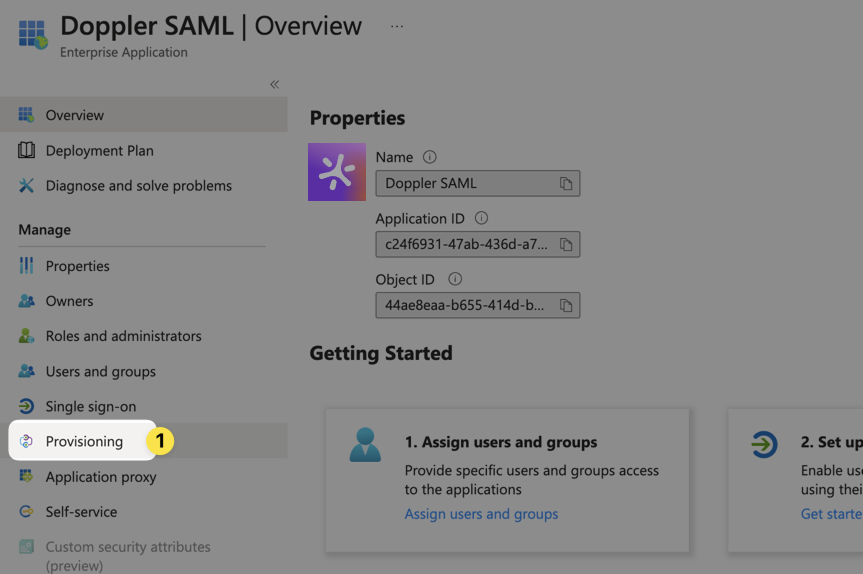
Open up your Entra ID SAML application and click on the Provisioning link in the left sidebar:
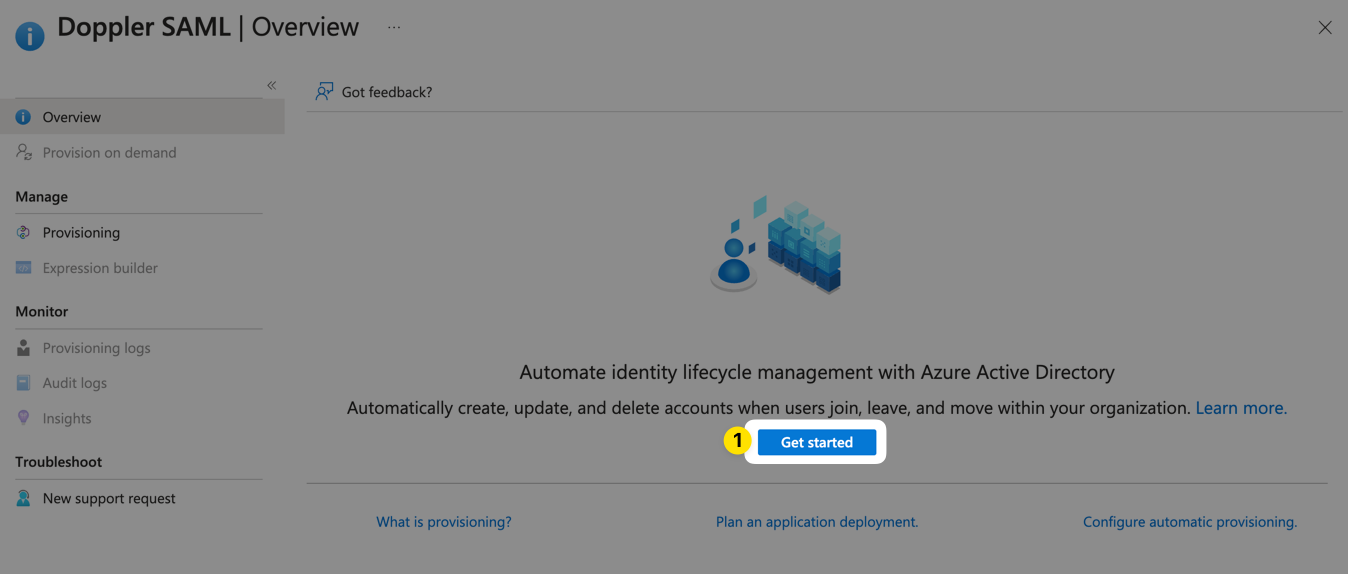
If this is your first time trying this, then you'll see a greeting message. Click Get Started to proceed:
Choose Automatic for the Provisioning Mode. Next, expand the Admin Credentials area, paste in the Base URI you saved from the previous step in the Tenant URI field, and paste in the SCIM token you saved from the previous step in the Secret Token field:
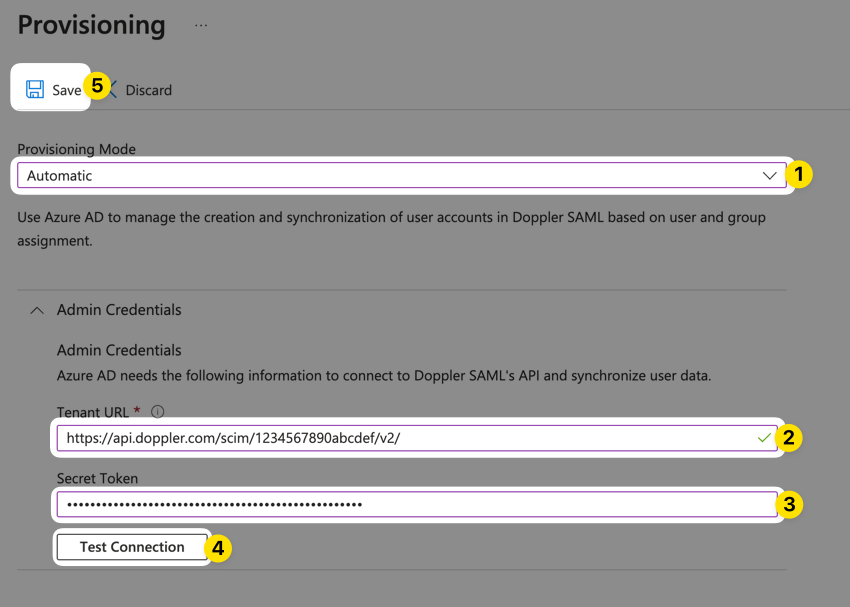
Click Test Connection to make sure your URL and token are working properly, then click Save.
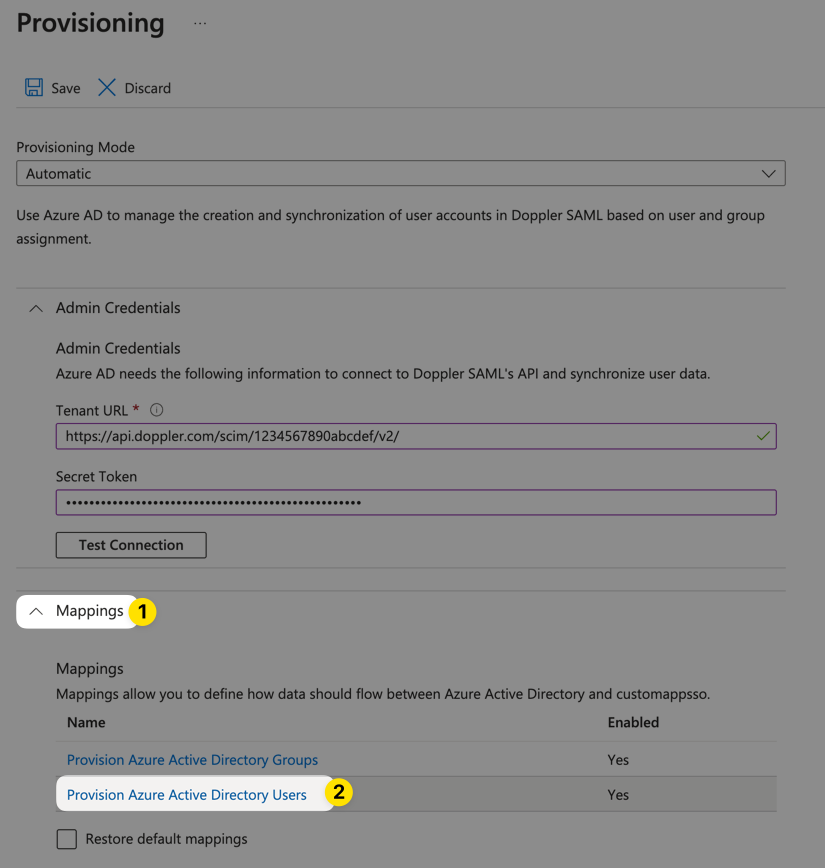
Configure Mappings for Entra ID Provisioning
Next, expand the Mappings area on the Provisioning page and click the Provision Entra Users link:
On the next page, scroll down to the Attribute Mappings section and delete all entries except the ones shown below (no changes are required to the entries being kept):
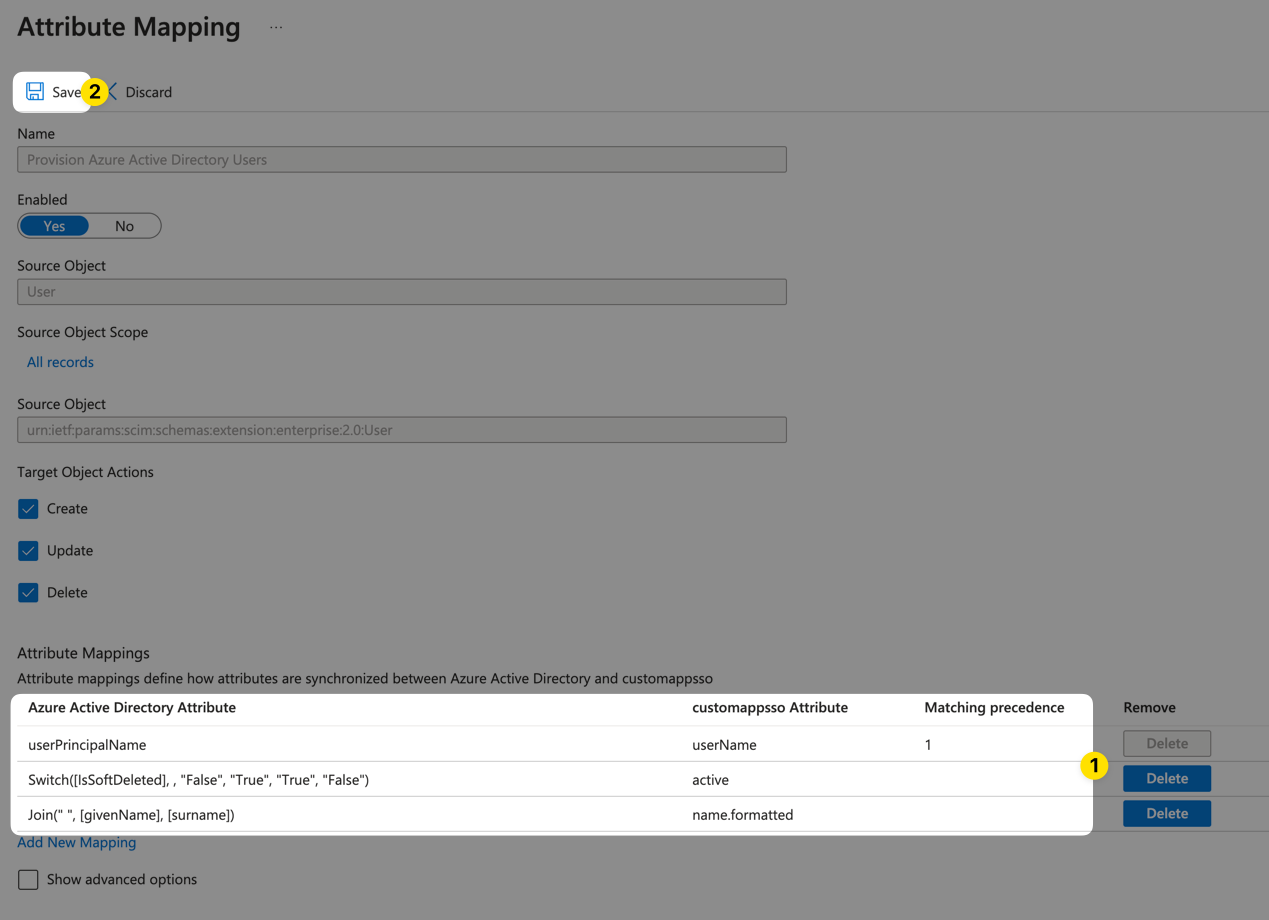
Then, click the Save button.
Assign Users & Groups for Entra ID Provisioning
Browse to the Users and groups area from the left sidebar of the Azure application overview:
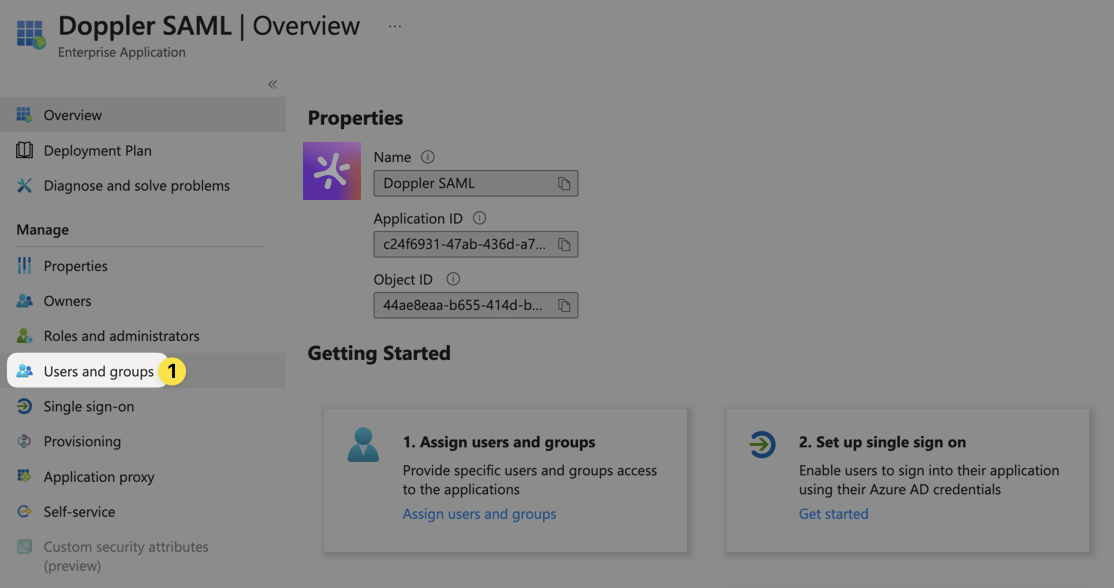
Assign all users and groups you want to be synced to Doppler to the application.
Start Provisioning for Entra ID Application
Finally, you need to click Start provisioning for the provisioning to actually kick off:
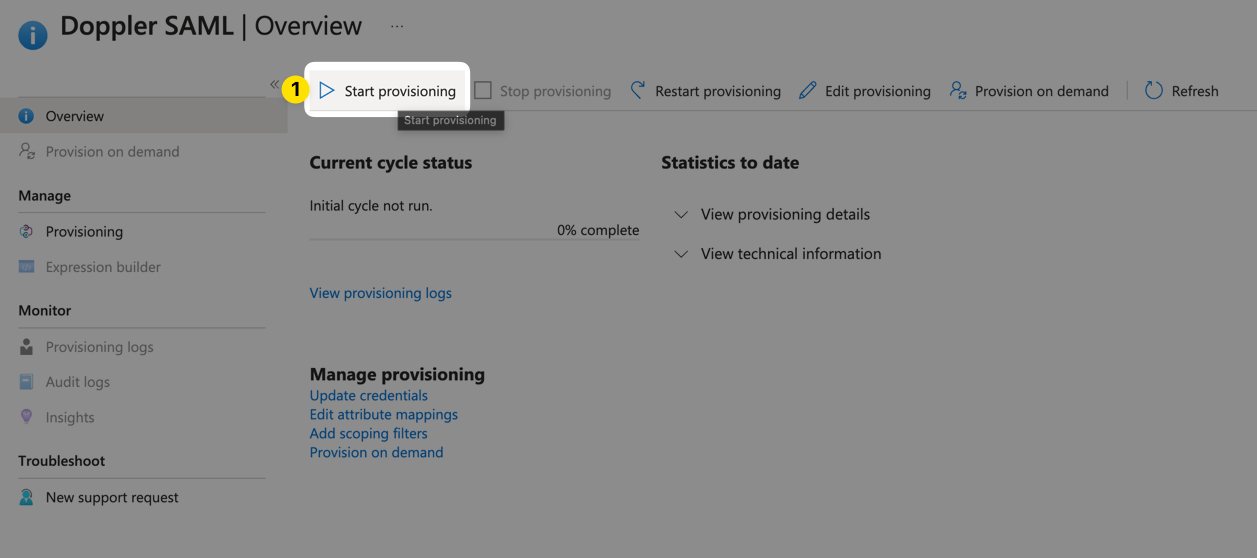
It may take a couple minutes for the initial sync to kick off. After that, it will update at fixed intervals (40 minutes).
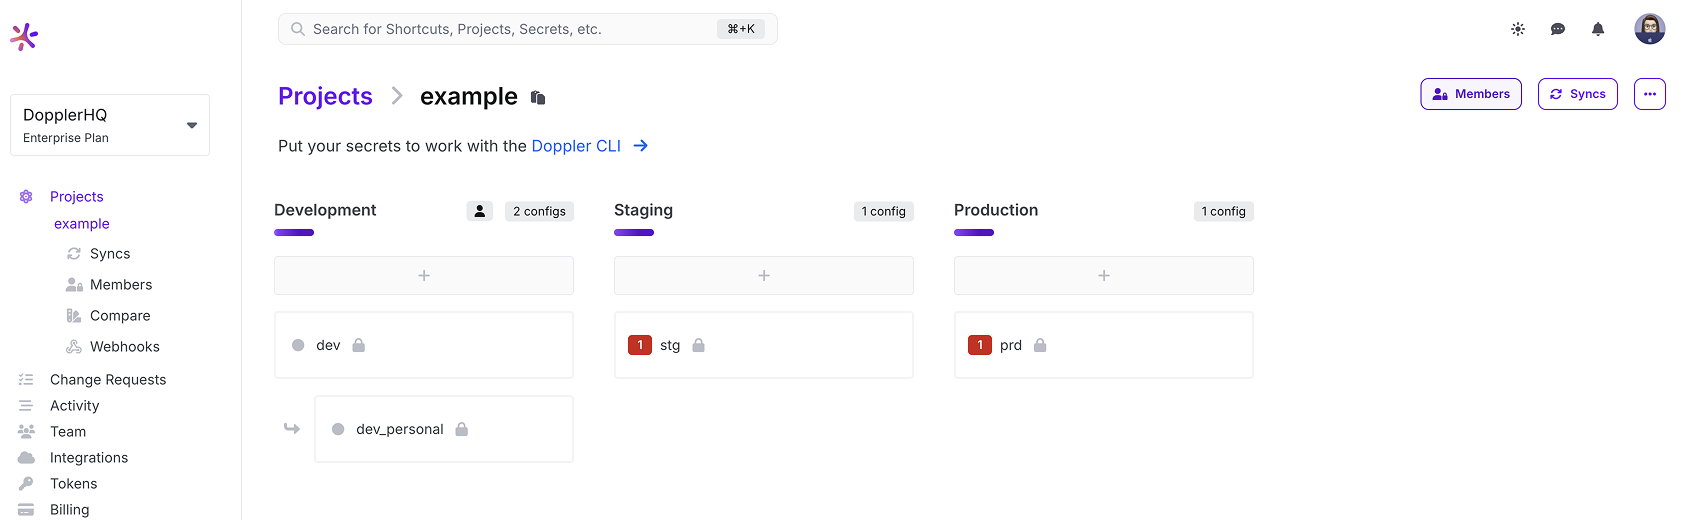
Doppler Project Access
Now that your Microsoft Entra ID users and groups are syncing into Doppler via SCIM, the final step is to assign access to Projects in Doppler.
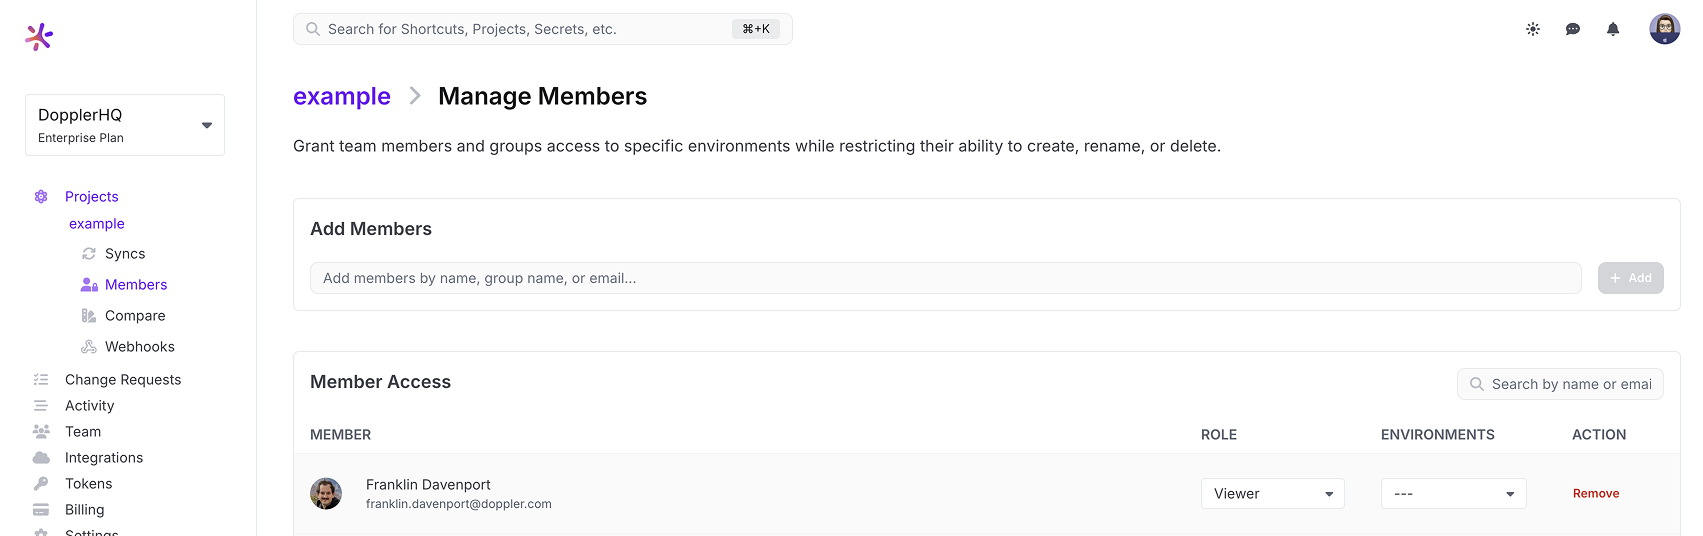
Navigate to a Doppler project and click on Members.
Then search for and select the group(s) and click Add.
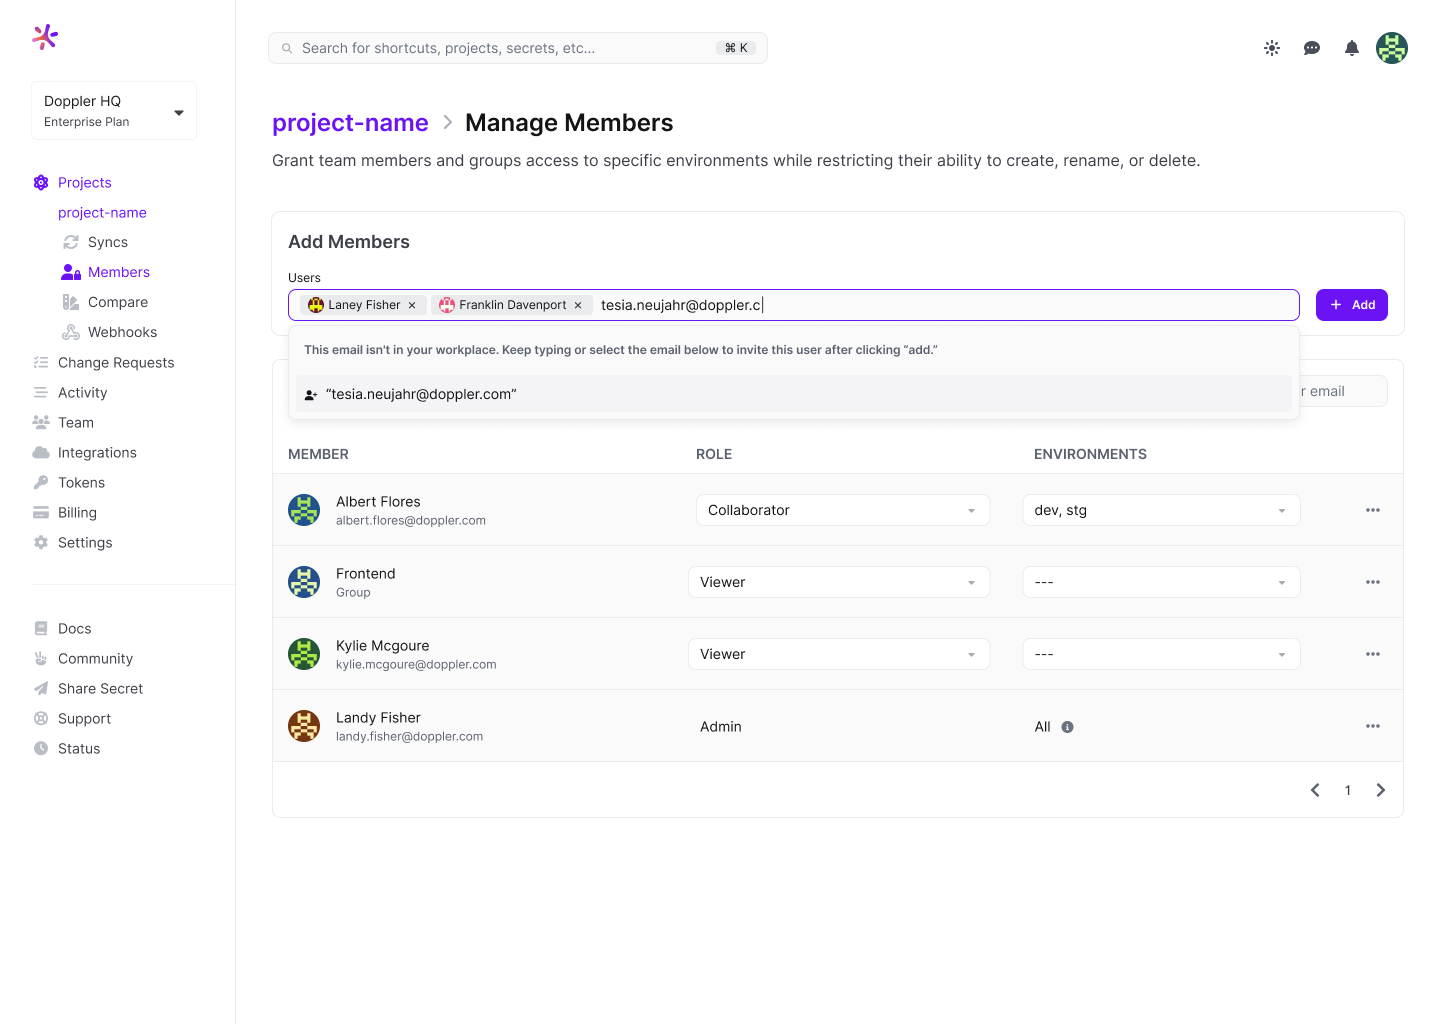
Once the group has been added to the project, select which environments they can access.
Awesome Work!You've successfully configured a Microsoft Entra ID application for syncing users and groups to Doppler using SCIM and assigned them access to a Doppler project.