JumpCloud SCIM
Configure JumpCloud to automatically provision users in Doppler using SCIM.
This guide will show you how to set up a JumpCloud SCIM 2.0 application to automatically provision and manage user access to Doppler.
Requirements
- Enterprise subscription
- Domain Verified (Settings page)
- JumpCloud Account
- JumpCloud SAML application for Doppler
Enable SCIM in Doppler
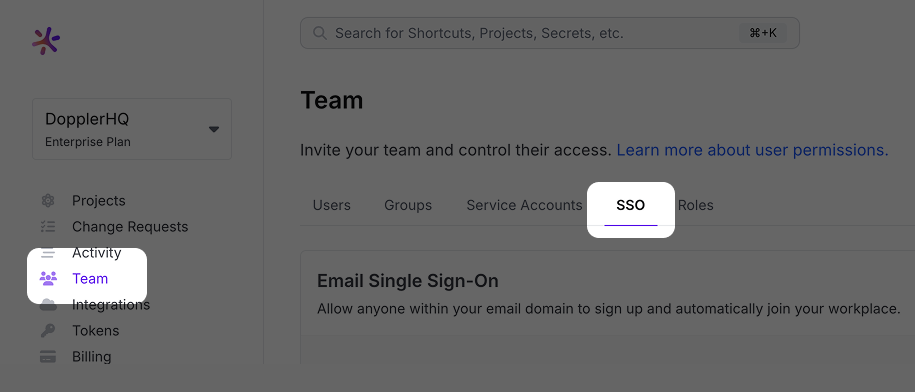
Browse to your Doppler workplace. Click on the Team link in the left navigation menu and then click on the SSO tab.
Scroll down to the SCIM 2.0 section, choose Enabled from the status dropdown menu, and then click Save.
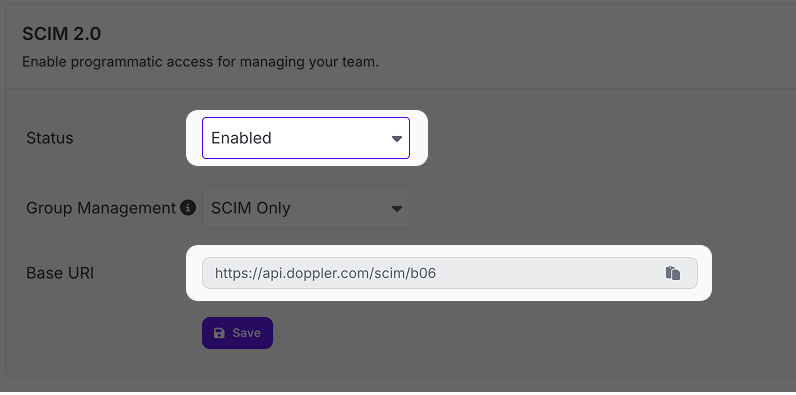
After doing so, a new Base URI and Authentication option will appear. These will both be used in the next section to further configure JumpCloud SCIM provisioning, so leave this tab open.
Configure JumpCloud SCIM Provisioning
This guide assumes you've already setup a JumpCloud SAML application for Doppler. If you haven't, please follow that link and create one before continuing.
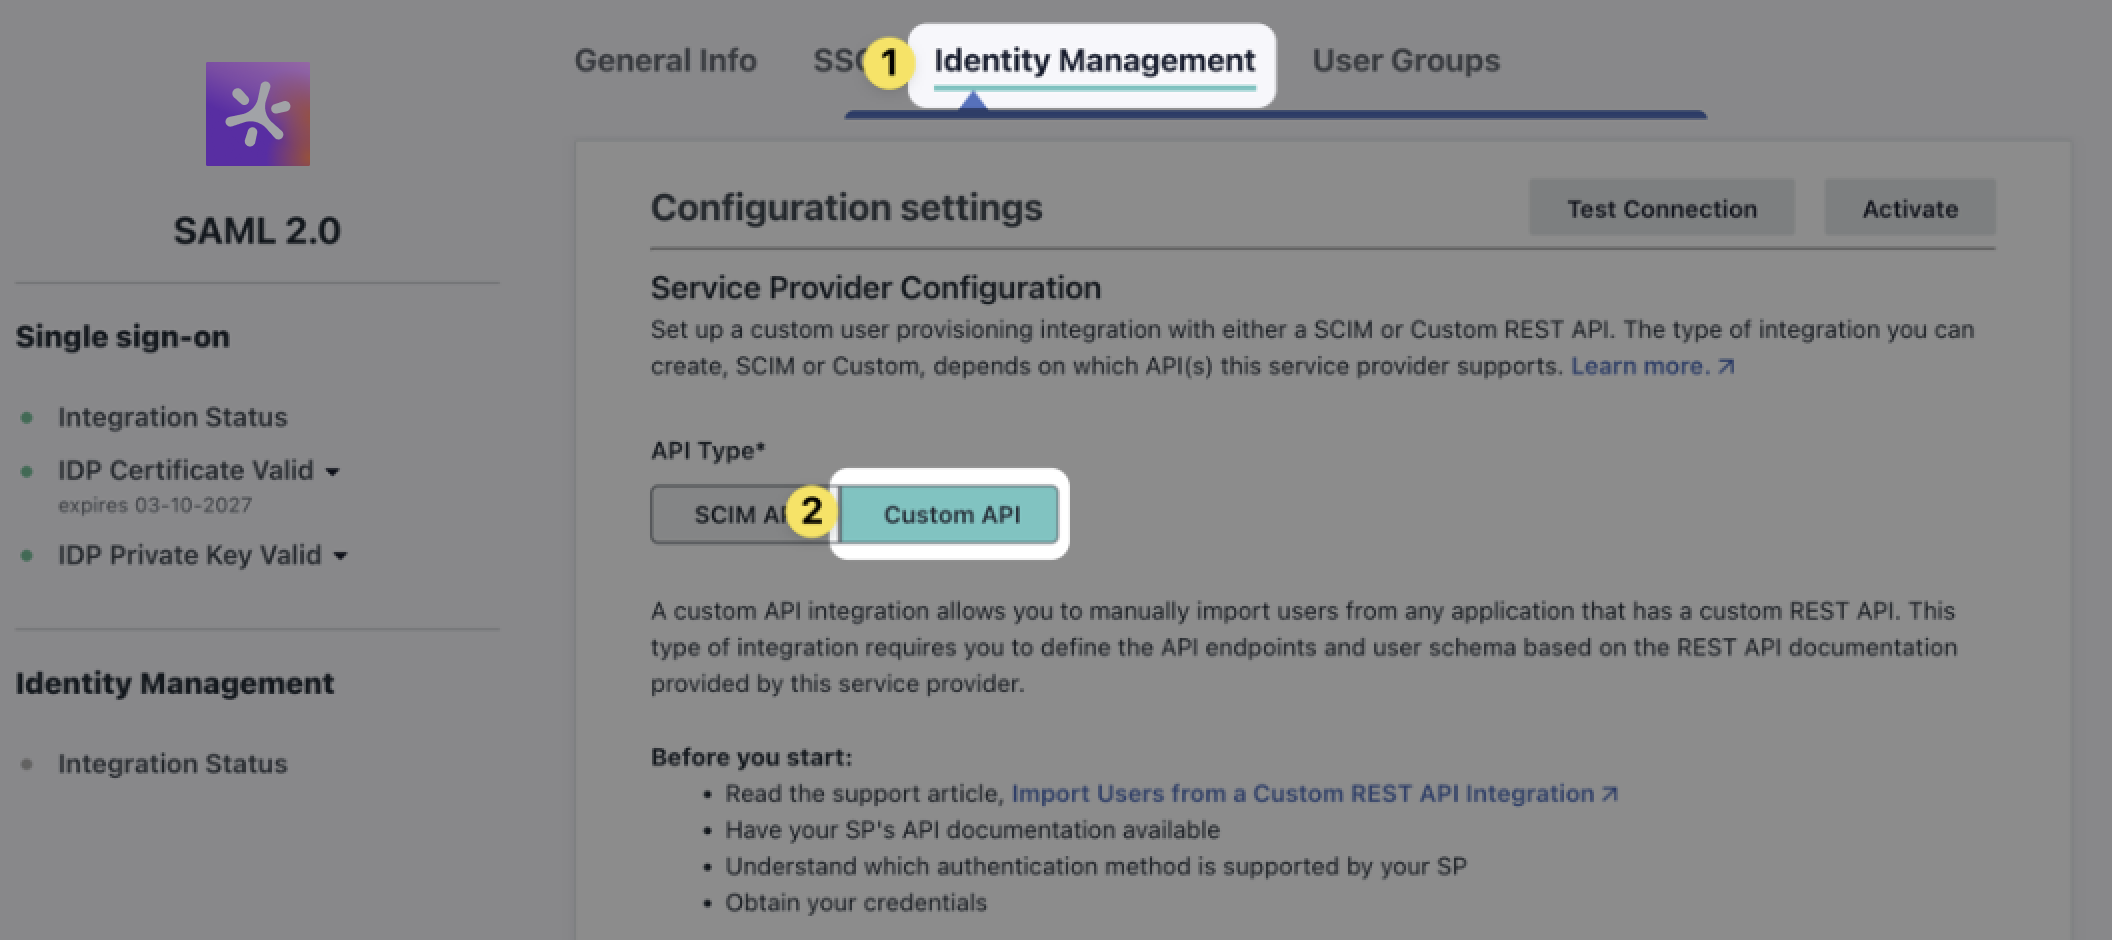
Open up a new browser tab and open your existing JumpCloud SAML application. Browse to the Identity Management tab, scroll down to the Configuration settings section and choose the Custom API option.
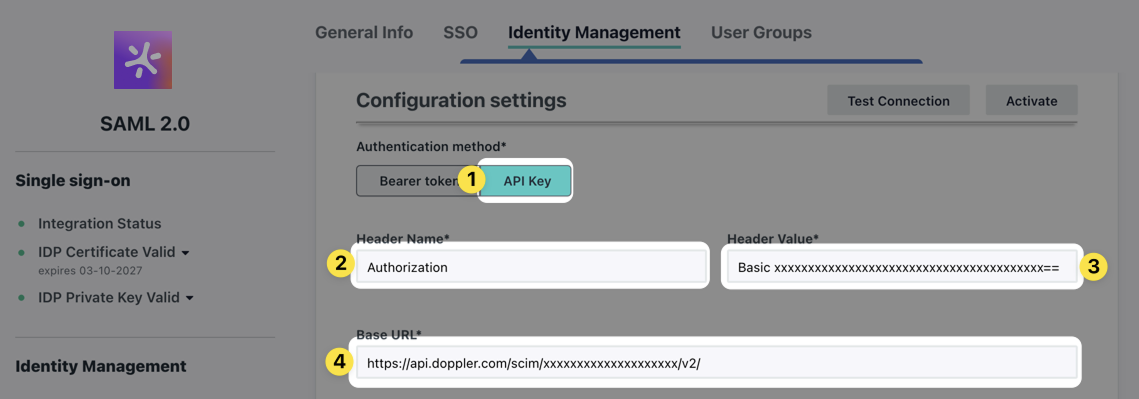
Now scroll down to the Authentication method section and choose the API Key option. Under Header Name enter Authorization.
To get the Header Value, swap back to your Doppler workplace tab and click on the Manage link next to Authentication. You'll be taken to the SCIM tab under the Tokens section your workplace. Click on the Roll link under the Action column – click the Roll button when prompted again. Copy the contents of the Basic Auth Header field.

Swap back to your JumpCloud browser tab and paste that into the Header Value field. Swap back to your Doppler workplace tab and find the SCIM 2.0 section again. Copy the contents of the Base URI field and swap back to your JumpCloud browser tab and paste that into the Base URL field.
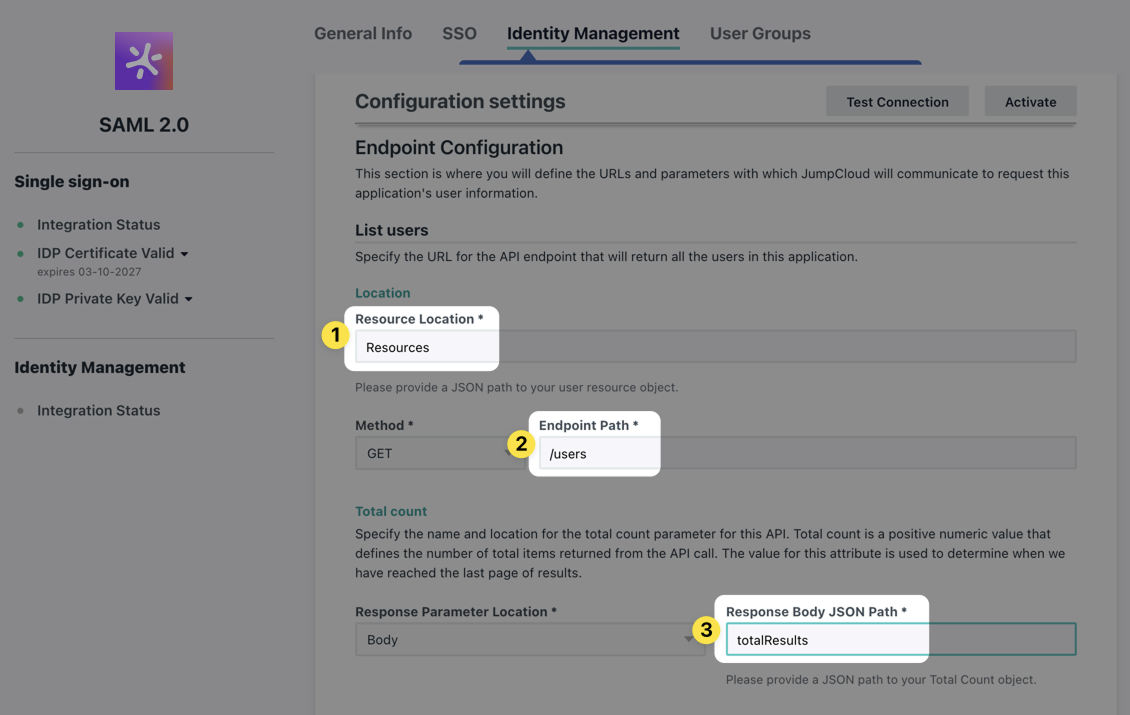
Next, scroll down to the Endpoint Configuration section. Set the Resource Location field to Resources, the Endpoint Path field to /users, and Response Body JSON Path field to totalResults.
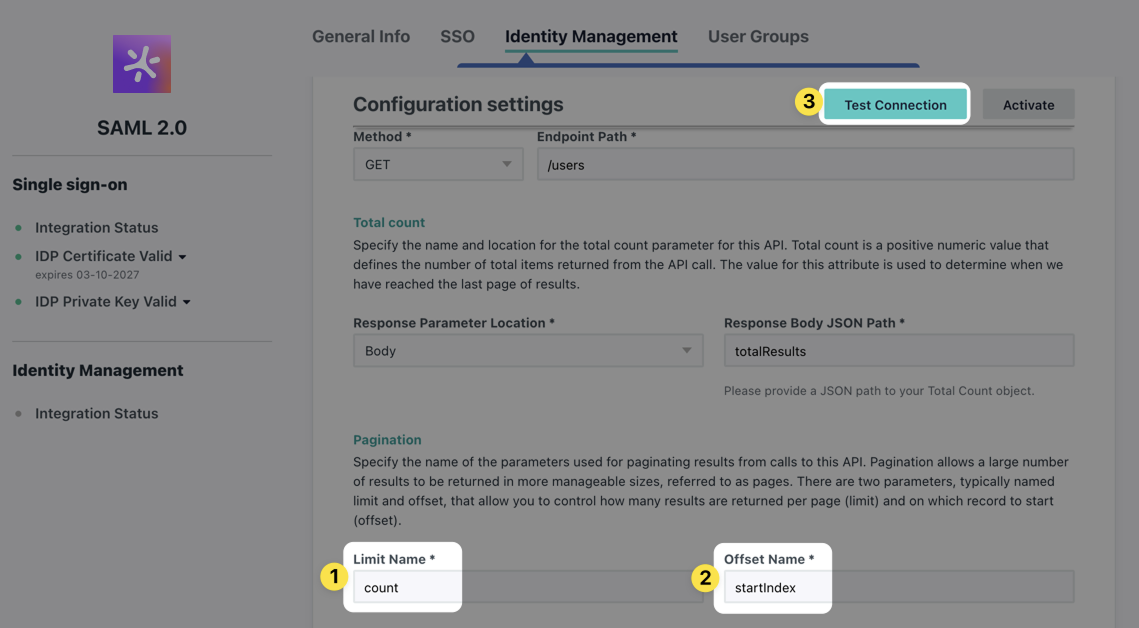
Scroll down to the Pagination section. Set the Limit Name field to count and the Offset Name field to startIndex. After doing this, the Test Connection button at the top of the page should turn green and become clickable (you may need to tab out of the Offset Name field first). Go ahead and click that button to test the connection.
A connection successful message should appear if you made the above configuration changes correctly. Once the test succeeds the User Schema Attribute Mapping section will fill out with additional options.
User Schema Attribute Mapping
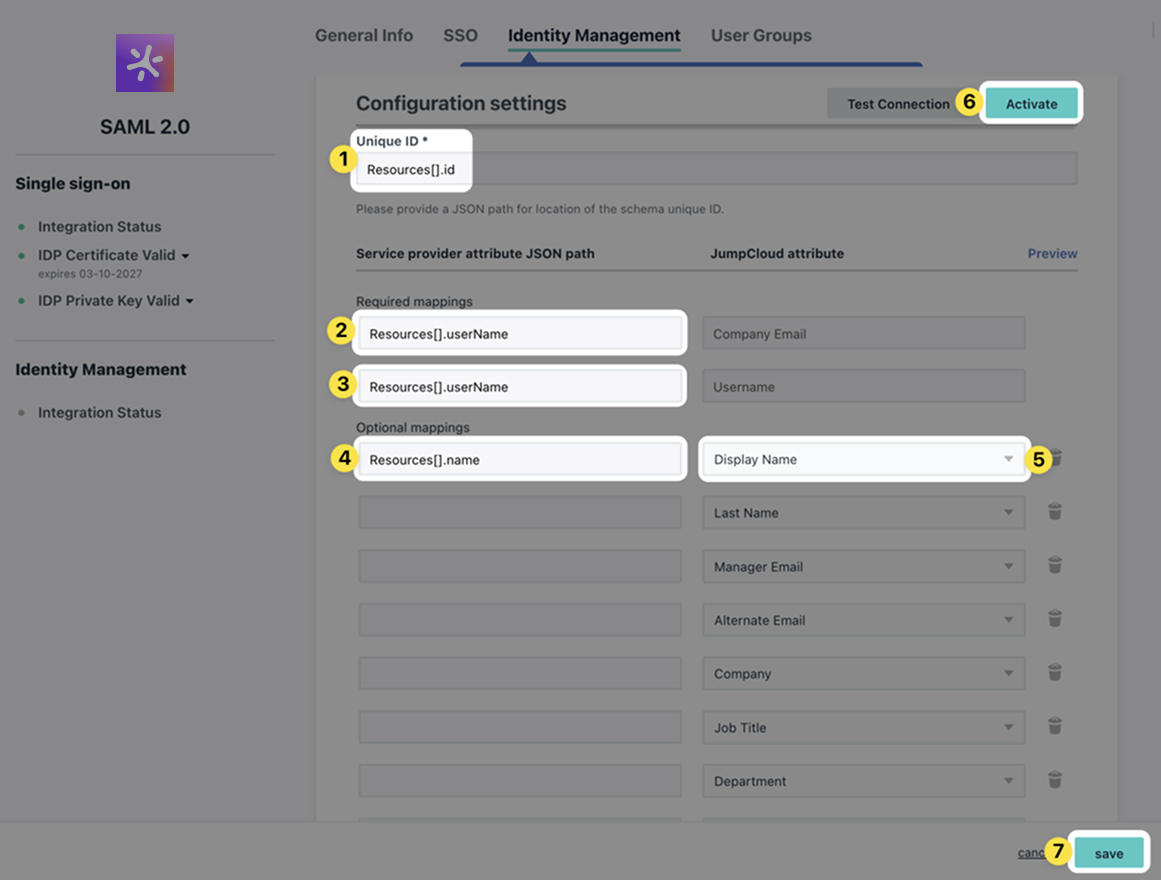
Scroll down to the User Schema Attribute Mapping section. Under the Unique ID field, enter Resources[].id. Under the Service provider attribute JSON path section, set the mapping values for Company Email and Username to Resources[].userName. Under Optional Mappings, choose Display Name from the dropdown menu on the right and then enter Resources[].name for the mapping value.
Once the above is set, click the green Activate button to save your settings and enable SCIM. Then, click the green Save button in the bottom right of the page.
Awesome Work!You've now set up a JumpCloud SCIM 2.0 application to automatically provision and manage user access to Doppler.