Okta SCIM
Configure Okta to automatically provision users in Doppler using SCIM.
This guide will show you how to set up an Okta SCIM 2.0 application to automatically provision and manage user access to Doppler.
Requirements
- Enterprise subscription
- Domain Verified (Settings page)
- Okta Developer Account
- Okta SAML application for Doppler
Enable SCIM in Doppler
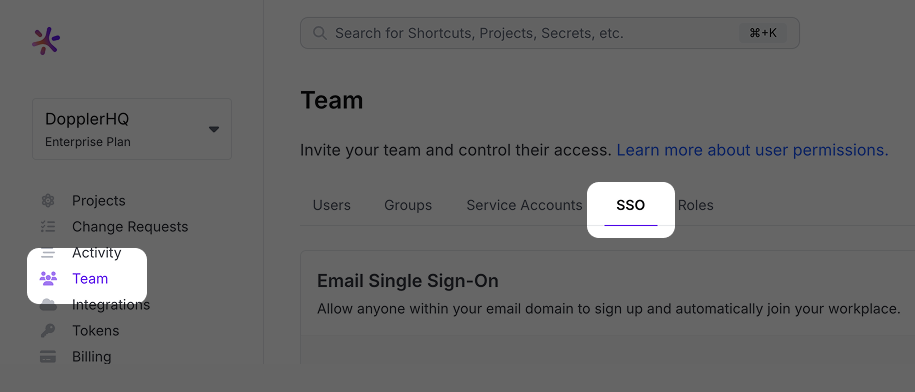
In a separate tab, browse to your Doppler workplace. Click on the Team link in the left navigation menu and then click on the SSO tab.
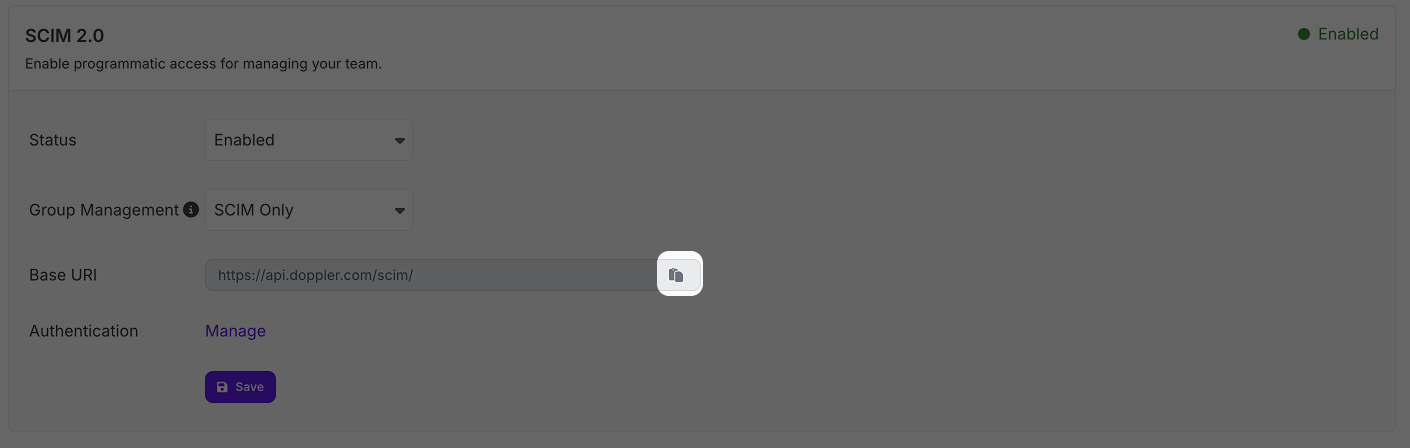
Scroll down to the SCIM 2.0 section, choose Enabled from the status dropdown menu, and then click Save.
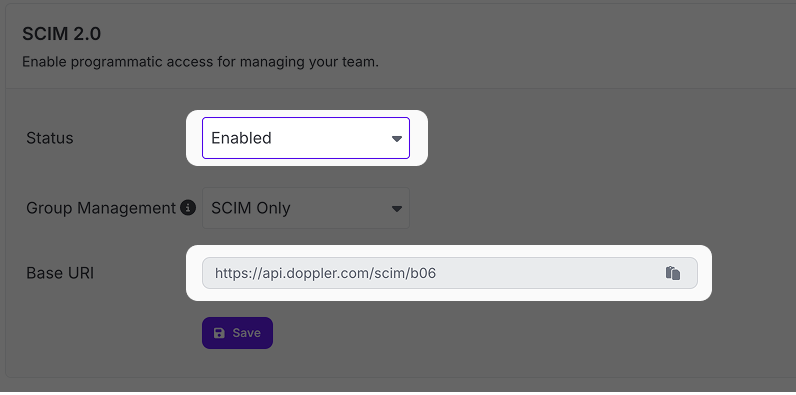
After doing so, a new Base URI and Authentication option will appear. These will both be used in the next section to further configure Okta SCIM provisioning.
Enable Okta SCIM Provisioning
This guide assumes you've already setup an Okta SAML application for Doppler. If you haven't, please follow that link and create one before continuing.
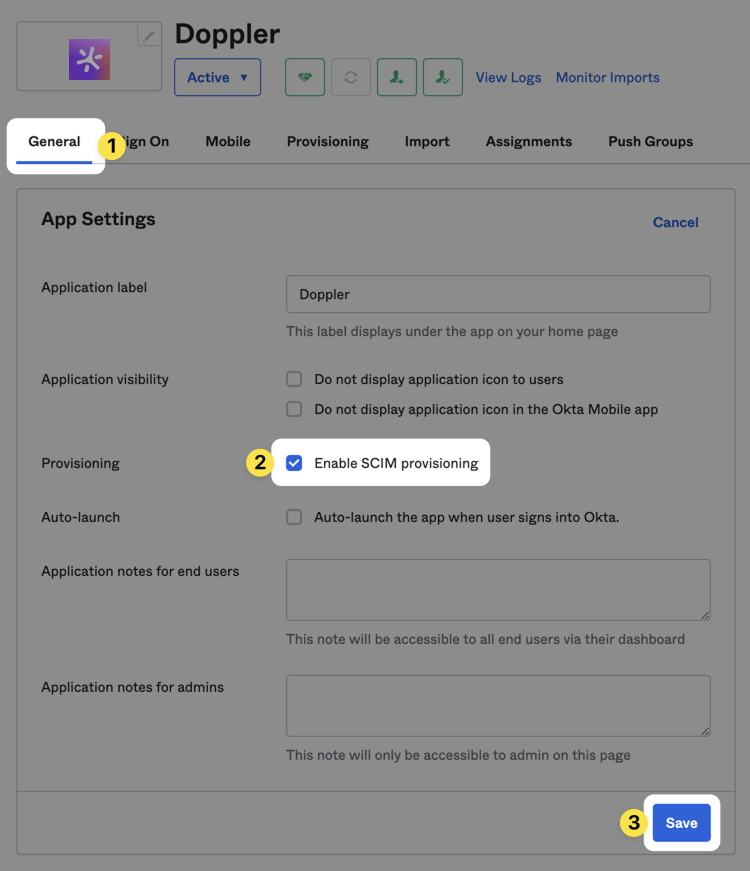
In your existing Okta SAML application, browse to the General and click the Edit link in the top right corner of the App Settings section, then check the Enable SCIM provisioning box and click Save.
Configure Okta Provisioning Integration Settings
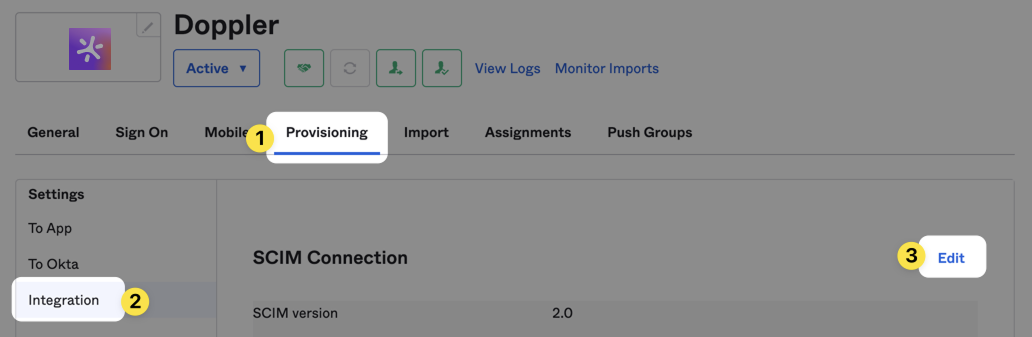
Back on the Provisioning tab in your Okta application's settings page, click on the Integration option under Settings on the left side of the page, and then click the Edit link on the top right corner under SCIM Connection.
Next, switch back to your Doppler browser tab and copy the contents of the Base URI field by clicking the clipboard icon next to it.
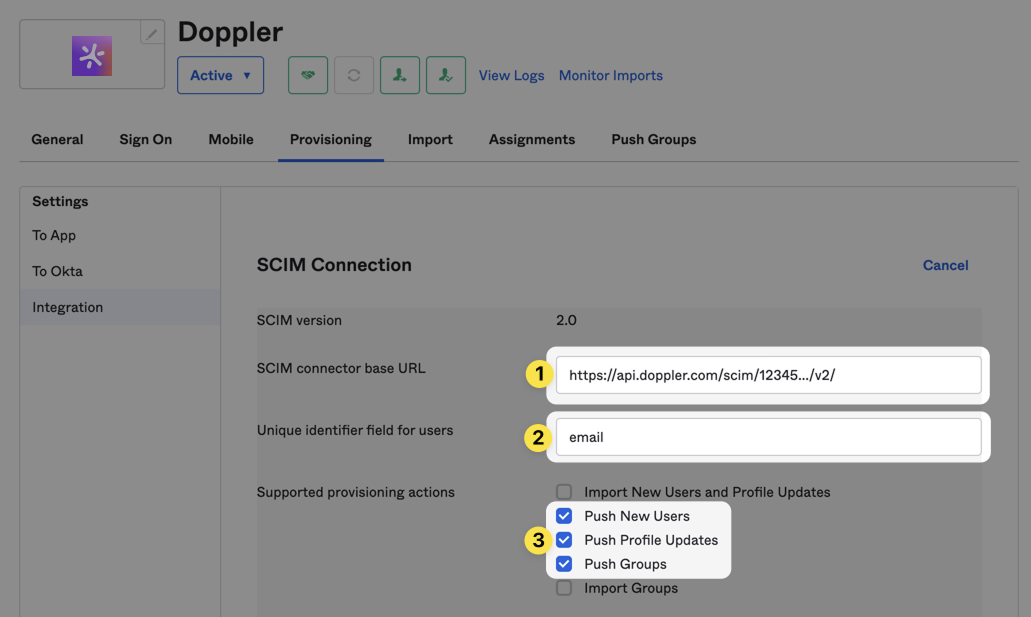
Swap back to your Okta browser tab and paste that into the SCIM connector base URL field. Next, set the value of the Unique identifier field for users field to email and check the Push New Users, Push Profile Updates, and Push Groups checkboxes.
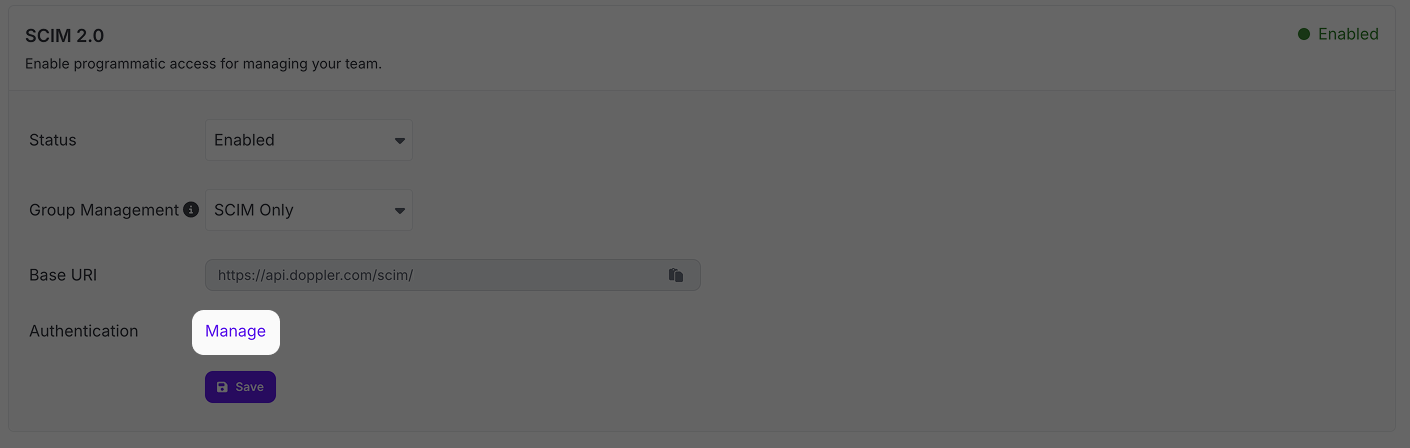
Swap back to your Doppler browser tab and click on the Manage link next to the Authentication option.
The next step involves rolling your SCIM token. If you're setting up SCIM for the first time, it's fine to proceed with this operation. However, if you had already setup SCIM previously keep in mind that performing a roll will invalidate the old token, so any existing SCIM setup using that token will stop working until it's updated with the new token.
This will open up a new browser tab that takes you to the SCIM section of the Tokens page of your Doppler workplace. Once there, click on the Roll link.

This will open up a new dialog containing the new token. Copy the token by clicking on the clipboard icon next to it.
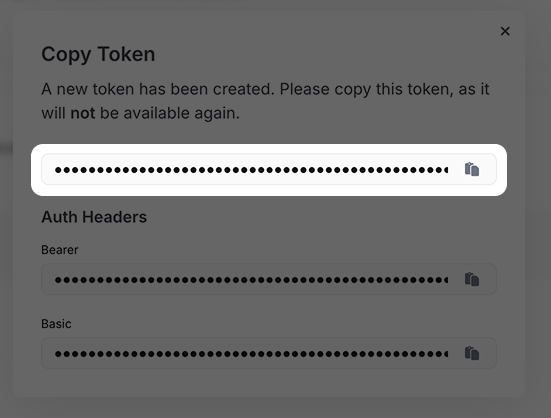
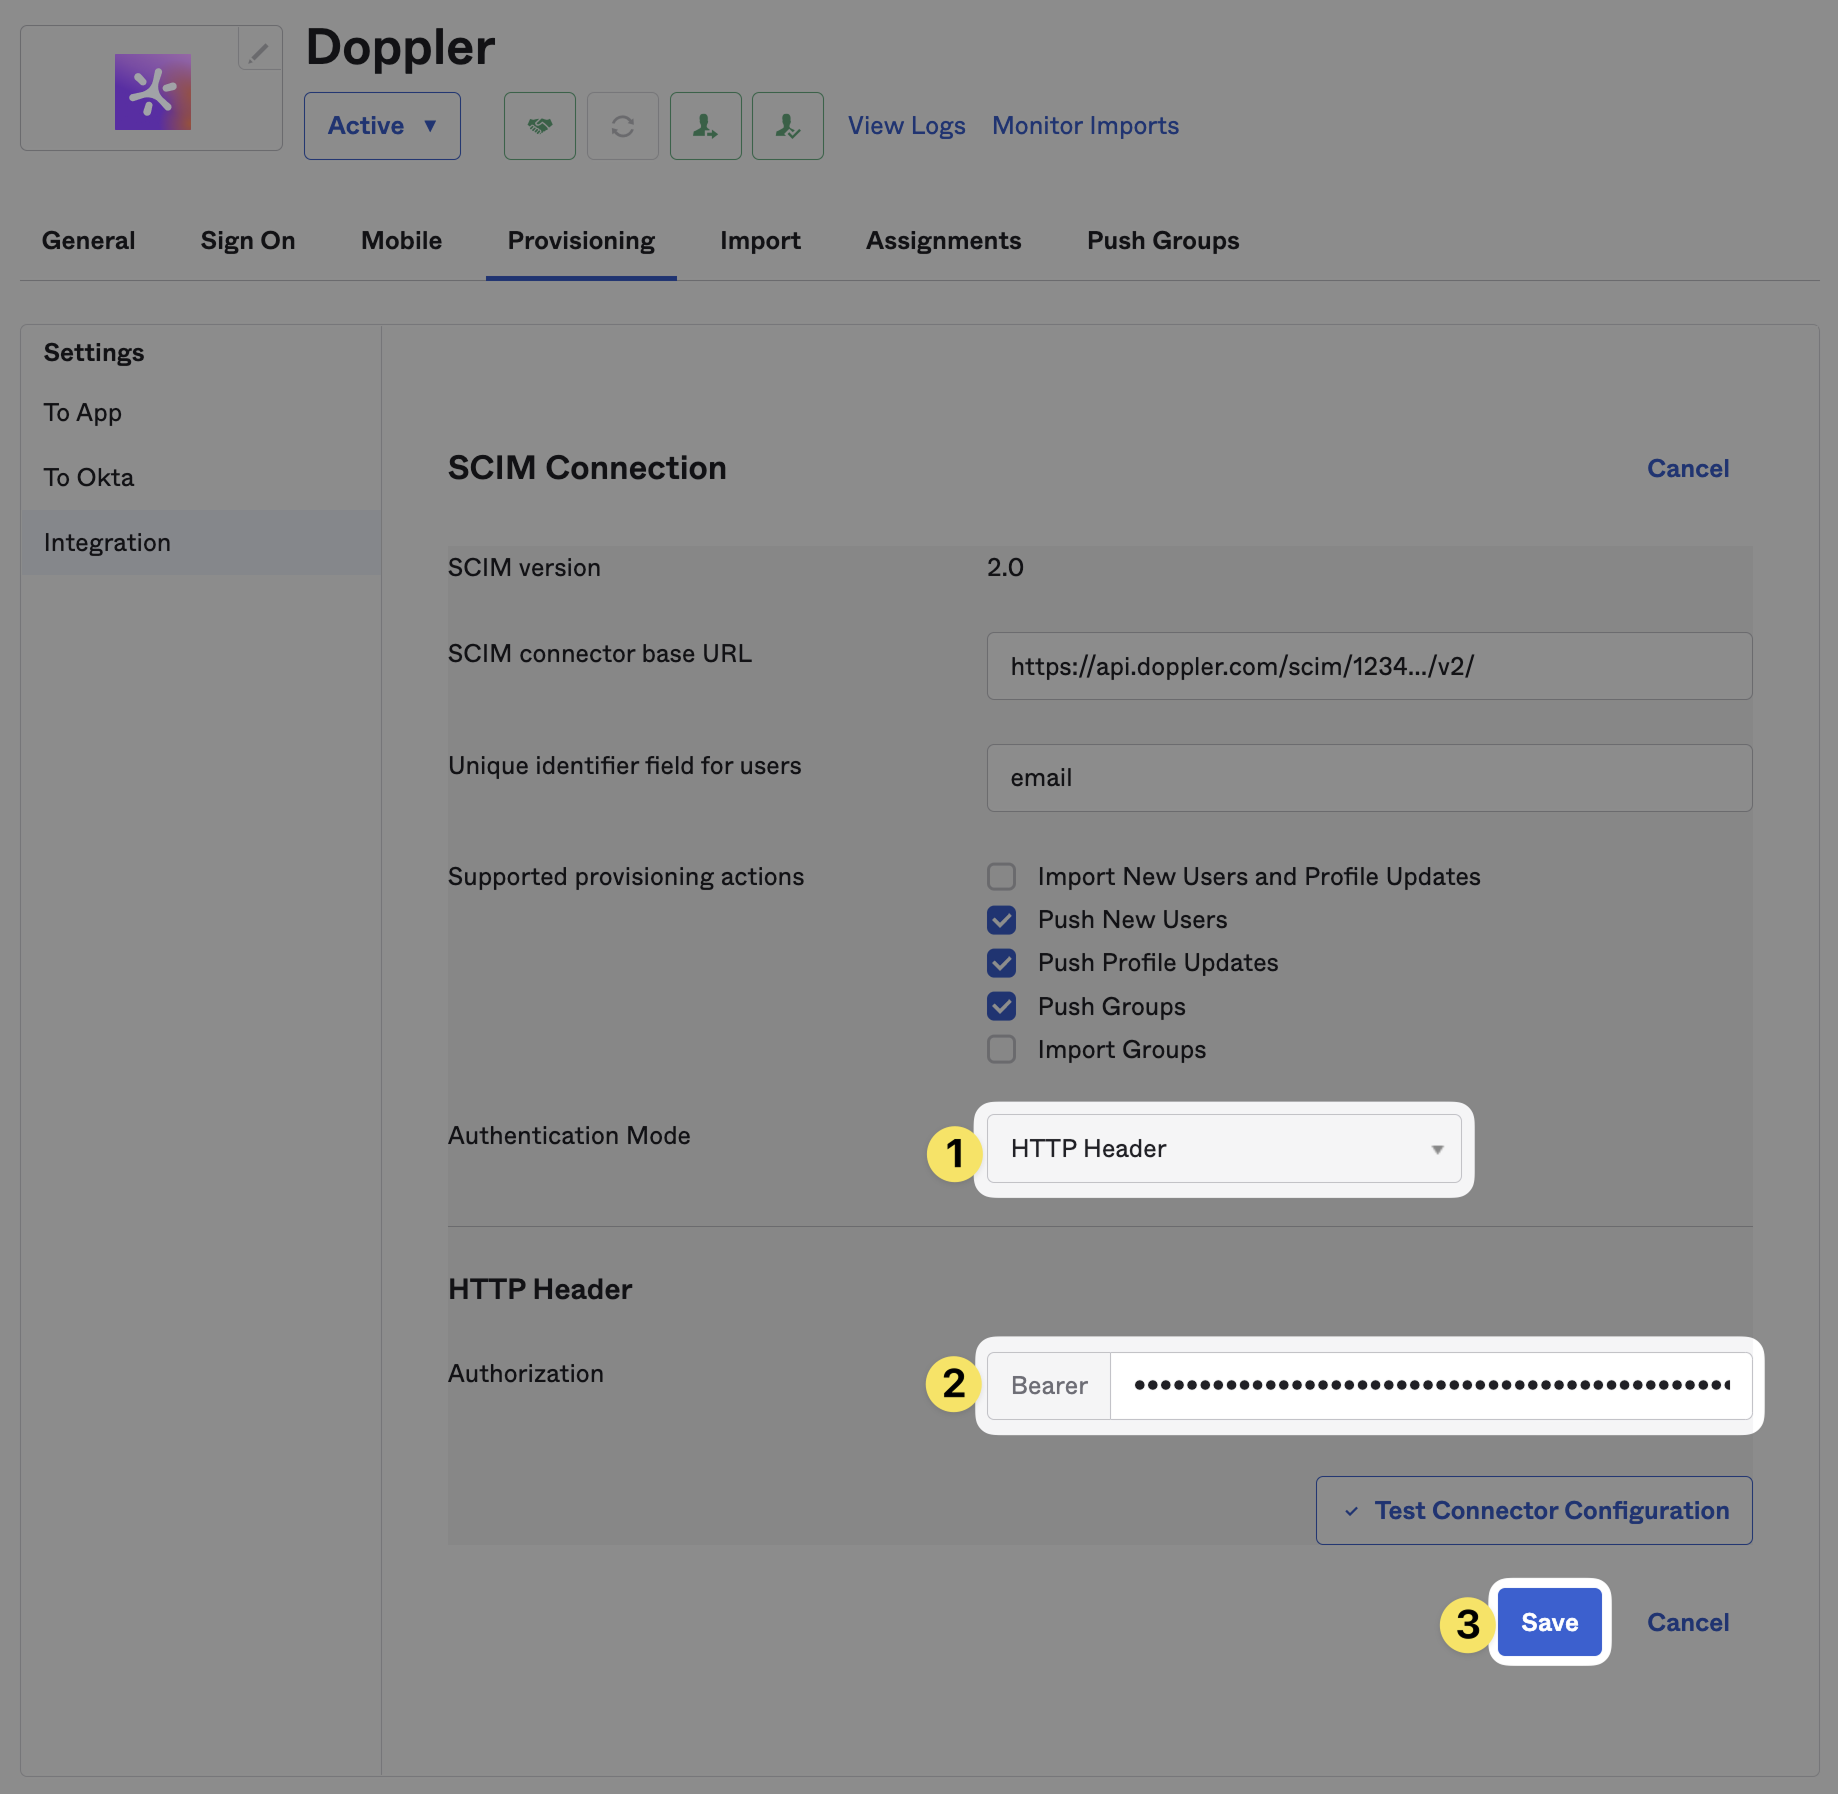
Swap back to your Okta browser tab and choose HTTP Header from the Authentication Mode dropdown menu. Next, paste the SCIM access token you just copied into the Authorization field under the HTTP Header section, then click Save.
Configure Okta Provisioning to App Settings
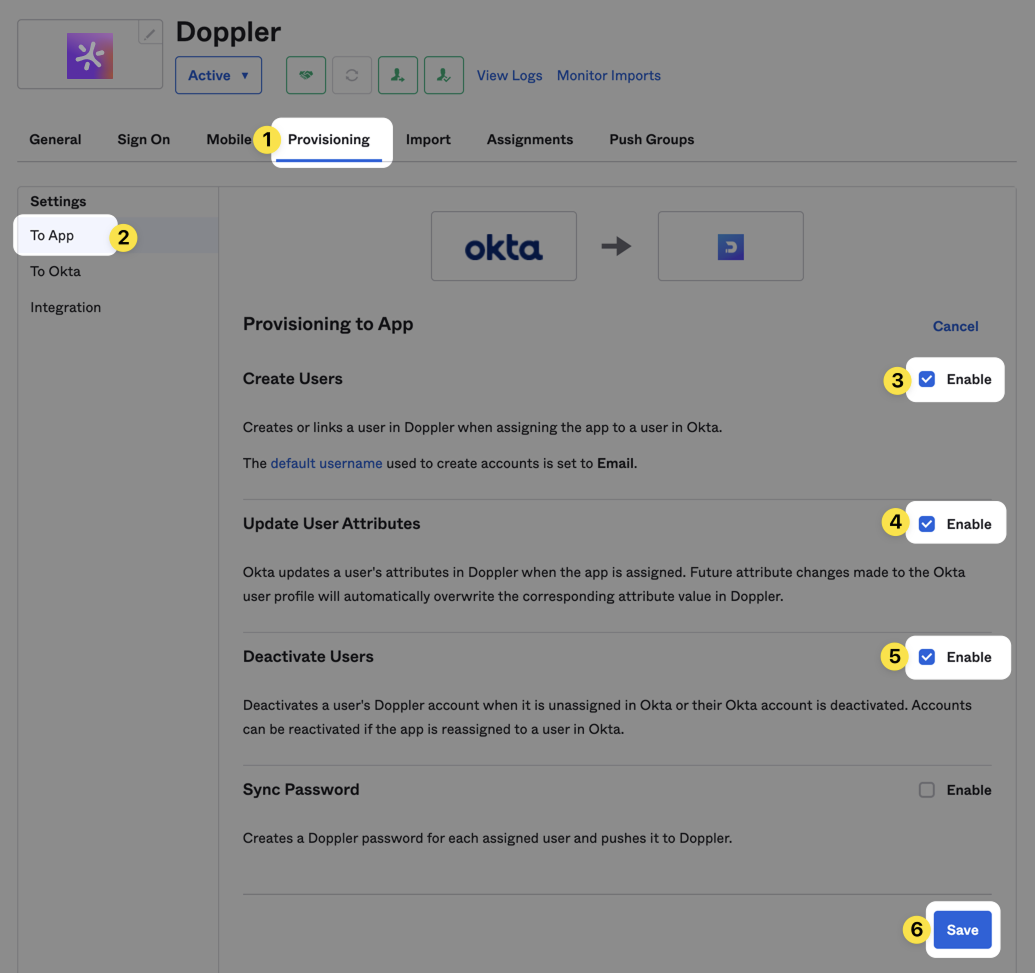
Browse to the Provisioning tab and click on the To App option under Settings on the left side of the page, then click the Edit link in the top right corner under Provisioning To App. Next, check the Enable box next to Create Users, Update User Attributes, and Deactivate Users, then click Save.
Configure Okta Push Groups
It's assumed that you've already configured Okta application assignments when setting up the initial SAML application. If you haven't already done so, make sure you do that before proceeding with this step.
This is where you configure Okta to push groups of users you have setup in Okta into Doppler. As an example, you might have a Doppler Engineers group in Okta. Setting that up as a push group will create a Doppler Engineers group in Doppler with the same users as members.
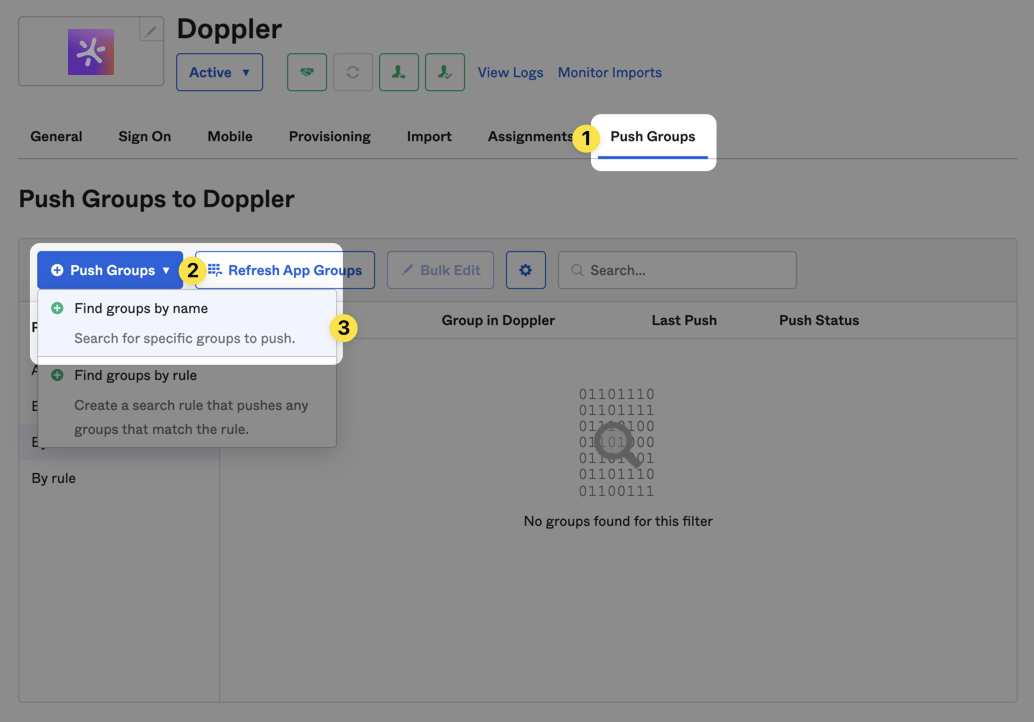
Click on the Push Groups tab and then click the + Push Groups button. Choose Find groups by name from the dropdown menu.
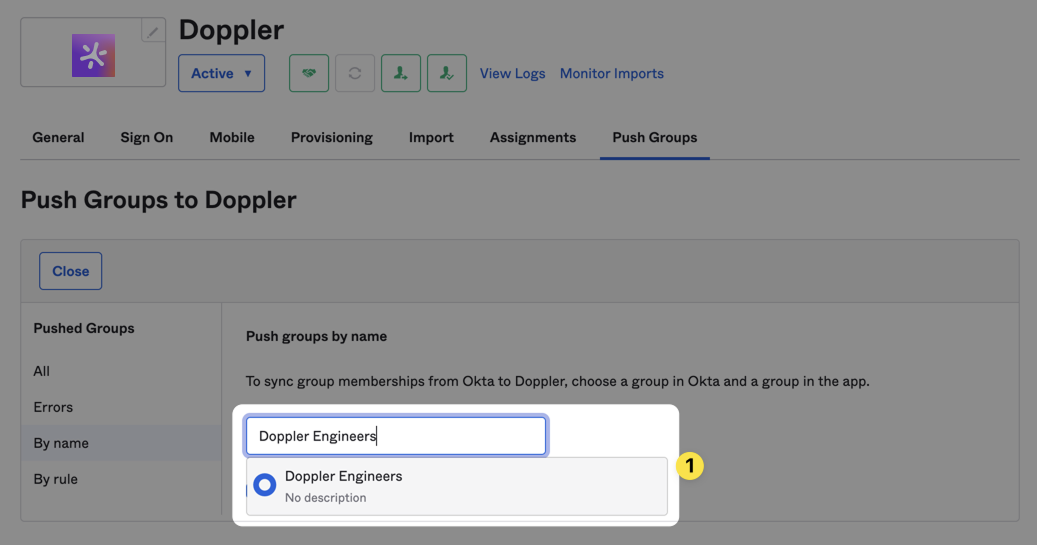
Search for a group you want to add and choose it from the dropdown menu.
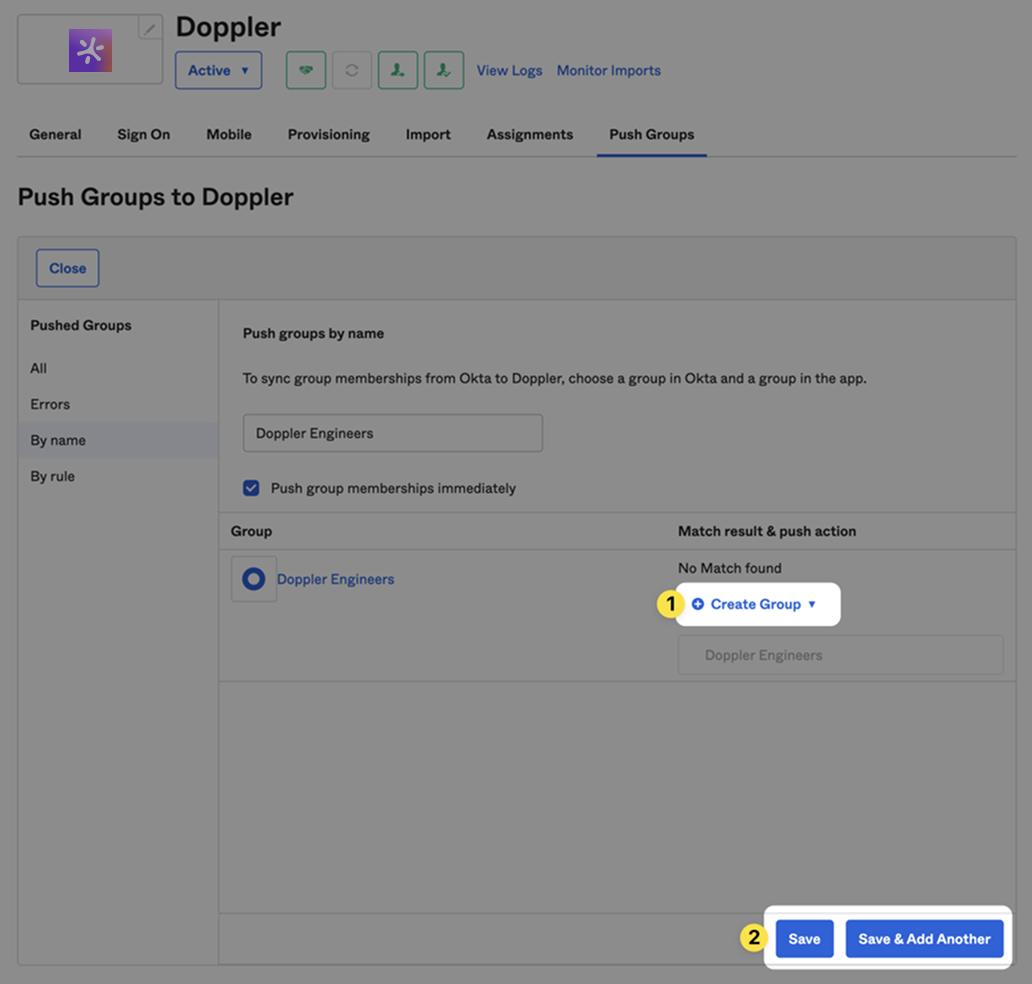
After adding the group, make sure you have Create Group selected in the Match result & push action column and then click either Save or Save & Add Another depending upon whether you have more groups to add or not.
When setting this up, we assume you've not created any groups in your Doppler workplace prior to enabling SCIM. If you had and the name matches one you're trying to add from Okta, change the Create Group option to Link Group instead. Generally, we recommend setting this up without any pre-existing groups in Doppler though.
After saving, the group will be pushed immediately and you should be able to see the Group and Users in Doppler once the push completes.
Now, whenever new users are added, updated, or deactivated in Okta, Doppler will receive the relevant API call to sync changes to its user records.
Awesome Work!You've now set up an Okta SCIM 2.0 application to automatically provision and manage user access to Doppler.