AWS EC2 OIDC Authentication
Authenticate the Doppler CLI from EC2 instances using AWS IAM identity federation
Requires an upgraded subscriptionThis feature is available with our Team and Enterprise plans. View our plans or book a demo for more details.
This guide walks through authenticating the Doppler CLI from an EC2 instance using the instance's AWS IAM identity — with no static Doppler tokens stored anywhere.
AWS IAM Outbound Identity Federation allows EC2 instances to mint short-lived, cryptographically signed JWTs that assert the instance's IAM role identity. Doppler accepts these JWTs via its OIDC login flow and exchanges them for short-lived Doppler API tokens.
Prerequisites
- A Team or Enterprise Doppler plan
- An AWS account with IAM administrative access
- The AWS CLI installed locally (for IAM setup)
- The Doppler CLI installed on your EC2 instance
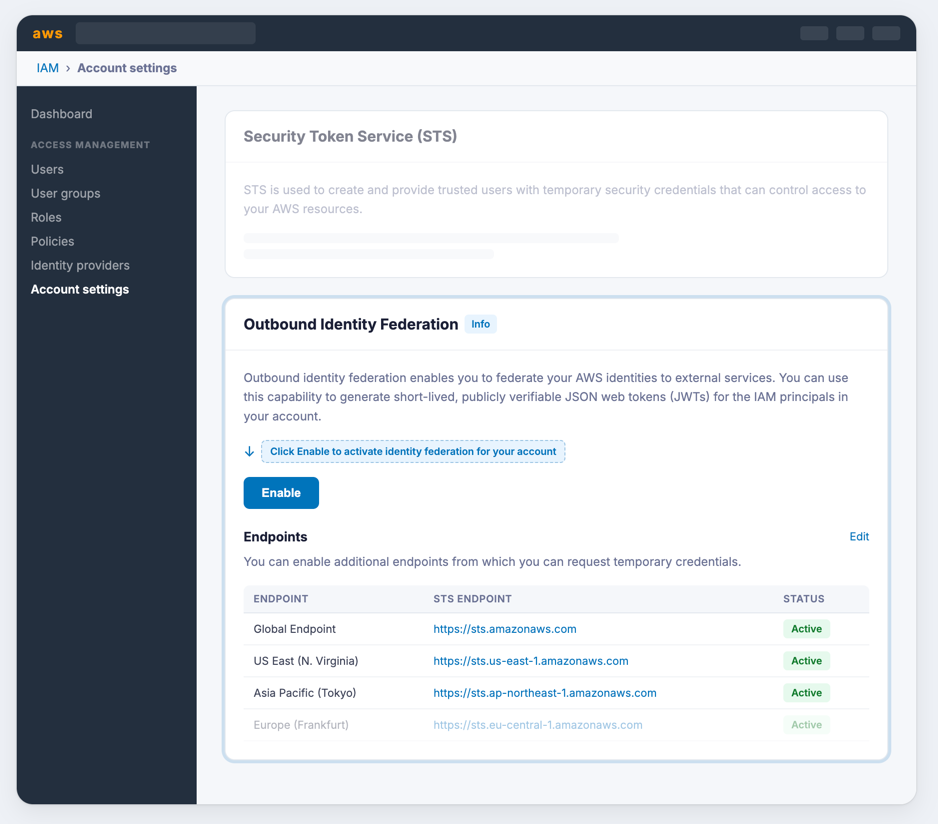
Step 1: Enable AWS IAM Outbound Identity Federation
IAM Outbound Identity Federation is an account-level setting that must be enabled before EC2 instances can mint identity tokens.
- Open the IAM console
- In the left sidebar, click Account settings
- In the Outbound identity federation section, click Enable
Once enabled, AWS generates a unique issuer URL for your account. This URL appears in the Outbound identity federation section and looks like:
https://96e40952-de33-4e54-a532-d0c9b6136950.tokens.sts.global.api.awsCopy this URL — you'll need it when configuring the Doppler identity in Step 4.
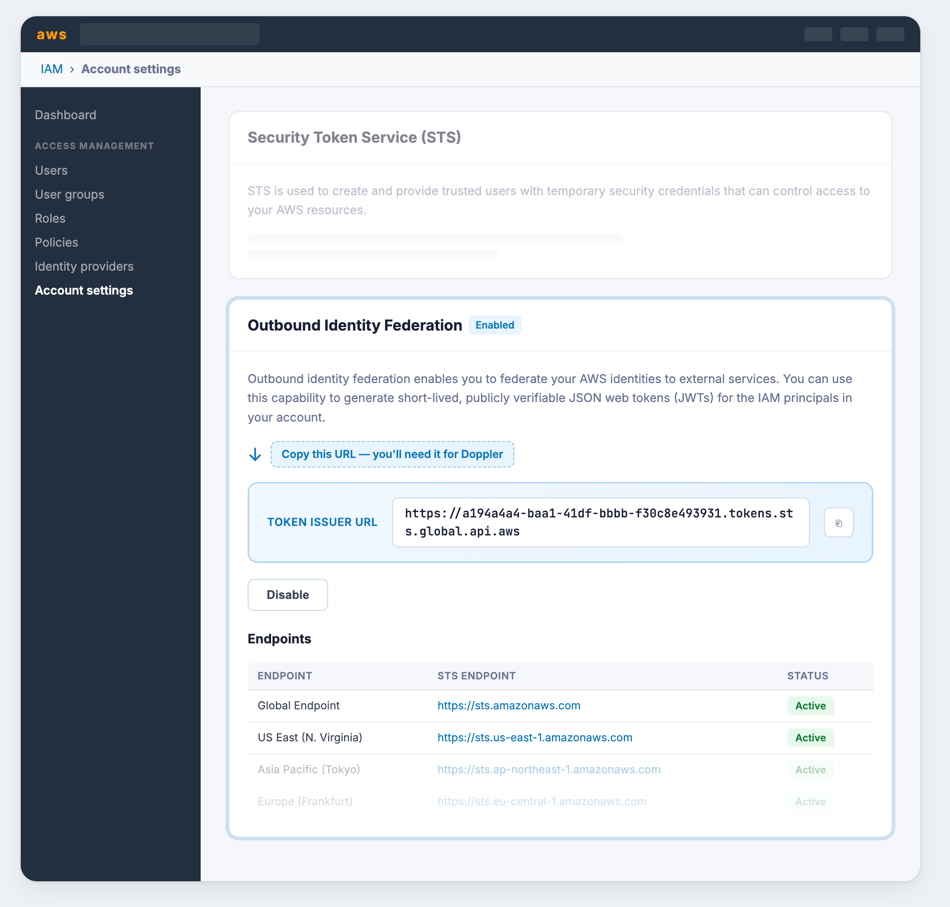
The issuer URL is unique to your AWS account and won't change. It serves as the OIDC discovery endpoint that Doppler uses to verify tokens. AWS also provides regional STS endpoints (visible in the Endpoints table on the same page) that can be activated if you want to reduce latency by minting tokens from a region closer to your instances. The global endpoint works from any region by default.
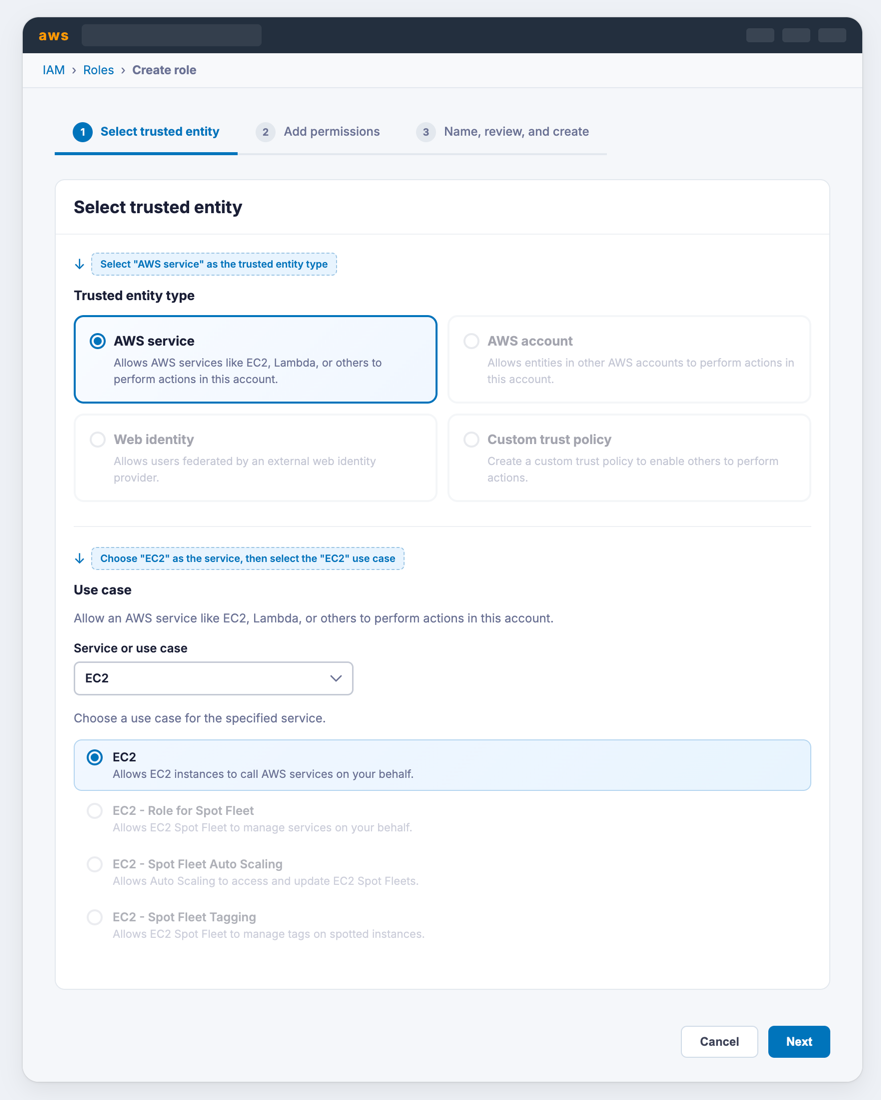
Step 2: Create an IAM Role for EC2
EC2 instances assume IAM roles to get permissions. You need a role that EC2 can assume and that has permission to call sts:GetWebIdentityToken (the API that mints identity JWTs).
Create the role
- Open the IAM console and navigate to Roles → Create role
- Under Trusted entity type, select AWS service
- Under Use case, select EC2, then click Next
- Click Next on the Add permissions page (no additional policies are needed for the OIDC flow)
- Give the role a descriptive name (e.g.,
ec2-doppler-oidc) and click Create role
Add the STS permission
The role needs permission to call sts:GetWebIdentityToken. Create an inline policy on the role:
- Open the role you just created
- Go to the Permissions tab → Add permissions → Create inline policy
- Switch to the JSON editor and paste:
{
  "Version": "2012-10-17",
  "Statement": [
    {
      "Effect": "Allow",
      "Action": "sts:GetWebIdentityToken",
      "Resource": "*"
    }
  ]
}- Name the policy (e.g.,
AllowGetWebIdentityToken) and save it
The role's trust policy (automatically created when you selected EC2 as the use case) should look like this:
{
"Version": "2012-10-17",
"Statement": [
{
"Effect": "Allow",
"Principal": { "Service": "ec2.amazonaws.com" },
"Action": "sts:AssumeRole"
}
]
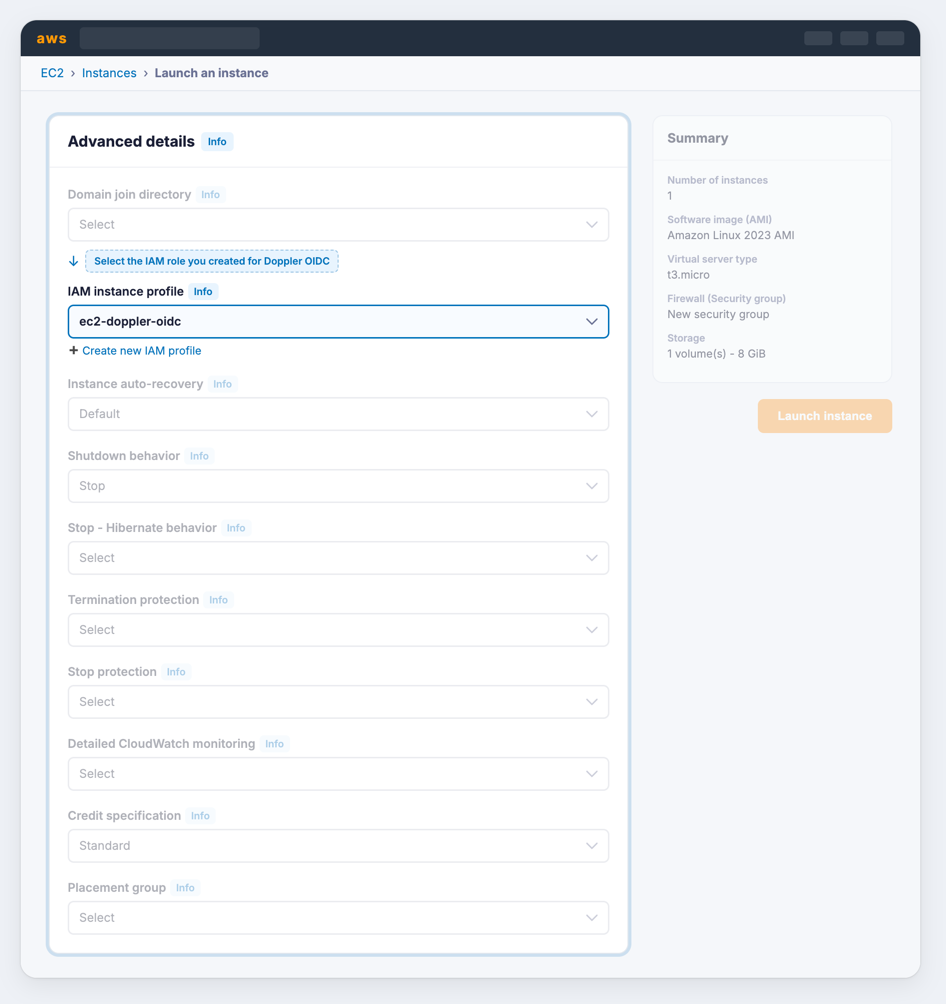
}Step 3: Launch an EC2 Instance with the Role
Launch an EC2 instance (or update an existing one) with the IAM role attached:
- In the EC2 console, launch a new instance or modify an existing instance
- Under Advanced details → IAM instance profile, select the role you created (e.g.,
ec2-doppler-oidc)
Step 4: Configure a Doppler Service Account Identity
Now configure Doppler to trust tokens issued by your AWS account's identity federation endpoint.
- In the Doppler dashboard, navigate to Team → Service Accounts
- Select your service account (or create one), ensuring it has access to the projects and configs your EC2 instance needs
- In the Service Account Identities section, click New Identity
Configure the identity
In the identity drawer:
- Under Provider, select Custom
- Set the Discovery URL to your AWS account's issuer URL from Step 1:
https://96e40952-de33-4e54-a532-d0c9b6136950.tokens.sts.global.api.aws - Set Audience to
doppler(this must match the--audienceflag you'll pass to AWS in Step 5) - Set Subject to your IAM role's ARN:
arn:aws:iam::123456789012:role/ec2-doppler-oidc
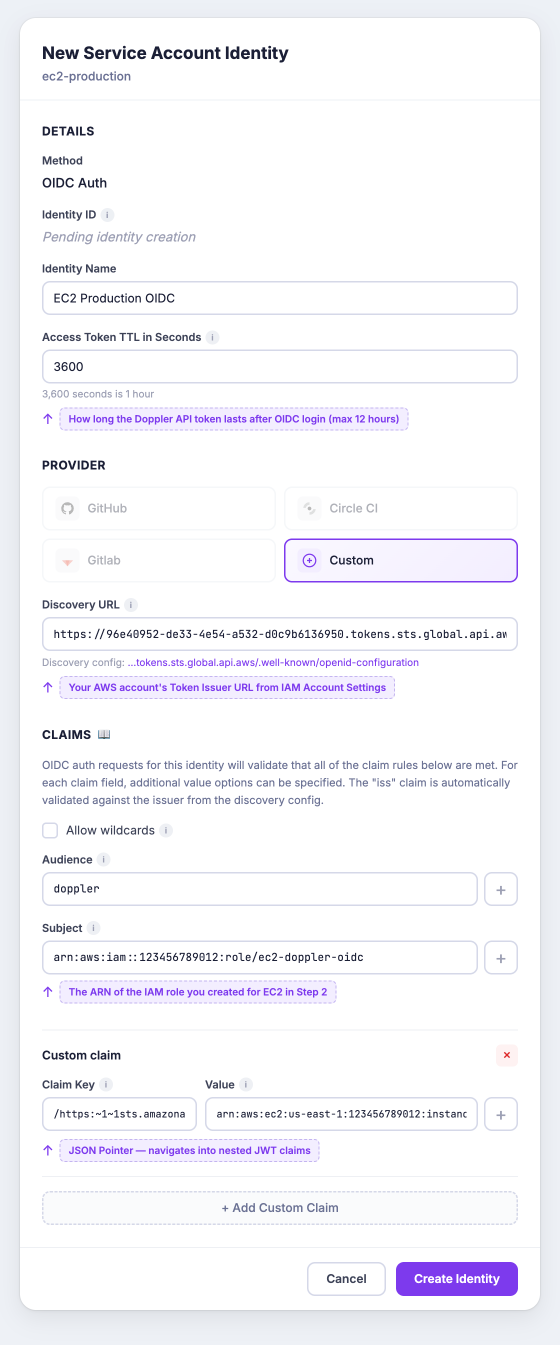
Optionally scope to a specific EC2 instance
The JWT that AWS mints contains detailed instance metadata nested inside a https://sts.amazonaws.com/ claim object. You can use Doppler's JSON Pointer support to validate these nested claims and restrict which instances can authenticate.
To scope the identity to a specific EC2 instance, click Add Custom Claim and configure:
- Claim Key:
/https:~1~1sts.amazonaws.com~1/ec2_source_instance_arn - Value:
arn:aws:ec2:us-east-1:123456789012:instance/i-0abc123def456789
The claim key uses JSON Pointer (RFC 6901) syntax. The
~1sequences are escaped forward slashes — so/https:~1~1sts.amazonaws.com~1/ec2_source_instance_arntraverses intopayload["https://sts.amazonaws.com/"]["ec2_source_instance_arn"]. See Nested Claims with JSON Pointers for details.
Other nested claims you can validate include:
| JSON Pointer Claim Key | Description | Example Value |
|---|---|---|
/https:~1~1sts.amazonaws.com~1/aws_account | AWS account ID | 123456789012 |
/https:~1~1sts.amazonaws.com~1/source_region | Instance region | us-east-1 |
/https:~1~1sts.amazonaws.com~1/ec2_source_instance_arn | Instance ARN | arn:aws:ec2:us-east-1:123456789012:instance/i-0abc123def456789 |
/https:~1~1sts.amazonaws.com~1/ec2_instance_source_vpc | VPC ID | vpc-012d5d9206d99ef27 |
/https:~1~1sts.amazonaws.com~1/org_id | AWS Organization ID | o-abc123def4 |
- Click Create Identity
- Copy the Identity ID from the confirmation dialog — you'll use this on the EC2 instance
Step 5: Authenticate from the EC2 Instance
Connect to your EC2 instance and run the following commands.
Mint a JWT
Use the AWS CLI to request an identity token from STS:
JWT=$(aws sts get-web-identity-token \
  --audience "doppler" \
  --signing-algorithm ES384 \
  --duration-seconds 300 \
  --query 'WebIdentityToken' \
  --output text)
This calls the GetWebIdentityToken API, which returns a signed JWT asserting the instance's IAM role identity. The --audience value must match what you configured in Doppler. The token is short-lived (5 minutes in this example).
Authenticate the Doppler CLI
Pass the JWT to the Doppler CLI's OIDC login command:
doppler oidc login \
  --scope=. \
  --identity=YOUR_DOPPLER_IDENTITY_ID \
  --token="$JWT"
Replace YOUR_DOPPLER_IDENTITY_ID with the identity ID you copied in Step 4.
Use the CLI
The CLI is now authenticated. Use it normally:
doppler secrets --project my-app --config productionOr inject secrets into a process:
doppler run --project my-app --config production -- ./start-server.shRevoke the token (optional)
The Doppler token is short-lived and expires automatically, but you can revoke it explicitly:
doppler oidc logout --scope=.Putting It All Together
Here's a complete script suitable for use in EC2 user data, a cron job, or a systemd service:
#!/usr/bin/env bash
set -euo pipefail

DOPPLER_IDENTITY_ID="YOUR_DOPPLER_IDENTITY_ID"

# Mint a short-lived JWT from AWS STS
JWT=$(aws sts get-web-identity-token \
  --audience "doppler" \
  --signing-algorithm ES384 \
  --duration-seconds 300 \
  --query 'WebIdentityToken' \
  --output text)

# Authenticate with Doppler
doppler oidc login \
  --scope=. \
  --identity="$DOPPLER_IDENTITY_ID" \
  --token="$JWT"

# Use secrets
doppler run --project my-app --config production -- ./start-server.sh
Understanding the JWT
For reference, the JWT minted by AWS contains these claims:
{
  "aud": "doppler",
  "sub": "arn:aws:iam::123456789012:role/ec2-doppler-oidc",
  "iss": "https://96e40952-de33-4e54-a532-d0c9b6136950.tokens.sts.global.api.aws",
  "exp": 1775499921,
  "iat": 1775499621,
  "https://sts.amazonaws.com/": {
    "aws_account": "123456789012",
    "ec2_source_instance_arn": "arn:aws:ec2:us-east-1:123456789012:instance/i-0abc123def456789",
    "source_region": "us-east-1",
    "ec2_instance_source_vpc": "vpc-012d5d9206d99ef27",
    "ec2_instance_source_private_ipv4": "172.31.69.150",
    "org_id": "o-abc123def4"
  }
}
The top-level aud, sub, and iss claims are validated directly. The AWS-specific metadata is nested inside the https://sts.amazonaws.com/ object — use JSON Pointer syntax in custom claims to validate these values.
Updated 3 months ago